E-7
General control (continued)
■ Auto power off function
The main unit will enter the stand-by mode (when iPad,
iPod or iPhone is not connected) after 15 minutes of
inactivity during:
iPod: Not docked.
Audio In: No detection of input signal.
CD: In the stop mode or no disc.
USB: In the stop mode or no media.
Bluetooth In the pause mode on not connected condition.
Note:
However, if iPod or iPhone is docked, the unit will begin
charging.
“Charge Mode” will be displayed.
■ Muting
The volume is muted temporarily when pressing the MUTE
button on the remote control. Press again to restore the
volume.
■ X-Bass control
When the power is first turned on, the unit will enter the
extra bass mode which emphasises the bass frequencies,
and “X-BASS” indicator will appear. To cancel the extra
bass mode, press the X-BASS button on the remote
control.
■ Bass control
1
Press the BASS/TREBLE button to select “Bass”.
2 Within 5 seconds, press the VOLUME (+ or –) button to
adjust the bass. “X-BASS” indicator will disappear.
↔
........
↔ +
↔ +
■ Treble control
1
Press the BASS/TREBLE button to select “Treble”.
2 Within 5 seconds, press the VOLUME (+ or –) button to
adjust the treble. “X-BASS” indicator will disappear.
↔
........
↔ +
↔ +
■ Function
When the FUNCTION button on main unit is pressed, the
current function will change to different mode. Press the
FUNCTION button repeatedly to select desired function.
CD FM MONOFM STEREO
AM
Audio In iPod USB
Bluetooth
Note:
The backup function will protect the memorised function
mode for a few hours should there be a power failure or
the AC power lead becomes disconnected.
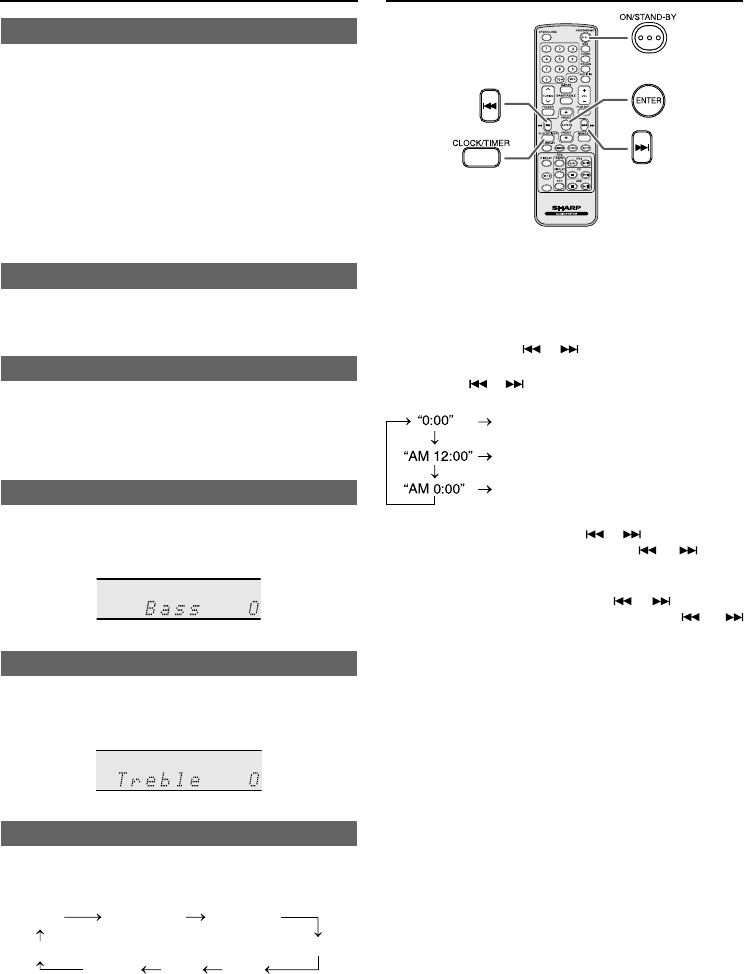
Setting the clock (Remote control only)
BLUETOOTH
PAIRING
In this example, the clock is set for the 24-hour (0:00)
display.
1 Press the ON/STAND-BY button to turn the power
on.
2 Press the CLOCK/TIMER button.
3 Within 10 seconds, press the ENTER button. To adjust
the day, press the
or button and then press the
ENTER button.
4 Press the or button to select 24-hour or 12-hour
display and then press the ENTER button.
The 24-hour display will appear.
(0:00 - 23:59)
The 12-hour display will appear.
(AM 12:00 - PM 11:59)
The 12-hour display will appear.
(AM 0:00 - PM 11:59)
5 To adjust the hour, press the or button and then
press the ENTER button. Press the
or button
once to advance the time by 1 hour. Hold it down to
advance continuously.
6 To adjust the minutes, press the or button and
then press the ENTER button. Press the
or
button once to advance the time by 1 minute. Hold it
down to advance continuously.
To confirm the time display:
Press the CLOCK/TIMER button. The time display will
appear for about 5 seconds.
Note:
When power supply is restored after unit is plugged in
again or after a power failure, time display will be blinking.
Reset the clock.
To readjust the clock:
Perform “Setting the clock” from step 1.
