E-4
EN
Wall mount preparation
To mount the unit on the wall
Caution:
● Be very careful to prevent the unit [2.45 kg (5.4 lbs.)]
from falling when mounting on the wall.
● Before mounting, check the wall strength. (Do not
put on the veneer plaster or whitewashed wall. The
unit may fall.) If unsure, consult a qualified service
technician.
● Mounting screws are not supplied. Use appropriate
ones.
● Check all wall mount screws for looseness.
● Select a good location. If not, accidents may occur or
the unit may get damaged.
● SHARP is not responsible for accidents resulting
from improper installation.
■ Driving screws
SHARP designed the unit so you may hang it on the wall.
Use proper screws (not supplied). See below for size and
type.
3.2 mm (1/8”)
9 mm (3/8”)
Min. 22 mm (7/8”)
5 mm
(3/16”)
■ Installing the unit
1 Fix the pattern paper to the wall in horizontal
position as below.
29 mm
44 mm
509 mm
Wall surface
Pattern paper (supplied)
188 mm
2 Make a hole on the wall following the screw point
marks on the pattern paper by using a drill.
Wall surface
32 mm (1-1/4”)
8-9 mm (3/8”)
3 Fix a wall mount plug into the hole using a hammer,
until it is flush with the wall surface.
32 mm (1-1/4”)
8-9 mm (3/8”)
Wall surface
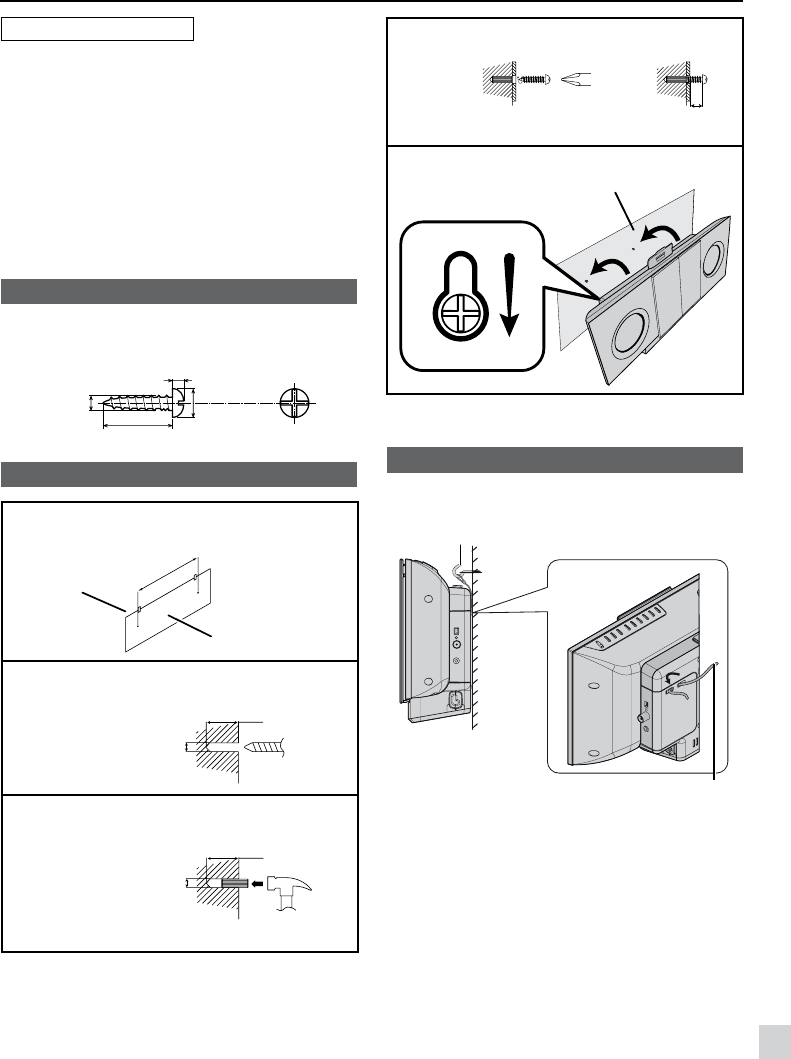
4 Fasten the screws to the wall as shown below.
(Total screw is 2 pieces).
Wall surface Wall surface
4.3 ~ 4.8 mm
Gap from the wall surface
5 Hang the unit onto the screws.
Wall surface
■ Falling prevention
Safety wires (not supplied) are useful to prevent the unit
from falling off the wall.
Wall
Screw eye (not supplied)
Safety wires (not supplied)
Loop the safety wires (not supplied) into each hole as
shown and tie the safety wires to a hook (screw eye).
Ø wire > 1.5 mm
The diameter of wire/cable must be less than 1.5 mm.


