17
Chapter 1 Basic Operation
Chapter 1
Basic Operation
Flow from Startup to Termina-
tion
• If the program is not installed, see page 57
and install the program.
At first, please confirm the positions of the follow-
ing features using the navigation’s “Hardware
Manual”, “Operation Manual” and display’s
“Operation Manual”.
• Disc loading slot
• NAVI/AV button
• NAVI MENU button
1 Start the engine.
After a little time, the navigation opening
screen comes on for a few seconds. Then, a
message screen is displayed.
❒ If the disc is not set, the message asking to
insert the disc appears. After you set the
disc correctly, your Navigation System
starts up.
2 Insert the Pioneer DVD map disc to the
disc loading slot.
3 Press the NAVI/AV button to switch the
Navigation map screen.
Pressing the NAVI/AV button switches
between the navigation map screen and the
audio screen.
4 Check the details of the cautionary mes-
sage and touch “OK”.
You can operate the Navigation System by
touching keys displayed on the screen.
If the route is already set, it changes to route
guidance mode. The map of your surround-
ings is displayed.
➲ How to read the current position screen ➞
Page 24
➲ Setting the time ➞ Page 58
➲ Starting the operation with voice com-
mands only ➞ Page 51
❒ You can press the TALK (or VOICE) but-
ton of the steering remote control to pro-
ceed instead of touching “OK”.
❒ Touch keys which are not available at this
time are grayed out.
❒ Be sure to touch the touch keys with a fin-
ger. Touch keys cannot be operated by a
pen or similar object.
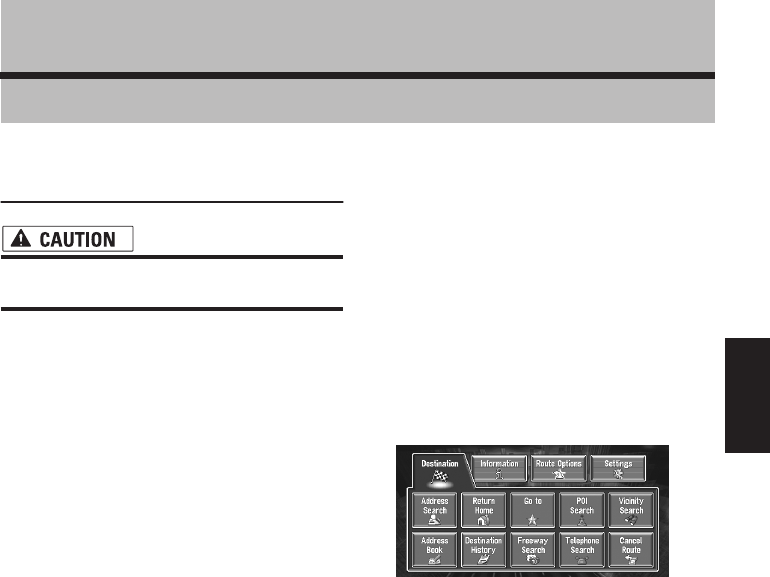
5 Press the NAVI MENU button.
Displays the main menu.
6 Searches the destination and gives route
guidance.
➲ Specifying the address and searching the
destination ➞ Page 18
➲ Searching the destination by map ➞
Page 27
➲ Other search methods ➞ Page 29 to 32
7 Turn off the vehicle engine.
This Navigation System is also turned off.
❒ Until the vicinity of the destination is reached,
the set route will not be deleted automatically
even if the power is turned off.


