2
FEATURES
■ Containing Standard Functions for an Institutional-Use Solid-State Player
• Playback of music files recorded on an SD card/SDHC card (see page 7)
• Playback of music files recorded on various media connected to the USB jack
(see page 7)
• Supporting WAV, MP3 (MPEG-1 Layer III) (see page 7)
• Displaying the ID3 tags of MP3 (see page 8)
• Quick Track Search with Jog Wheel (see page 9)
• CUE function to return to the playback starting position (see page 12)
• Headphones output with trim (see page 2)
• Microphone input with trim (one on the front panel and the other on the rear panel) (see
page 2 and 3)
• Analog audio output with trim (see pages 2 and 3)
• Paging function to decrease the playback audio output level by 20 dB automatically when
using a microphone (see page 13)
• Microphone mute function to mute the microphone input automatically when the
microphone input level is -60 dBV or less (see page 13)
• User memory function for storing various settings when the power is turned off (see page
8 and 9)
• Monaural audio output function that mixes the left- and right-channels and outputs them
from the L- and R-output jacks (see page 13)
■ Advanced Playback
• ±20% variable pitch control in 0.1% steps (see page 12)
• Tempo Lock Function to Retain the Normal Pitch by Compensating the Pitch Variation by
Pitch Control (see page 12)
• Selectable play mode (All Tracks, All Tracks in a Folder, Single Track, Random All Tracks,
Random Tracks in a Folder) (see page 10)
• Repeat function ( A-B section setting, various play mode) (see page 11)
• Auto cue (auto audio level search) (see page 13)
• Power ON play (See page 13)
• Next track reserve playback (see page 12)
■ 19-inch 1U Rack Mount
■ IR Remote Control (Remote Controller RC-1135 Included)
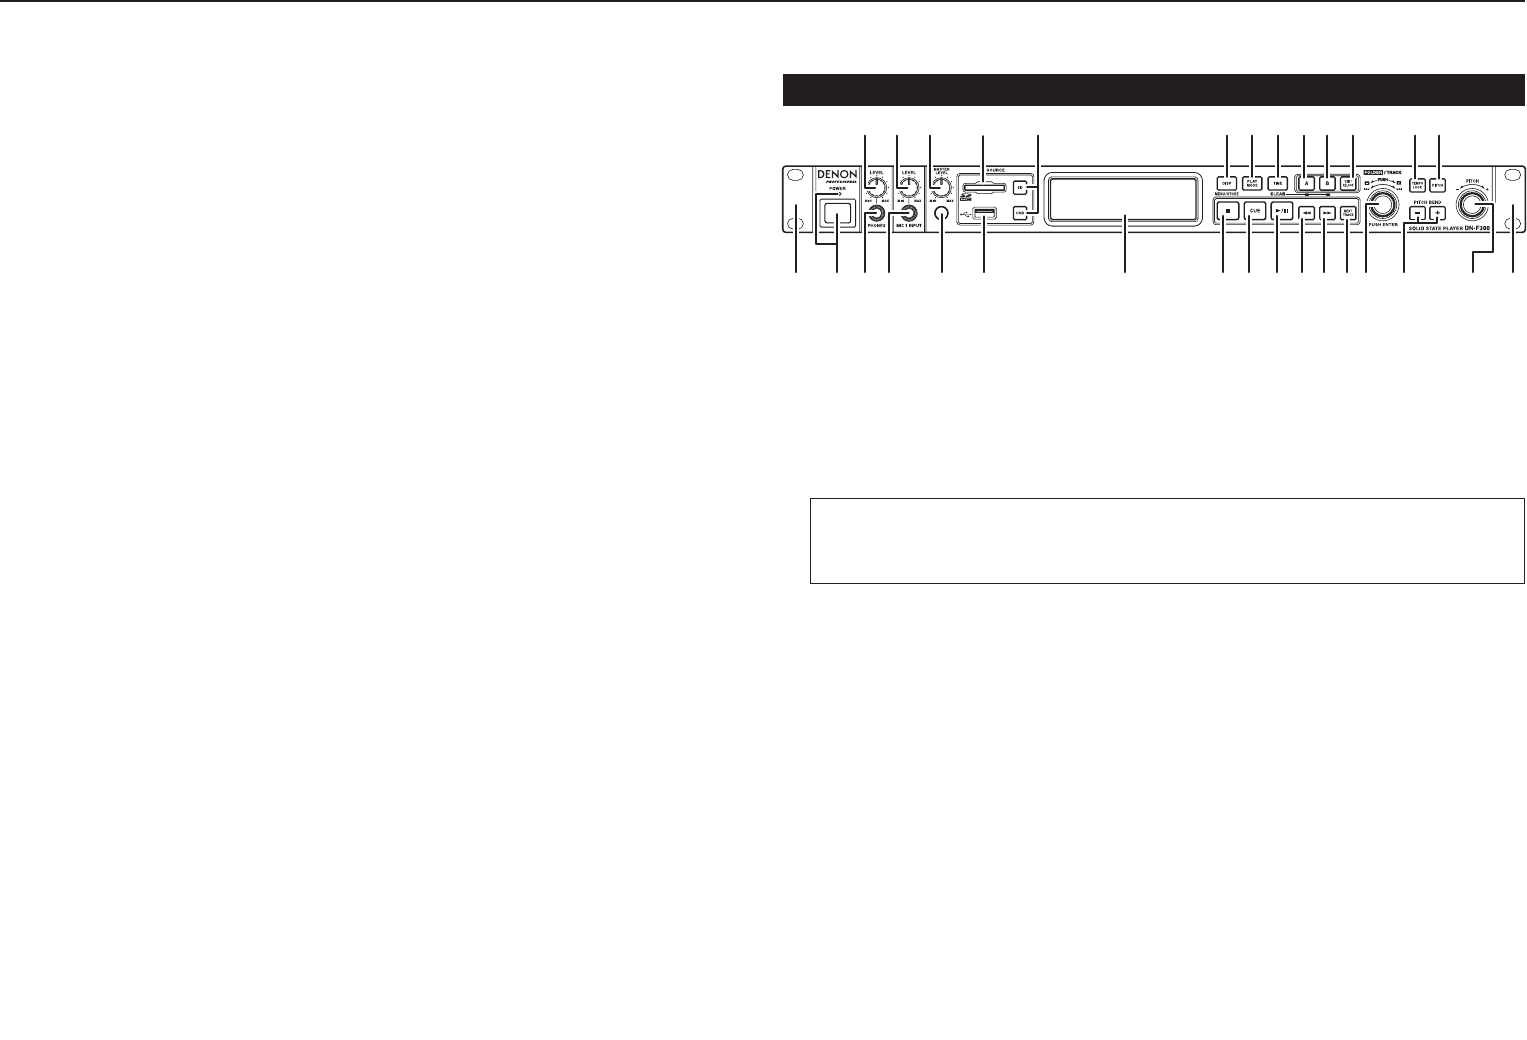
PART NAMES AND FUNCTIONS
Front panel
wry i o !2!3!4!5!6!7 @5@6
et !0
!1 !8 @1@2@3@4 @7 @8@0!9u@9 @9q
q
POWER switch and indicator
• Press this button to turn the power on or off.
• The indicator lights when the power is turned on.
w
LEVEL control
• Use this knob to adjust the output level of the headphones.
• Push the knob. The knob pops out and controls the level. When control is finished, push
the knob back in.
Warning!
• When using headphones, take care not to turn the volume too high. Listening at high
volumes for extended periods of time may result in permanent hearing damage.
e
PHONES jack
• You can connect your headphones to this jack. (Stereo phone 1/4" jack)
r
LEVEL control
• Use this knob to adjust the input level of the microphones.
• This knob controls the level of the microphones connected via the MIC 1 INPUT and MIC
2 INPUT jacks simultaneously.
• Push the knob. The knob pops out and controls the level. When control is finished, push
the knob back in.
t
MIC1 INPUT jack
• Connect a microphone to this jack. (Monaural phone 1/4" jack, dynamic microphone)
y
MASTER LEVEL control
• Use this knob to adjust the audio output level.
• Push the knob. The knob pops out and controls the level. When control is finished, push
the knob back in.
u
Remote control sensor
1. GENERAL INFORMATION


