6
INSTALLATION
■ Mounting in a rack
• The DN-F300 is of 1U size, allowing it to be mounted in EIA standard 19-inch racks.
• Do not cover the top of the unit. Remember, heat is dispersed from the DN-F300’s upper
surface.
• Set up the installation environment carefully. For example, take care to protect the DN-
F300 from heat from other devices. If necessary, use forced ventilation. The surrounding
conditions must meet the specifications described in “SPECIFICATIONS” on Page 15.
• If the DN-F300 is placed near an amplifier, tuner or other components, noise (induced hum)
or beat interference may result (especially during AM or FM reception).
If interference occurs, disconnect the DN-F300 or change the installation place.
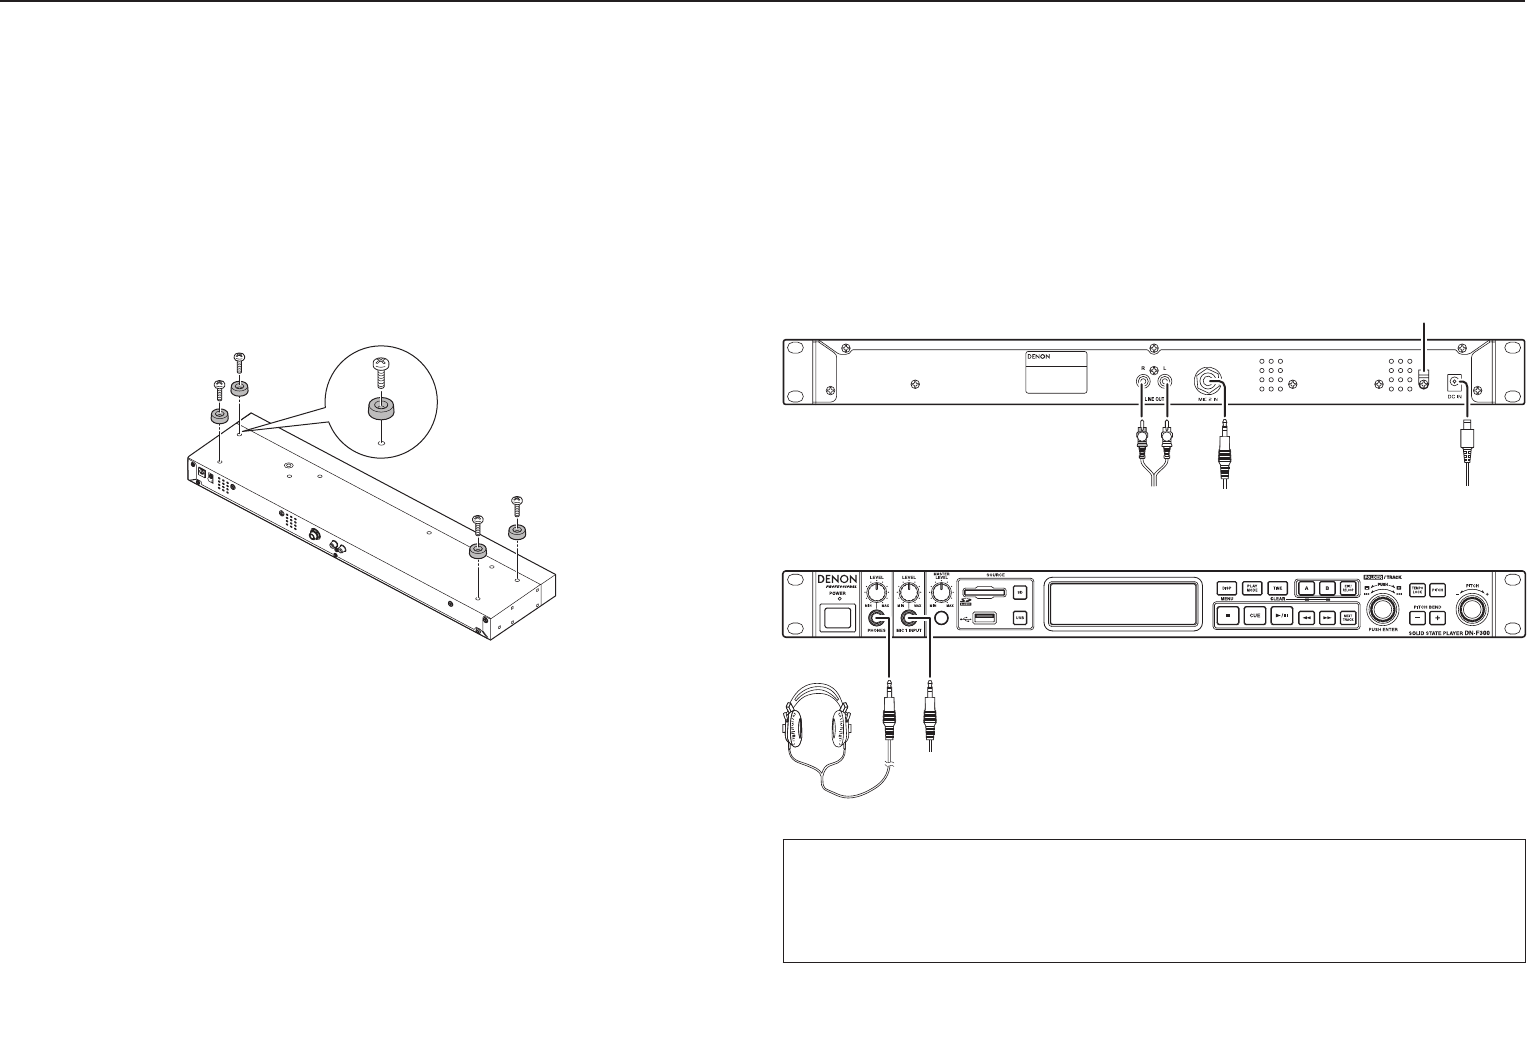
• If the unit is not to be mounted in a rack, remove the rack mount brackets and attach the
included feet.
CONNECTIONS
■ Connection precautions
• Before proceeding with connections or disconnections of cables and AC adaptor, be sure
to turn all system components off.
• Ensure that analog audio cables are connected properly to the L (left) and R (right) jacks.
• Insert plugs fully into the terminals.
• Connect the output jacks to the amplifier CD or AUX input jacks.
■ Basic connection
1. Rear panel
LR
Analog audio cable Microphone cable
(Dynamic microphone)
Included AC
adaptor
Secure the cable connection of the AC adaptor with the clamp it
to avoid its becoming disconnected from the DC power input.
2. Front panel
Headphones
Microphone cable (Dynamic microphone)
CAUTIONS:
• Before connecting, the POWER ON/OFF switch should be set the OFF position.
• Do not touch the power cord with wet hands.
• When disconnecting the power cord, always make sure that you take hold of the plug.
Yanking out or bending the cord can damage it and/or cause electric shocks or a fire.
2. PREPARATIONS


