MSD 7R SHEARS
Page 10 Section 3 Installation
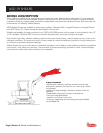
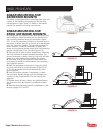
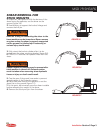
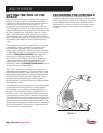
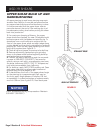
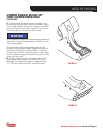
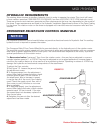
HYDRAULIC START-UP
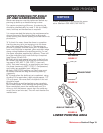
With the shear installed on the base machine, it is important that the air be bled from the cylinder by the
following procedure. Failure to follow this start-up procedure could result in cylinder seal damage or base
machine hydraulic system cavitation. Following the O.E.M. procedures, start and warm up the base machine
hydraulic system. Do not operate the shear circuit during this warm-up period. After the base machine hy-
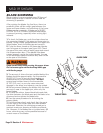
draulic system has reached normal operation temperature, lower the engine speed to idle. Place the shear in
a horizontal position with the cylinder ports on top; this will bleed air from the cylinder.
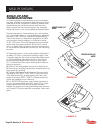
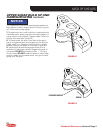
Begin to stroke the shear cylinder back and forth by opening and closing the jaw slowly. Do not open or close
the jaw fully at first. After stroking the cylinder a minimum of five times in this manner, fully stroke the cyl-
inder at least five complete cycles. During these start-up procedures, when the cylinder reaches its limit of
travel, reverse its direction immediately—do not hold pressure on the cylinder at the end of its stroke.
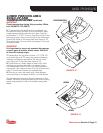
To prevent damage to the hydraulic systems, the base machine hydraulic fluid must be kept at proper levels.
To check the fluid level, open the shear jaw completely, lower the shear to the ground, stop the base machine
and follow the base machine instructions.
Restart the base machine and bring to normal operating speed and again stroke the cylinder through at least
five complete cycles. Be sure not to hold pressure on the cylinder at the end of its stroke during these initial
procedures. Shut the excavator off and check for hydraulic leaks. For personal safety, do not use your hands to
check for hydraulic leaks.
NOTICE
If the shear has been stored or idled for a long period
of time, or if any hydraulic lines have been discon-
nected, these start-up procedures must be per-
formed before putting the shear into operation.
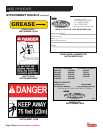
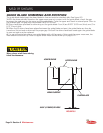
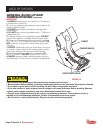
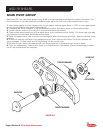
SHEAR STORAGE
1. Block the shear up off the ground using wood blocking.
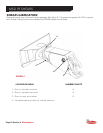
2. Grease the pins and machined bores of the mounting bracket of the shear (refer to the lubrication instruc-
tions in the Maintenance section of this manual). Then apply a generous amount of grease to shear blades,
cylinder rod and all other exposed and unpainted surfaces.
3. Install plugs and caps over the quick disconnect couplings.