25
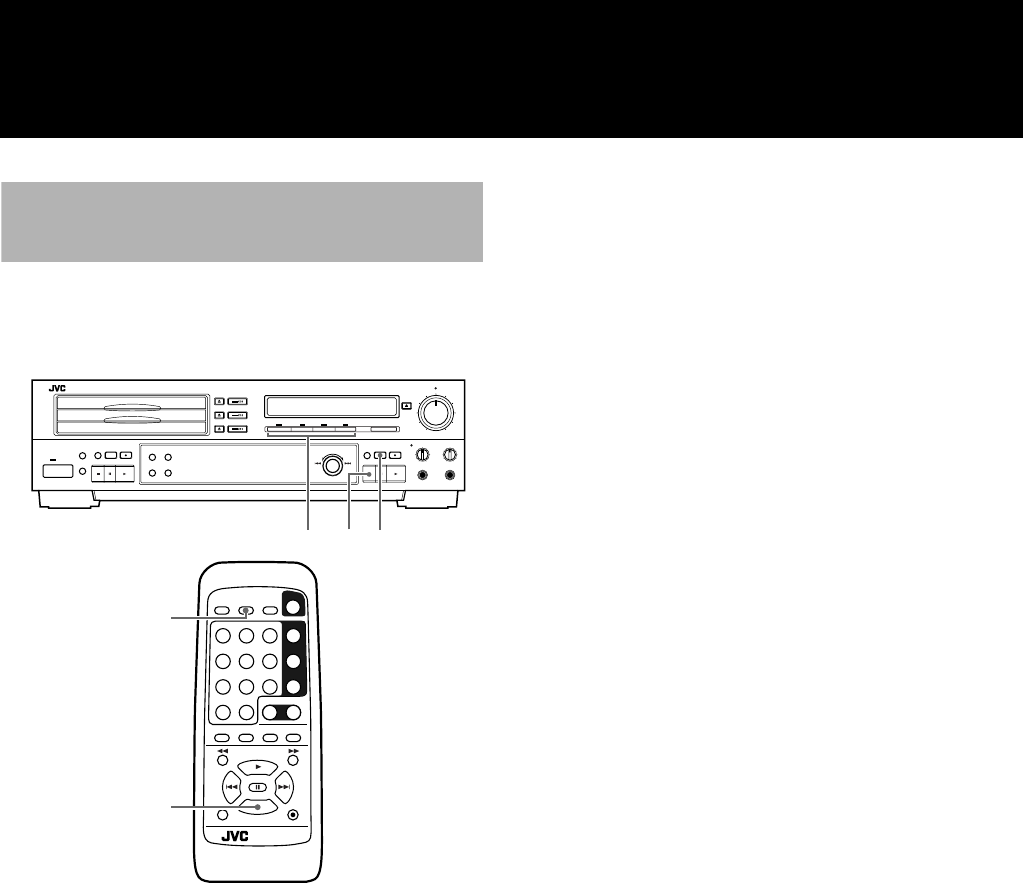
Perform synchronized start recording of sources such as DAT and
CD connected to either the DIGITAL IN OPTICAL connector or
LINE IN (REC) connectors on this unit. Recording is automati-
cally started when the unit detects audio signal input.
1 Press the REC SOURCE SELECTION button
repeatedly to select an input source.
2 Press the SYNCHRO button (or the SYNCHRO/
FINALIZE button on the remote control).
• The unit is put in the record pause mode, the SYNCHRO indi-
cator lights in the display.
• For this procedure to work, playback of the source component
should be stopped.
3 Start playing the source component
When performing synchronized recording of a digital source
• Recording is started based on the digital signal.
• Track marking is based on track information recorded in the
digital signal. (CD, MD, DAT only.) For other digital sources,
track marking is based on spaces of silence.
When performing synchronized recording of an analog
source
• Recording is started when the unit detects an audio signal.
• Track marking is based on spaces of silence which the unit
interprets to be track breaks. If automatic track marking has
been turned off, manual track marking is necessary.
When recording is started, the “SYNCHRO” indicator disappears
from the display.
To stop recording at any time
Press the 7 (stop) button.
When recording external sources
• Synchronized recording (other that synchronized start record-
ing) cannot be used to record an external source (connected to
DIGITAL IN OPTICAL or LINE IN (REC)). During synchro-
nized recording, this unit is put in record pause after the end of
each recorded track, and adjusts the blank between tracks to be
uniform. Because this unit is not capable of predicting or adjust-
ing the blank between the source tracks in the input signal, the
blank between tracks that are recorded will be identical to those
of the source.
• Normally, manual recording is recommended for recording an
external source (connected to DIGITAL IN OPTICAL or LINE
IN (REC)). Even if synchronized start recording is used, record-
ing will continue until there is no remaining time left on the CD
being recorded*. For this reason, when recording an external
source, be sure to press CDR CONTROL 7 to stop recording or
CDR CONTROL 8 to put this unit in record pause mode when
the source you are recording is finished.
* When an MD player is connected to DIGITAL IN OPTICAL,
this unit is put in record pause when MD playback is stopped or
paused.
Notes
• Please note that if “AUTO TRACK” is set to “AUTO TR ON”,
track numbers are automatically assigned even with external
sources.
• When the external source is a CD, MD or DAT player con-
nected to the DIGITAL IN OPTICAL connector on this unit,
this unit can automatically start and stop recording if a single
track is recorded. For more information, see “Setting Up Syn-
chronized Recording for External Digital Sources” on page 31.
CAUTION
When performing synchronized start recording of an external com-
ponent, there is a chance that a section at the beginning of the
source signal will not be recorded. When this occurs, please per-
form manual recording.
Synchronized Start Recording
of External Components
MIX BALANCE
STANDBY
PHONES LEVEL
MAXMIN
MULTI JOG
+–
POWER
REC LEVEL
21
XL - R5000 CD/CDR MULTIPLE COMPACT DISC RECORDER
12
3
4
5
6
78
10
+
10
9
PLAY MODE
REPEAT SET CANCEL
CONTROL
PITCH 0
PITCH
+
PITCH
–
SHIFT REC MUTING
REC
DISPLAYSYNCHROCD REC
CD EDIT FINALIZE MENU
POWER
CD 1
CD 2
CD 3
CD CDR
2
REMOTE CONTROL
RM-SXLR5000J
7
7
XL-R5000.book Page 25 Wednesday, March 29, 2000 6:37 PM


