


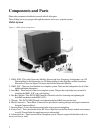
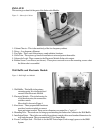

Wall Mounting
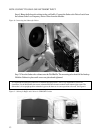
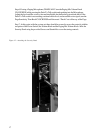
Both the Subwoofer and the Satellites arrive ready for wall mounting. The Subwoofer cabinet must first be
separated from the wall baffle. To do this, simply remove the screws from all the mounting tabs. Then pull
the cabinet off of the baffle. Be sure to disconnect the cables attaching the subwoofer driver to the electron-
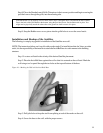
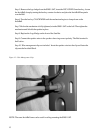
ics as soon as the cable is accessible. In the case of the Satellites, the InvisiBall base and arm are designed
so that optimum aiming angles can be achieved with the base firmly mounted to a wall or to a ceiling. In the
case of the Subwoofer, the Baffle is designed to mount to a wall surface only. IMPORTANT NOTE: For
proper convection cooling of the built-in power amplifiers, the SMS1-SUB Subwoofer MUST be installed
upright. Do NOT install SMS1-SUB on a ceiling.Detailed descriptions of procedure for mounting are
covered in the INSTALLATION AND HOOKUP sections of this manual. There are also options for
mounting the SMS1-SAT’s to ceilings either for aesthetic or architectural reasons. But the basics of place-
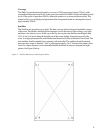
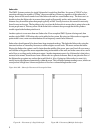
ment still apply. The Satellites should be near the corners of the room, aimed to the center of the room
approximately 4-ft (1.2m) above the floor. The Subwoofer(s) should be placed near corner junctions when
possible and if used in multiples, should be placed asymmetrically within the room.
Floor Placement
The Subwoofer can also be placed directly on the floor, or on a shelf (capable of supporting it) using the
INCLUDED Subwoofer Feet. Again, refer to the INSTALLATION AND HOOKUP Section of the
manual for information on placing the Subwoofer on the floor.
Running Wires
Once the location for each of the speakers is understood, running wires for all connections is thenext step.
One of the best options is the use of hard conduit, flex conduit, or bare wiring through walls and ceilings. It
is the safest and least visually distracting method. Another option is to run hard conduit externally on walls
and ceilings (and paint over it, if necessary), as the wiring is still well protected and it is a visually clean look.
If neither of these options is available, then be sure to fix any wires in place. Hanging loose wire is unsafe,
for the equipment and people, and visually unappealing. It could easily take away from the aesthetics of the
architecture.
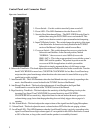
For a typical SMS1 System, the necessary wire runs are as follows:
- Four runs of speaker wire, one run to each SMS1-SAT, from the SMS1-SUB
- One run of Mono or Stereo Audio Signal, from the source (Soundzone Controller,
CD Player, DVD Player, Subscription Music Service, etc.) to the subwoofer.
- One Paging Microphone input connection (optional) to subwoofer
- One Cat-5 Cable for Remote Wallplate (optional) to subwoofer
- Power to the SMS1-SUB
The Subwoofer requires power. This can be done in several ways. If you are fortunate enough that you can
mount the Subwoofer directly over a junction box or outlet, this is a very good option. There are knockouts
and access plates on the Subwoofer’s Baffle that will allow the power cord to just plug into the outlet. If this
is not an option, an electrician can run power from some point, through the wall, to the desired Subwoofer
location and install a junction box or outlet that can then be accessed. It is also important to run power
through one junction box and audio through another. Be sure that, regardless of how power is brought to
the location of the Subwoofer, it terminates in a standard, grounded power socket. Detail about exact
hookup and installation of system components is covered below. Remember to always be aware of and
adhere to local, regional and national requirements for components of this nature.
10