


Managing Files 48
3 If you don’t want to have files from the viewer
automatically backed up on your computer, deselect the
Copy backup data to the computer checkbox. You
can still back up files manually, as described on page 45.
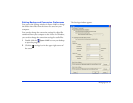
4 If you want to specify the conversion settings for video
files, click the arrow next to
Normal in the Movie File
box.
Select
Normal, High Quality, High Compression,
Custom, or No Conversion.
Selecting
Custom allows you to specify the resolution,
frame rate, and bit rate.
Choose higher settings for improved video quality, or
lower settings for reduced file sizes. Frame rates lower
than 29.97 may cause flicker or poor quality video.
5 If you want to specify the conversion settings for music
files, click the arrow next to
Normal in the Music File
box (Windows only).
Select
Normal, High Quality, High Compression, or
Custom.
Selecting
Custom allows you to specify the sampling
rate and bit rate. Choose higher settings for improved
audio quality, or lower settings for reduced file sizes.
6 If you want to change the folder where files are backed
up on your computer, you can adjust the Store Folder
Settings. The default folder is Epson Link2 Backup in
My Documents (Windows XP or 2000) or Documents
(Windows Vista
®
or Macintosh).
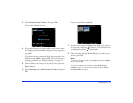
7 When you are finished, click
OK.
For more information about backup and conversion settings
in Epson Link2, click the
? in the upper right corner of the
Epson Link2 screen.
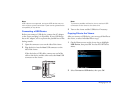
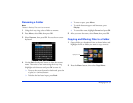
Using the Viewer With USB Devices
You can connect a flash memory drive or other USB device
to your viewer and copy files to or from the device.
The viewer supports devices that are compatible with the
USB Mass Storage specification, including:
❍ Digital cameras
❍ Flash memory drives
❍ Memory card readers
❍ External hard drives
❍ Epson multimedia storage viewers