ESPAÑOL
77
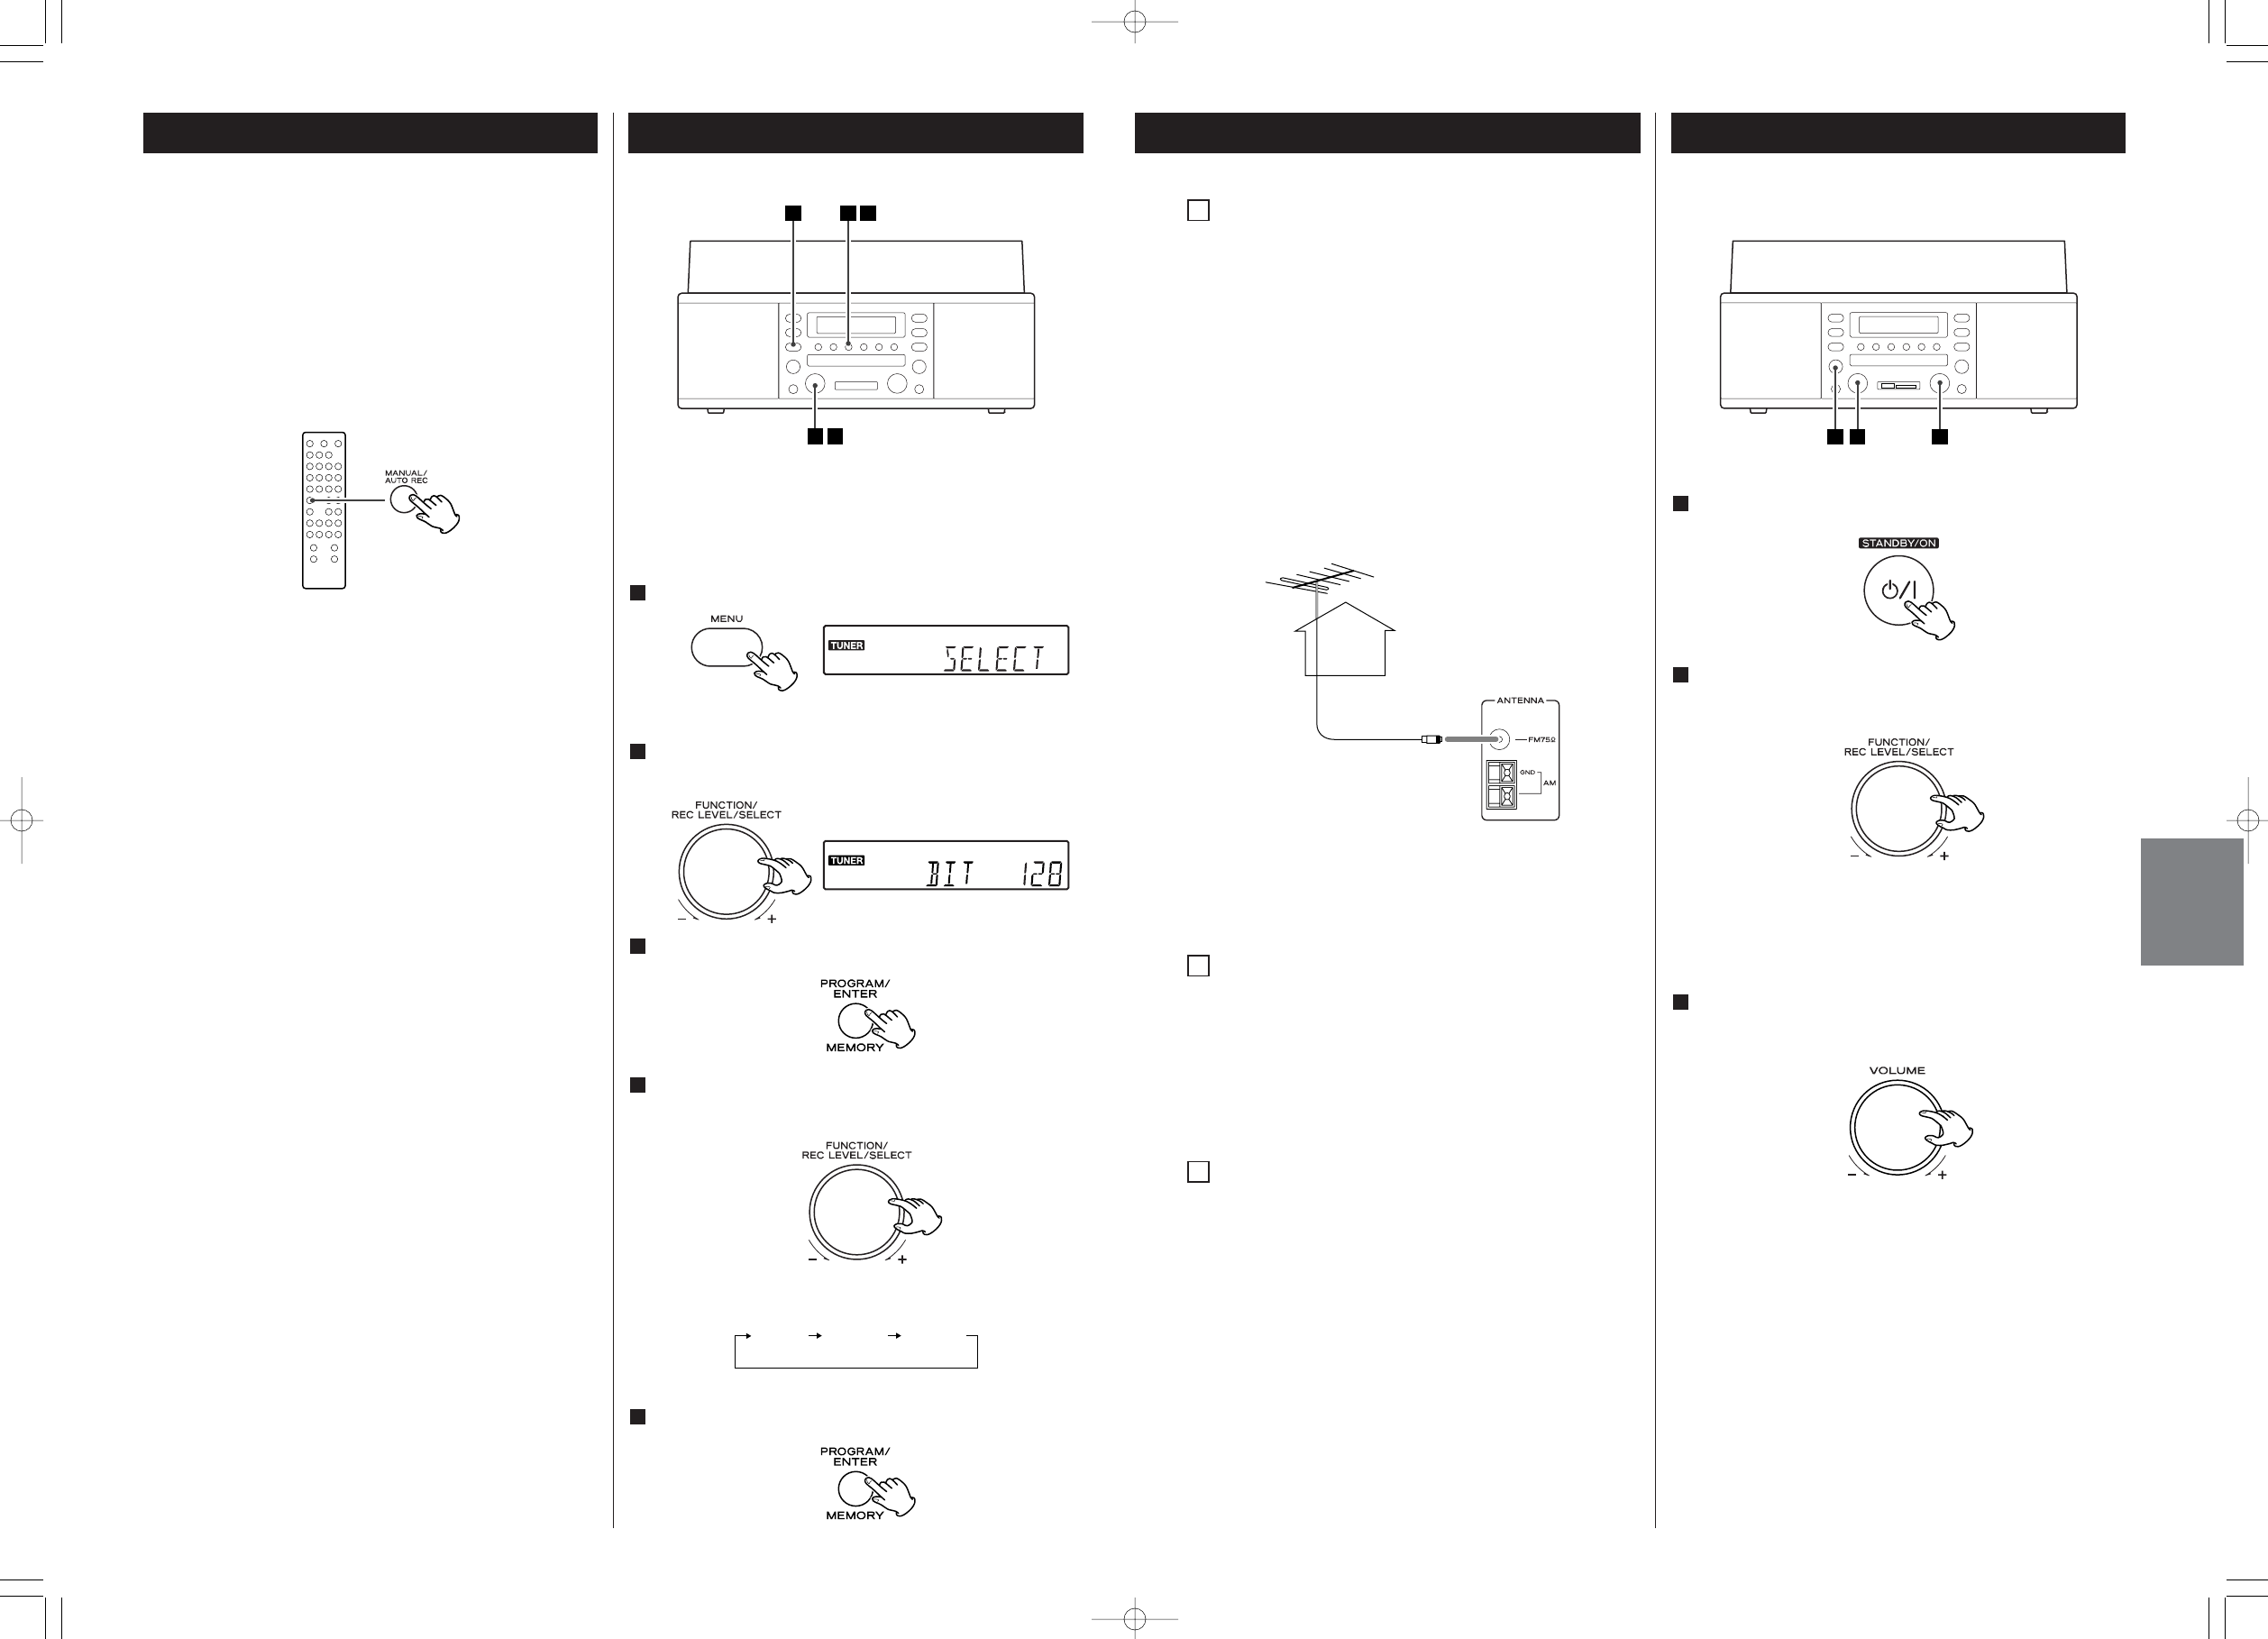
Pulse el botón STANDBY/ON para encender la unidad.
1
Seleccione una fuente girando el botón FUNCTION/REC
LEVEL/SELECT.
2
< Para escuchar una fuente externa conectada a los conectores
AUX, seleccione AUX girando el botón FUNCTION/REC
LEVEL/SELECT.
Reproduzca la fuente y ajuste el volumen con el botón
VOLUME.
3
Operaciones básicas
1 32
El volumen es ajustable desde MIN a MAX en incrementos de
30.
Antena de FM
En el modo FM, sintonice una emisora de FM y extienda el
cable para encontrar la mejor posición para la recepción. Es
posible que esta antena debe reorientarse si traslada la
unidad a un nuevo lugar.
Antena de FM exterior
En una zona donde la recepción de la señal de FM sea débil,
será necesario utilizar una antena de FM exterior.
Generalmente, una antena de 3 elementos será suficiente; si
vive en una zona donde las señales de FM sean
particularmente débiles, es posible que sea necesario utilizar
una con 5 o más elementos.
< Desconecte la antena de FM interior al utilizar una antena
exterior.
B
Conectores AUX IN
Puede conectar un reproductor de CD, grabadora de cinta
de cassette, etc., a esta unidad.
Conecte el componente con los cables de PIN RCA.
Asegúrese de conectar el enchufe blanco a los conectores
blancos (izquierda) y el enchufe rojo a los conectores rojos
(derecho).
Cable de alimentación de CA
Enchufe este cable de alimentación de CA a una toma de
corriente de pared.
D
C
Conector 75 Ω
Al grabar de una transmisión de FM, puede aumentar el
ruido. Para reducir los ruidos no deseados, se necesitará una
antena exterior o grábelo con el modo FM conectado a
MONO.
24
When the MANUAL/AUTO REC button is pressed once, the
current mode is displayed. Press the MANUAL/AUTO REC
button repeatedly to select any other mode.
MANUAL
The unit doesn’t divide files automatically.
Use the TRACK INCREMENT button to divide files.
MANUAL is recommended for recording an analog source
such as a record.
AUTO20dB, AUTO30dB, AUTO40dB
The unit will automatically enter pause mode and insert a file
division in the recorded material, when the sound level has
dropped below the threshold for more than 4 seconds. When
the sound has been back recording will be restart.
“AUTO 20dB” takes a louder signal to trigger the file division.
“AUTO 40dB” means that a relatively quiet signal will trigger
the file division. “AUTO 40dB” is suitable for recording a
noiseless source such as a digital player.
< AUTO REC may not work properly with analog sources that
contain low-level noises.
< The default setting is MANUAL (off). When the unit is turned
on, the setting is automatically reset to MANUAL (off).
< The MANUAL/AUTO REC button doesn’t work during
recording or in the record pause mode.
When you record from TUNER, PHONO or AUX, you can change
a method of file division by pressing the MANUAL/AUTO REC
button.
< This function don’t work when you record from CD or
TUNER.
While recording from CD, the unit insert a file division only
automatically.
While recording from TUNER, a file division will be inserted
only manually.
Setting of Bit RateSetting of File Division
You can set the recording bit rate of MP3.
In CD, PHONO and AUX mode the default setting is 128 kbps.
In TUNER mode the default setting is 96 kbps.
Press the MENU button.
1
1 3 5
42
< To cancel the menu setting mode, leave the unit idle for a
minute, or press the STOP button (H).
Turn the FUNCTION/REC LEVEL/SELECT knob to select
“BIT RATE”.
2
Press the PROGRAM/ENTER button.
3
Turn the FUNCTION/REC LEVEL/SELECT knob to select
bit rate.
4
Bit rate is changed as follows.
160kbps128kbps96kbps
Press the PROGRAM/ENTER button.
5


