


20 TASCAM DR-1
Selecting the input source
Setting the INT/MIC1 input functions
8–Recording
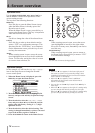
Follow these procedures to select the input source.
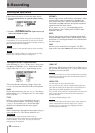
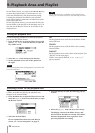
1 Press the SETTING key to open the Input Setting
Screen.
2 Use the
INPUT
item to select the input source you
want to use (listed at right).
CAUTION
Use headphones to monitor when you are recording with
a microphone. If you use speakers to monitor, the sound
output from the speakers may also be recorded, causing a
poor recording and even feedback.
NOTE
The input source is the recording source when recording.
TIP
Use the DR-1’s built-in effects as necessary on the input
source. (See “Using the Effects” on page 32.)
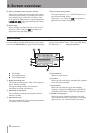
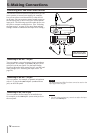
INT/MIC1
Sets the input source as the built-in microphone when
no microphone cable is connected to the
MIC 1 IN
jack (stereo mini-jack). When a microphone cable is
connected to the MIC 1 IN jack, the input microphone
signal becomes the input source.
If you select
INT/MIC1
, you should also set the
input functions. (See “Setting the INT/MIC1 input
functions” below.)
MIC2
Sets the input source as the microphone signal input
through the
MIC 2 IN jack (mono standard jack) on the
front panel. Left and right channels are combined into
the same signal.
LINE
Sets the source as the line level signal (–10 dBV)
input to the rear panel
LINE IN jack (stereo mini-jack).
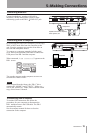
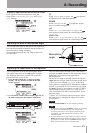
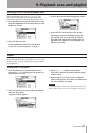
After selecting
INT/MIC1
as the
INPUT
item, press
the
µ key to highlight
INPUT
, then turn the wheel
right to open the
INT/MIC1
Input Setting screen.
This screen has the following settings. Except for
POWER
, all items also affect the built-in microphone.
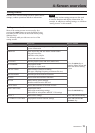
GAIN
Set the input sensitivity as
HIGH
or
LOW
. The factory
default setting is
LOW
. Change it to
HIGH
if the input
level is too low.
TYPE
Select
STEREO
or
MONO
according to the type
of connected microphone. The factory setting is
STEREO
. If you select
MONO
, the left and right
channels are combined into the same signal.
POWER
When connecting a microphone that requires plug-in
power set this to
ON
. The factory default is
OFF
.
CAUTION
Set this to
OFF
when using the built-in mic or
connecting a dynamic microphone or microphone with
a built-in battery. If set to
ON
, the plug-in power my
damage such microphones.
LOW CUT
The factory default setting of the low cut lter is
OFF
,
but you can also select
80Hz
or
120Hz
as the cut-off
frequency for a low cut lter.
TIP
Try using one of the low cut filter settings when recording
outdoors or another place where the unwanted sound of
wind is being recorded.
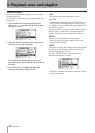
LEVEL CTRL
Use this to set the level control function.
Set it to AUTO to have the DR-1 automatically adjust the
input gain according to the input level. Loud sounds and
quiet sounds are both adjusted to the same level.
Set it to LMT to have the DR-1 automatically limit the input
gain so that input level of loud sounds are reduced to
prevent distortion.
The factory default setting is OFF.
NOTE
When recording live performances and in other situations
where unexpected loud sounds might occur, set this
function to
LMT
to prevent input clipping and allow
recording without distortion.