45
Chapter 6
ROUTINE MAINTENANCE
This chapter explains how to replace the toner and drum cartridge, clean the machine and store the supplies.
REPLACING TONER CARTRIDGES
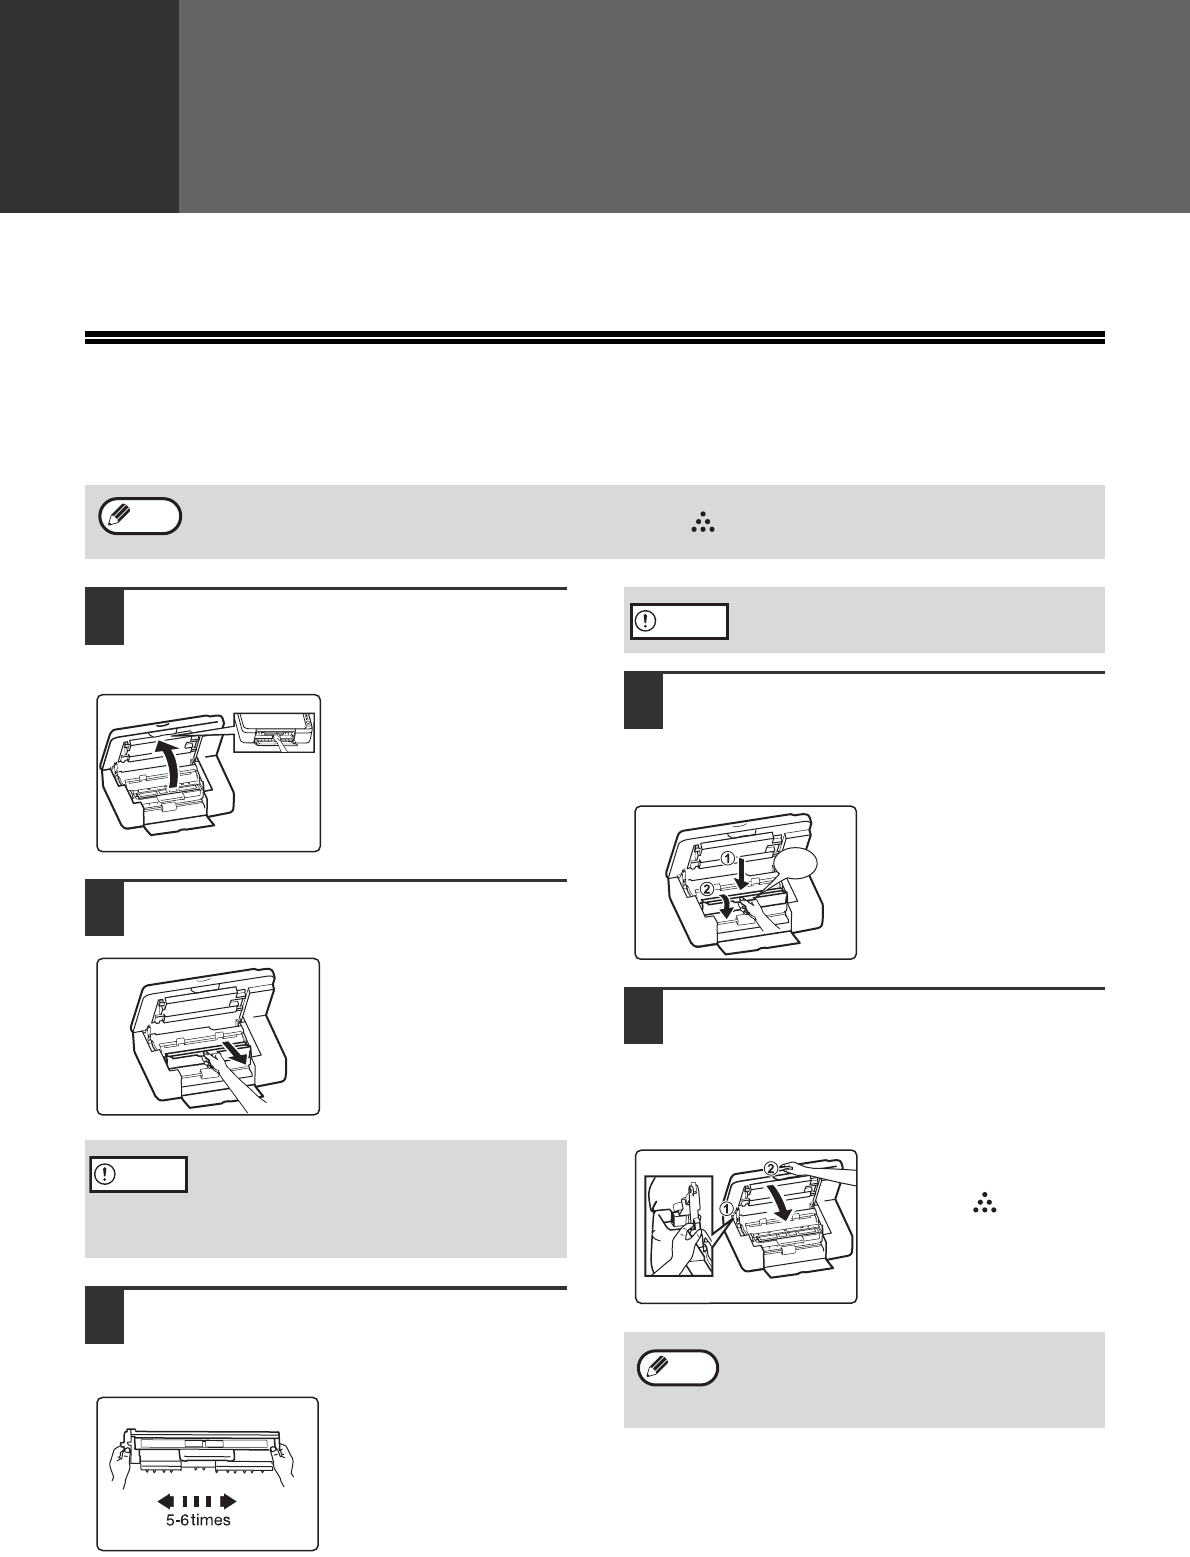
Please replace the toner cartridge according to the following steps.
1
Lift the document glass locking
handle and open the cover of the
machine.
2
Remove the old cartridge following
the upward direction of the arrow.
3
Take the new cartridge out of the bag,
grasp the cartridge on both sides and
shake it horizontally five to six times.
Please give priority to
using the toner delivered
together with the
machine when using the
toner cartridge for the
first time.
4
Hold the new cartridge by its grips,
and insert it at a 45-degree angle
towards the slot. Press it down until a
"click" is heard.
If there is any dirt or dust
on the new toner
cartridge, remove it
before installing the
cartridge.
5
Gently lift the support bar at the
green-marks and pull to a half-closed
position, and then gently lift the bar
again until the cover is completely
closed. Connect the power.
The "toner cartridge
replacement required"
indicator ( ) will go
out.
The following phenomena indicate that the cartridge has run out of toner, please replace it with a new cartridge.
• When the "toner cartridge replacement required" indicator ( ) is on.
• If the copies show white lines, light-colored printing or fogged image.
Note
After removing the old cartridge, do not shake
it or tap it. Otherwise toner may leak from the
cartridge. Immediately put the old cartridge in
the bag of the new cartridge. Dispose of the
old cartridge according to local regulations.
Caution
Grasp the cartridge grips when holding the
cartridge.
• Before closing the cover, make sure that the
new toner cartridge is correctly installed.
• Confirm whether the original is placed slant
or not when making copies again.
Caution
“Click”
Note
