Replacing Consumables and Maintenance Kit
36
3
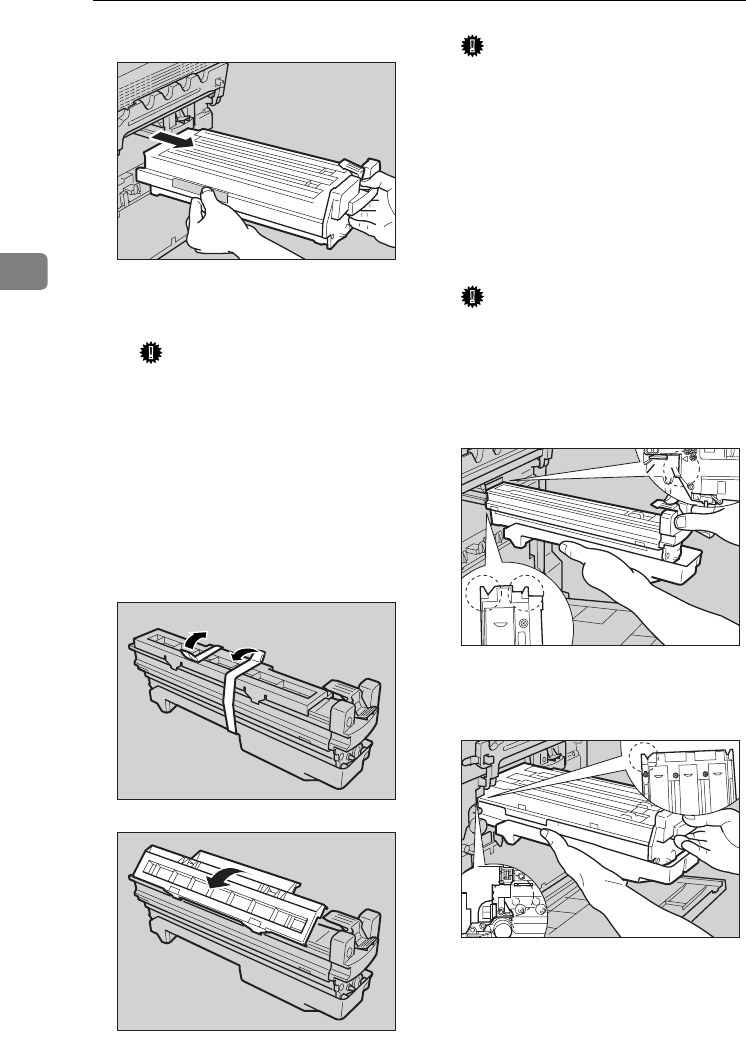
C Pinch the green part to unlock.
D Pull out the photo conductor
unit slowly.
Important
❒ Be sure to hold the unit with
both hands, and then pull it
out slowly.
F
FF
F
Take out the new photo conduc-
tor unit.
G
GG
G
Peel off the tape, which is around
Photo Conductor Unit by peeling
it downward, and remove the cov-
er on top of the Unit.
Important
❒ Do not remove the cover at-
tached to the bottom of the pho-
to conductor unit yet.
❒ After you take the new Photo
Conductor Unit out of the bag,
quickly install it.
H
HH
H
Align the green arrow at the tip of
the photo conductor unit to the
rail inside the printer.
Important
❒ Make sure the green arrow fits
securely on the rail before pro-
ceeding to the next step.
❖
❖❖
❖ Photo Conductor Unit Type 125
Black
❖
❖❖
❖ Photo Conductor Unit Type 125
Color
ZHBHa910E
ZHBH681E
ZHBHA680E
ZHBH370E
ZHBH380E
AresPGBMaintGuide-F_FM.book Page 36 Friday, July 26, 2002 5:17 PM


