


12
Tip
You can also set clock automatically by •
synchronizing with the DAB or RDS time.
See details in the “Automatic clock setting via
RDS”.
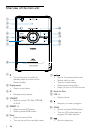
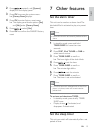
Turn on
1
Press .
The unit switches to the last selected »
source.
Switch to standby
1 Press again to switch the unit to
standby mode.
The clock (if set) appears on the »
display panel.
To switch the unit to Eco Power Standby
mode:
1 Press and hold for more than 2
seconds.
Message » [ECO POWER] displays.
Then clock (if set) displays. »
To switch between standby mode and Eco
Standby Mode:
1 Press and hold for more than 2
seconds.
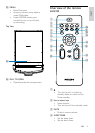
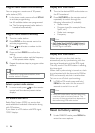
3 Insert the black wire into the black (-)
socket.
4 For the left speaker, find the sockets on
the main unit marked ‘LEFT’.
5 Repeat steps 2-3.
Connect power
Caution
Risk of product damage! Ensure that the power •
voltage corresponds to the voltage printed on
the back or underside of the apparatus.
Risk of electric shock! When you unplug the
•
AC adaptor, always pull the plug from the
socket. Never pull the cord.
Before connecting the AC adaptor, ensure you
•
have completed all other connections.
1 Connect the power adaptor to the wall
outlet.
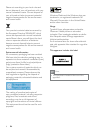
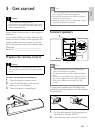
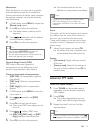
Set clock
Note
You can set the clock in the standby mode •
only.
1 Press and hold CLOCK/DISPLAY on the
remote control for 2 seconds.
2 Press PROG repeatedly to select 12 hour
or 24 hour format.
3 Press CLOCK/DISPLAY to confirm the
selection.
The hour digits blink. »
4 Press / to set the hour.
5 Press CLOCK/DISPLAY to confirm the
hour setting.
The minute digits blink. »
6 Press / to set the minute.
7 Press CLOCK/DISPLAY to confirm the
setting.
EN