


4
WARNING!
• Do not mix old and new batteries.
• Do not mix alkaline, standard (carbon-zinc), or rechargeable (nickel cadmium) batteries.
SETTING-UP:
NOTE: Do not set the clock until the outdoor temperature is displayed.
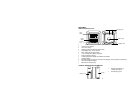
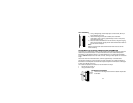
1. Place batteries in the outdoor transmitter first, then into the radio-controlled
clock.
2. DO NOT PRESS ANY BUTTONS FOR 15 MINUTES.
3. After 15 minutes both the Indoor and Outdoor areas on your clock should have a
temperature showing. If not, remove both sets of batteries, wait 15 minutes and repeat
step one.
4. After the clock receives the outdoor temperature, and 15 minutes have elapsed,
set your time zone. The default time zone is Eastern Standard Time (EST). If you
live in the Eastern Time zone move to step 6.
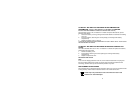
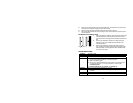
5. To set the time zone:
• Push and release the “SET” function button.
• The time zone (LCD2) will start flashing (Default setting -5EST).
• Push the (+) function button to change the default setting (-5EST) to the desired
time zone.
-6 CST (Central Time Zone)
-7 MST (Mountain Time Zone)
-8 PST (Pacific Time Zone)
(See “Time Zone Setting” if you live outside the USA)
6. After the clock receives the outdoor temperature the WWVB time code reception will
automatically start. The clock will automatically set itself to the exact time, day and
date after receipt of the WWVB time code reception. This typically takes over night.
For best reception place your clock next to a window facing Colorado over night. Once
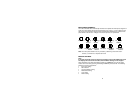
a successful reception is received the Radio Reception ( ) icon will appear above
the blinking colons. Once a successful reception is received relocate your clock to a
desired location. The clock will then automatically attempt to receive the WWVB time
from 12:00 am through 6:00 am each day (attempts WWVB reception every full hour
within this time frame). When this is successful, the received time will override the
manually set time. The date is also updated with the received time (Please refer to
notes on “Manual time setting”).