


13
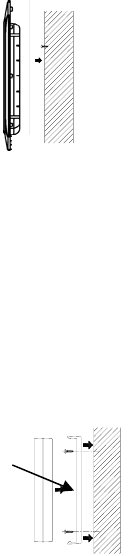
WALL MOUNTING
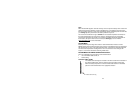
1) Using a straightedge, horizontally space at 2.36 inches (60 mm) 3
screw positions on a wall.
2) Install 3 mounting screws (not included) into a wall within
transmission range—leaving approximately 3/16 of an inch (5mm)
extended from the wall.
3) Place the radio-controlled clock onto the screws, using the hanging
holes on the backside. Gently pull the radio-controlled clock down to
lock the screws into place.
Note:
Always ensure that the radio-controlled clock locks onto the screws
before releasing.
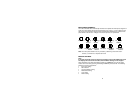
POSITIONING THE OUTDOOR TEMPERATURE TRANSMITTER
To achieve a true temperature reading, avoid mounting where direct sunlight can reach the
outdoor temperature transmitter. It is recommended to mount the outdoor temperature
transmitter on a North-facing wall or in any well-shaded area. The maximum transmitting
range is 330 feet obstacles such as walls, concrete, and large metal objects can reduce the
range.
Place both units in their desired location, and wait approximately 15 minutes before
permanently mounting to ensure that there is proper reception. The outdoor temperature
transmitter is not waterproof and should not be placed anywhere it will become submerged
in water or be directly in the rain.
The outdoor temperature transmitter can be mounted in two ways:
• with the use of screws, or
• using the adhesive tape.
MOUNTING WITH SCREWS
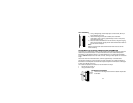
1) Remove the mounting bracket from the outdoor temperature
transmitter.
Mounting
Bracket