


– 42 –
English
CD RW
UNFINALIZE DISC
SKIP
ON
321
REC
CD
-
RW
UNFINALIZE DISC
321
REC
CD RW
UNFINALIZE DISC
d
B
REC LEVEL
FINALIZE DISC
321
CD
-
RW
UNFINALIZE DISC
d
B
REC LEVEL
FINALIZE DISC
321
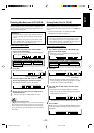
Erasing Tracks (Only for CD-RW)
Before finalizing a disc, you can erase recorded tracks—
from a selected track up to the last track—on a CD-RW at
a time.
• To erase recorded tracks on a finalized CD-RW,
unfinalize the disc first (see page 43).
IMPORTANT
• Once erasure is performed, erased data cannot be restored.
• If you unplug the power cord or if a power failure occurs
while “ERASE TRACK” is flashing in the main display (in
step 4), the disc may not be utilized any more.
On the remote control ONLY:
1
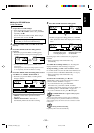
Press MENU repeatedly until “TRACK ERASE”
appears in the main display.
• Each time you press the button, the following menu
items appear as follows:
2
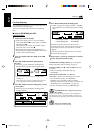
Press SET.
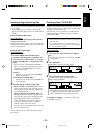
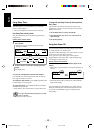
The following indication appears in the main display.
• Erasure start track number, when it appears, is the
same as the last track number. (In the above example,
18 tracks are recorded on the CD-RW.)
3
Press ¡ / ¢ or 4 / 1 to select the erasure
start track.
• You can also use the number buttons to select the
track. (See “To go to another track directly using the
number buttons” on page 27.)
4
Press ENTER.
While erasure is performed, “ERASE TRACK” flashes
in the main display. (The REC indicator also lights on
the display.)
Erasure start track
The last track
Ex.: When you erase the 12th track up to the last
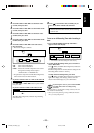
Recording Skip Marks onto a CD-R/CD-RW
Before finalizing a disc, you can record a skip mark to an
unwanted track so that it will be skipped (ignored as if it
does not exist) during play.
IMPORTANT
• Once skip marks are recorded, they cannot be erased (you
can only erase skip marks by erasing the tracks with skip
marks).
• If you unplug the power cord or if a power failure occurs
while “WRITE SKIP” is flashing in the main display (in
step 3), the disc may not be utilized any more.
On the remote control ONLY:
1
Press MENU repeatedly until “TRACK SKIP”
appears in the main display.
• Each time you press the button, the following menu
items appear as follows:
2
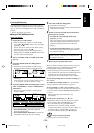
Press SET.
The following indication appears in the main display.
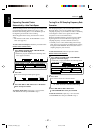
3
Press ¡ / ¢ or 4 / 1 to select a track you
want to skip (during play) then press ENTER.
The SKIP ON indicator lights on the display.
4
Repeat steps 1 to 3 until you record skip marks to
all unwanted tracks.
• You can record up to 21 skip marks on a disc.
More about skip marks
•“Skipping tracks during play” does not mean erasing recorded
data. Therefore the remaining time of the disc will not change.
• Tracks with skip marks will be skipped only when playing the
disc on CD Recorder and other CD player which can read these
skip marks.
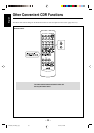
C
UNFINALIZE DISC
d
B
REC LEVEL
FINALIZE DISC
321
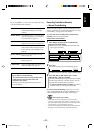
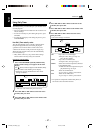
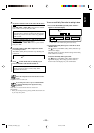
TRACK ERASE = DISC ERASE = UNFINALIZE =
TRACK SKIP
= AUTO TRACK = TRACK SPACE =
CONVERTER
= Canceled = (back to the beginning)
TRACK ERASE =
DISC ERASE
=
UNFINALIZE
=
TRACK SKIP
=
AUTO TRACK
=
TRACK SPACE
=
CONVERTER
=
Canceled
=
(back to the beginning)
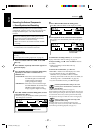
Track number flashes
EN39-43_NX-CDR7[J_C]_4 01.9.14, 3:42 PM42