


– 41 –
English
CD
-
RW
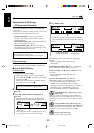
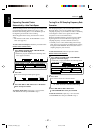
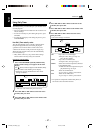
UNFINALIZE DISC
321
TRACK ERASE =
DISC ERASE
=
UNFINALIZE
=
TRACK SKIP
=
AUTO TRACK
=
TRACK SPACE
=
CONVERTER
=
Canceled
=
(back to the beginning)
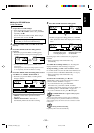
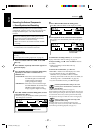
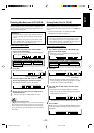
CD RW
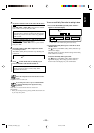
UNFINALIZE DISC
d
B
REC LEVEL
FINALIZE DISC
321
UNFINALIZE DISC
TRACK ERASE = DISC ERASE = UNFINALIZE =
TRACK SKIP
= AUTO TRACK = TRACK SPACE =
CONVERTER
= Canceled = (back to the beginning)
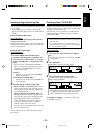
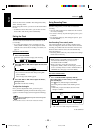
Turning On or Off Sampling Frequency Rate
Converter
The sampling frequency rate converter built in the CD
Recorder allows you to record a digital source having
sampling frequency (fs) of 32 kHz, 44.1 kHz, or 48 kHz by
converting the fs of the source signals into 44.1 kHz
(required fs to record on CD Recorder).
When the sampling frequency converter is turned “OFF,”
digital signals are sent to CD Recorder bypassing the
sampling frequency converter (without conversion).
• Normally set it to “ON” (Initial setting at the factory).
Only when you record dts CD or HDCD
signals coming
through the LINE DIGITAL IN terminal, turn off the
sampling frequency rate converter.
To turn off Converter, follow the procedure below:
On the remote control ONLY:
1
Press MENU repeatedly until “CONVERTER”
appears in the main display.
• Each time you press the button, the following menu
items appear as follows:
2
Press SET.
The current setting for Converter appears.
3
Press ¡ / ¢ or 4 / 1 to select
“CONVERTER OFF” then press ENTER.
To activate Converter, repeat steps 1 to 2 and select
“CONVERTER ON” then press ENTER in step 3.
Ex.: When Converter is activated (initial setting)
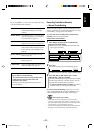
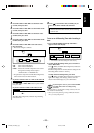
Separating Recorded Tracks
Automatically—Auto-Track Space
While recording from the 3-CD Changer onto CD Recorder
using Standard Recording method (see page 31), CD
Recorder automatically places a 2-second blank space at
the beginning of each track in the recording.
When shipped from the factory, this function is turned
“ON.”
• This function works when “AUTO TRACK” is set to
“ON.” (See page 40.)
To cancel Auto-Track Space, follow the procedure below:
On the remote control ONLY:
1
Press MENU repeatedly until “TRACK SPACE”
appears in the main display.
• Each time you press the button, the following menu
items appear as follows:
2
Press SET.
The current setting for Track Space appears.
3
Press ¡ / ¢ or 4 / 1 to select “TR SPACE
OFF” then press ENTER.
To activate Track Space, repeat steps 1 to 2 and select
“TR SPACE ON” then press ENTER in step 3.
Ex.: When Track Space is activated (initial setting)
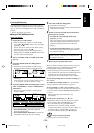
UNFINALIZE DISC
d
B
REC LEVEL
FINALIZE DISC
Continued
EN39-43_NX-CDR7[J_C]_4 01.9.14, 3:42 PM41