


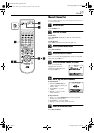


Masterpage:Right-No-Heading
EN
35
Filename [XVS44U_07S-VHS.fm]
Page 35 25 August 2003 11:07 am
Active Video
Calibration
The Video Calibration checks the condition of the tape in
use during playback and recording, and compensates to
provide the highest-possible playback and recording
pictures. You can set “VIDEO CALIBRATION” to “ON” or
“OFF” to your preference. (
੬
pg. 76)
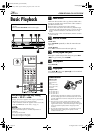
Playback
The unit assesses the quality
of the tape once you initiate
playback.
●
The unit adjusts the playback
picture quality based on the
quality of the tape in use.
●
Video Calibration is active
during automatic tracking. The
Video Calibration screen
appears blinking on the TV screen.
NOTES:
●
When watching a tape recorded with “VIDEO CALIBRATION”
set to “ON”, it is recommended that you leave VIDEO
CALIBRATION on during playback as well.
●
When watching a rental tape or one recorded on another VCR,
or when using this unit as the player for editing, set VIDEO
CALIBRATION to your preference. (
੬
pg. 76)
●
The Video Calibration only appears at the beginning of
automatic tracking. Even though it doesn’t appear after that,
the VIDEO CALIBRATION function is operative.
Recording
The unit assesses the quality
of the tape once you initiate
recording.
●
The unit spends approximately
7 seconds assessing the
condition of the tape, then
begins recording.
NOTES:
●
The Video Calibration works for
both SP and EP modes only
after a tape has been inserted
and the Record mode is first
initiated. It does not work
during recording.
●
The Video Calibration does not
work while Satellite Auto
Recording is in progress.
(
੬
pg. 41)
●
In the case of timer recordings,
the Video Calibration works
before recording is initiated.
●
Once the cassette is ejected,
the Video Calibration data is
cancelled. The next time the
cassette is used for recording, Video Calibration is re-
performed.
●
Pressing the unit’s
REC
(
7
) button while the Video Calibration
is displayed does not start Instant Timer Recording. (
੬
pg. 33)
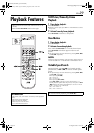
ATTENTION
Since the Video Calibration works before recording actually
starts, there is a delay of approximately 7 seconds after
REC
(
7
) and
PLAY
(
4
) on the Remote are pressed, or
REC
(
7
) on
the unit is pressed. To make sure you record the desired
scene or program in its entirety, first perform the following
steps:
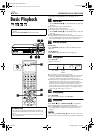
A
Press and hold
PAUSE
(
9
) and press
REC
(
7
) to engage
the Record Pause mode.
●
The unit then automatically checks the condition of the
tape and, after approximately 7 seconds, re-enters Record
Pause mode.
B
Press
PLAY
(
4
) to start recording.
If you want to bypass the Video Calibration and begin
recording immediately, set “VIDEO CALIBRATION” to
“OFF”. (
੬
pg. 76)
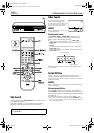
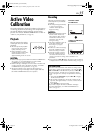
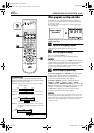
VIDEO CALIBRATION
COMPLETE
DURING VIDEO
CALIBRATION
XVS44U_01.book Page 35 Monday, August 25, 2003 11:08 AM