


6
WALL CORNER-MOUNTING
CAUTION
The customer is responsible for proper selection and use of mounting hardware
(available through hardware stores), to properly and safely wall-mount the
speakers. The JBL Control NOW speaker was designed to be easily installed.
However, if you are unable to clearly and fully understand and follow the
instructions in this manual, or if you are unsure of your ability to properly install
these loudspeakers, please contact your dealer or a qualified installer. Please
do not use any power tools during installation. Power tools can exert excessive
and unnecessary torque which, in turn, can damage fasteners or other parts
and accessories, reducing their strength and causing possible failure of the
fastener or part. A failed or damaged fastener or part may not be able to
perform as designed, and may lead to an unsafe installation.
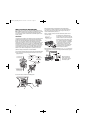
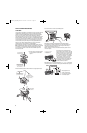
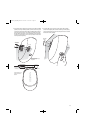
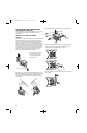
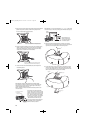
When deciding upon a location for the JBL Control NOW speaker, take care
NOT to install the mounting bracket closer than 3" (horizontal) and 8-1/2" (vertical)
to the ceiling. Any closer than the minimum measurements will not allow
the room needed to position and slide the JBL Control NOW speaker into
the mounting bracket.
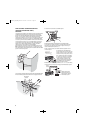
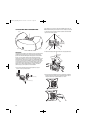
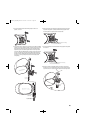
1. Run the wiring to the location desired
for mounting the JBL Control NOW
speaker.
2. Attach the mounting bracket to the wall. Be sure to use appropriate anchors.
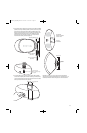
3. Connect the wires to the JBL Control NOW speaker.
IMPORTANT: Make sure all equipment is turned off before making
any connections. For speaker connections, use a high-quality speaker wire
with polarity coding. The side of the wire with a ridge or other coding is
usually considered positive polarity (i.e., +).
NOTE: If desired, consult your local JBL dealer about speaker wire and
connection options.
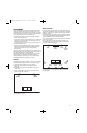
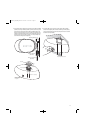
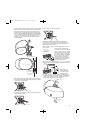
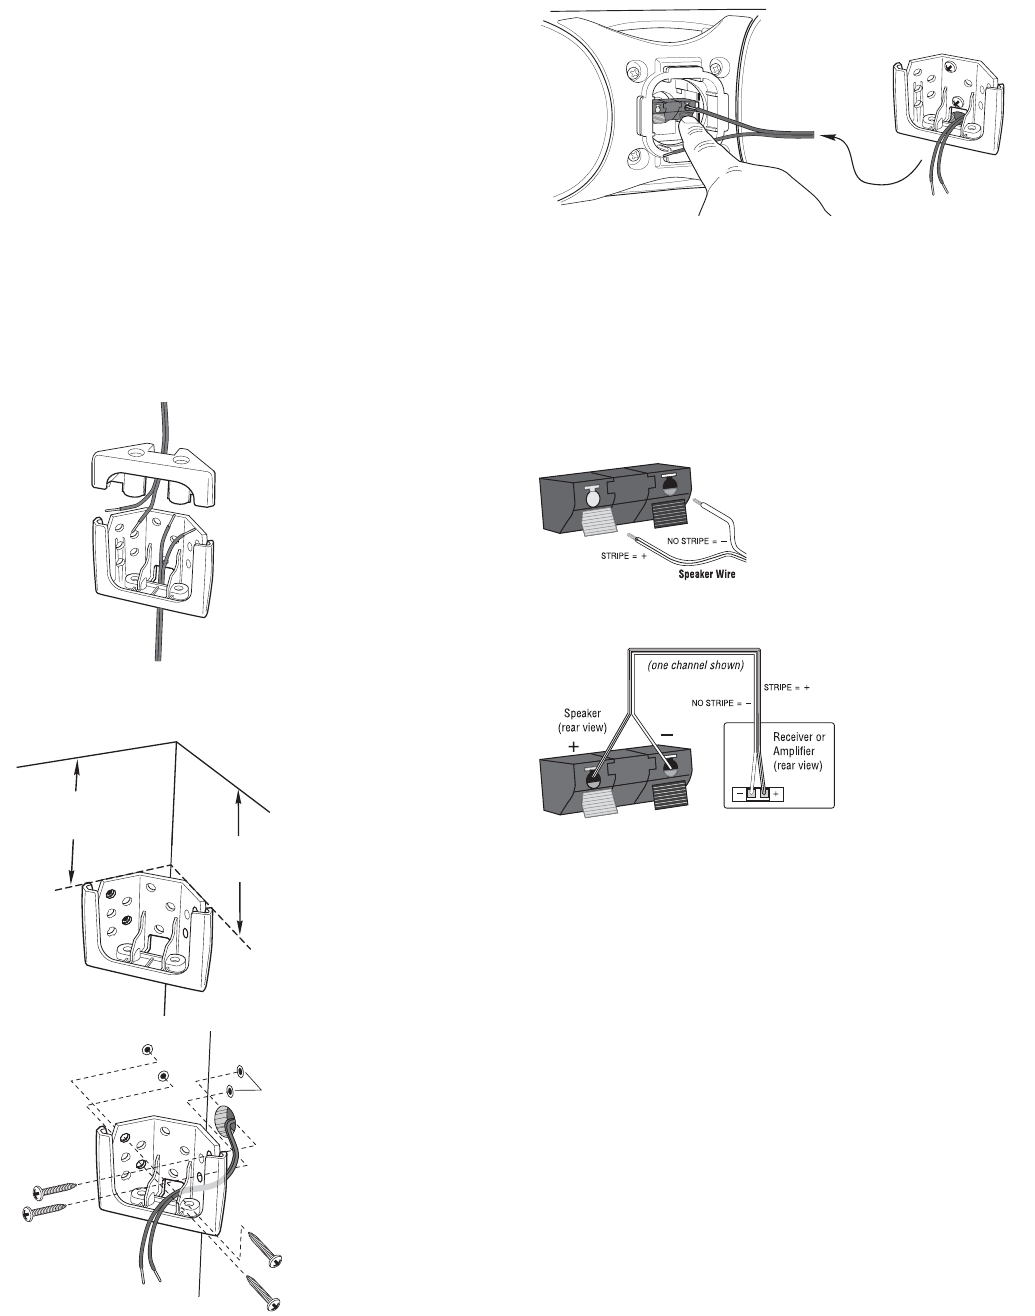
The speakers have coded terminals that
accept a variety of wire connectors. The most
common connection is shown in the diagram
to the left. To ensure proper polarity, connect
each + terminal on the back of the amplifier
or receiver to the respective + (red) terminal
on each speaker, as shown. Connect the
– (black) terminals in a similar way. See
the owner’s guides that were included with
your amplifier, receiver and television to
confirm connection procedures.
IMPORTANT: Do not reverse polarities (i.e., + to – or – to +) when making
connections. Doing so will cause poor imaging and diminished bass response.
Wiring diagram shows
polarity connections for
one channel of a stereo or
home theater system.
RED = +
BLACK = —
Standard
Connection
RED = +
BLACK = —
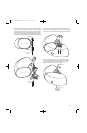
1. Strip 1/4" of wire
2. Press and push connector
3. Insert bare end;
release push connector
Appropriate
anchors
8-1/2" Minimum
distance from ceiling
3"
Minimum
(horizontal mount)
distance
from ceiling
(vertical mount)
Corner/Wall-Mount-
Bracket Assembly
NOTE:There are two
cable accessholes
providedin the Wall-
MountAssembly.
JBLP2605_CN_CNAW_PM-OM 4/23/08 12:57 PM Page 6