


15
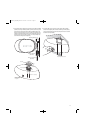
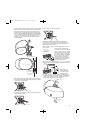
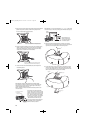
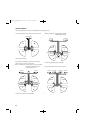
4. Connect the small end of the multiunit wiring adapter to the rear of
speaker 1, as shown.
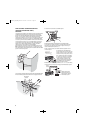
5. The mounting bracket is designed to trap the flange of the JBL Control NOW
speaker by securing the mounting-bracket cap with two screws through the
bottom of the mounting bracket. Run the loose end of the multiunit wiring
adapter through the rear cable-management hole in the mounting bracket
and rest the JBL Control NOW speaker’s rear flange in the mounting bracket,
as shown. This will support the weight of the speaker. Slide the mounting-
bracket cap over the assembly. Secure the mounting-bracket cap by inserting
two #10-32 x 2" screws (provided) in the bottom of the mounting bracket
and tightening.
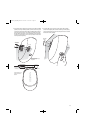
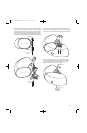
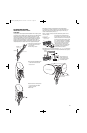
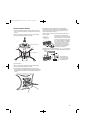
6. Place the large end of the multiunit wiring adapter that is already connected
to speaker 1 into speaker 2 by sliding the multiunit wiring adapter into the
rear of the speaker at a slight angle and rotate clockwise.
7. Connect the small end of an additional multiunit wiring adapter to the speaker
rear as shown.
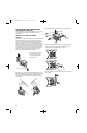
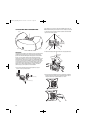
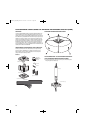
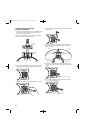
8. Rest the second JBL Control NOW speaker’s rear flange in the mounting
bracket, as shown, and complete the process. Secure the mounting bracket
cap with two #10-32 x 2" screws through the bottom of the mounting bracket.
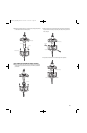
#10-32 x 2"
Screws(2)
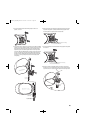
This end is connectedtothe firstspeaker now resting
in the Corner/Wall-Mount Bracket.
This end is connectedtothe firstspeaker now resting
in the Corner/Wall-Mount Bracket.
Mounting-Bracket Cap
MountingBracket
#10-32 x 2"Screws (2)
(side view)
(side view)
#10-32 x 2"
Screws(2)
15
JBLP2605_CN_CNAW_PM-OM 4/23/08 12:57 PM Page 15