


© 2005 Directed Electronics—all rights reserved
Installation Procedure
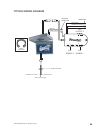
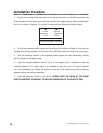
1. Identify the polarity of the dome light circuit and set the switch on the cable connection side
of the overhead monitor housing to match the vehicle’s door trigger polarity. Factory default posi-
tion for this switch is Negative. This switch is marked with the following instruction label.
2. Test fit the overhead monitor system on the ceiling of the vehicle, verifying it is not going to
interfere with the safe operation of the vehicle and is physically safe for the driver and passenger(s).
3. Once the mounting location of the overhead monitor system has been determined, carefully
mark the location with masking tape.
4. Lower the vehicle's headliner down to see if a roof support beam is available to screw the
mounting bracket to. If a support beam is not available to screw into, use a ¾" piece of plywood
cut to the appropriate size. Attach the plywood to the roof of the vehicle using silicone allowing
adequate drying time before proceeding.
5. Screw the mounting bracket in the vehicle. DOUBLE CHECK THE LENGTH OF THE SCREWS
PRIOR TO MOUNTING THE BRACKET, TO PRECLUDE PENETRATION OF THE VEHICLE’S ROOF.
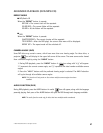
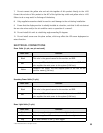
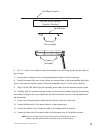
Dome Light Wiring
Positive
Trigger Door
Switch
Negative
Trigger Door
Switch
Grey: Door Switch Yellow: +12V Black: Ground
36