Basic Printing in Windows 31
5. Select a Quality Option:
■ Draft: For rough drafts with reduced print quality.
■ Text: For text-only documents with higher text quality.
■ Text & Image: For documents with text and images with higher quality.
■ Photo: For photos and graphics with good quality and speed.
■ Best Photo: For photos or graphics with high print quality.
Note: The Quality Option settings on this screen give you the best combination
of quality and speed for most prints. For information on selecting the highest
quality (Photo RPM) on selected papers, see your on-screen Reference Guide.
You can select page layout settings by clicking the Page Layout tab in the Printing
Preferences or Properties window.
6. Select the paper Type and Size for the paper you’ve loaded. See “Selecting the Correct
Paper Type” on page 37 for more information about paper types.
7. Select your document or image Orientation.
Tip: For more information about printer settings, click the ? or Help button.
8. Click OK to close the Printing Preferences or Properties window.
9. At the Print window, click
OK or Print to start printing.
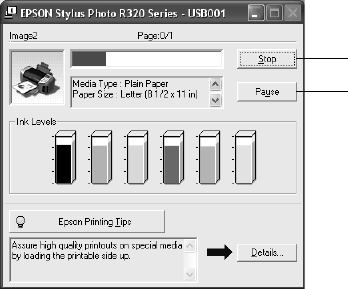
During printing, this window appears and shows the progress of your print job. You can use
the buttons to cancel, pause, or resume printing. You can also see how much ink you have left.
Click to cancel printing
Click to pause or
resume printing


