


13
OPERATION
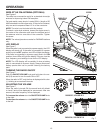
RADIO ON / vOLUME AT 10
RADIO OFF / vOLUME AT 0
Fig. 7
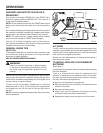
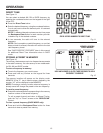
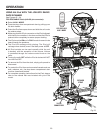
WIRE-STYLE FM ANTENNA (OPTIONAL)
See Figure 6.
The radio has a connection point for a standard wire-style
antenna for improving indoor FM reception.
For best results, use a simple 1-meter (39.4 in.) length of 22
AWG stranded or solid copper wire. If the wire is insulated,
strip one end to expose at least 1/2 in of the conductor.
NOTE: The wire is not included with this product.
To attach a wire-style antenna, loosen the single screw in
the center of the connector and insert the stripped end of
the antenna wire into one side of the connector. Tighten
the screw.
NOTE: The wire-style antenna works for FM BAND stations
only.
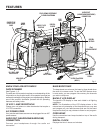
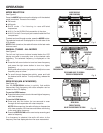
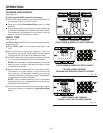
LCD DISPLAY
See Figure 7.
When the radio is not connected to a power supply, the LCD
display will remain off. If the radio is connected to a power
supply but in the OFF position, one LED will light the display.
If the radio is connected to a power supply and in the ON
position, three LEDs will light the display. You can view the
time, frequency, and settings in use on the LCD display.
NOTE: The LCD display will be partially lit when a battery
pack is connected as a power supply. Always disconnect
battery packs after use to prevent draining the battery
pack.
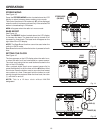
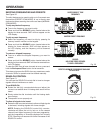
TURNING THE RADIO ON/OFF
See Figure 7.
Push the ON/OFF/VOLUME knob and hold down for one-
half (0.5) second to turn the radio ON or OFF.
When the radio is OFF, only the time is displayed with colon
( : ) blinking at one-second intervals.
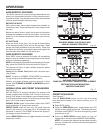
ADJUSTING THE VOLUME
See Figure 7.
When the radio is turned ON, the sound level will default
to Level 2 and will be displayed for one second. After one
second, the radio frequency will be displayed.
To increase the volume: turn the ON/OFF/VOLUME knob
to the right.
To decrease the volume: turn the ON/OFF/VOLUME knob
to the left.
Fig. 6
WIRE-STYLE
ANTENNA
SCREW
STRIPPED END
OF WIRE