


26
RQT8157
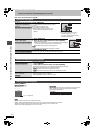
Timer recording
Refer to the control reference on page 24.
You can enter up to 32 programmes up to a month in advance.
(Each daily or weekly programme is counted as one programme.)
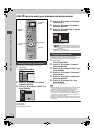
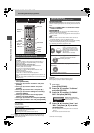
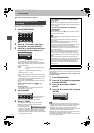
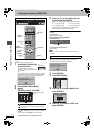
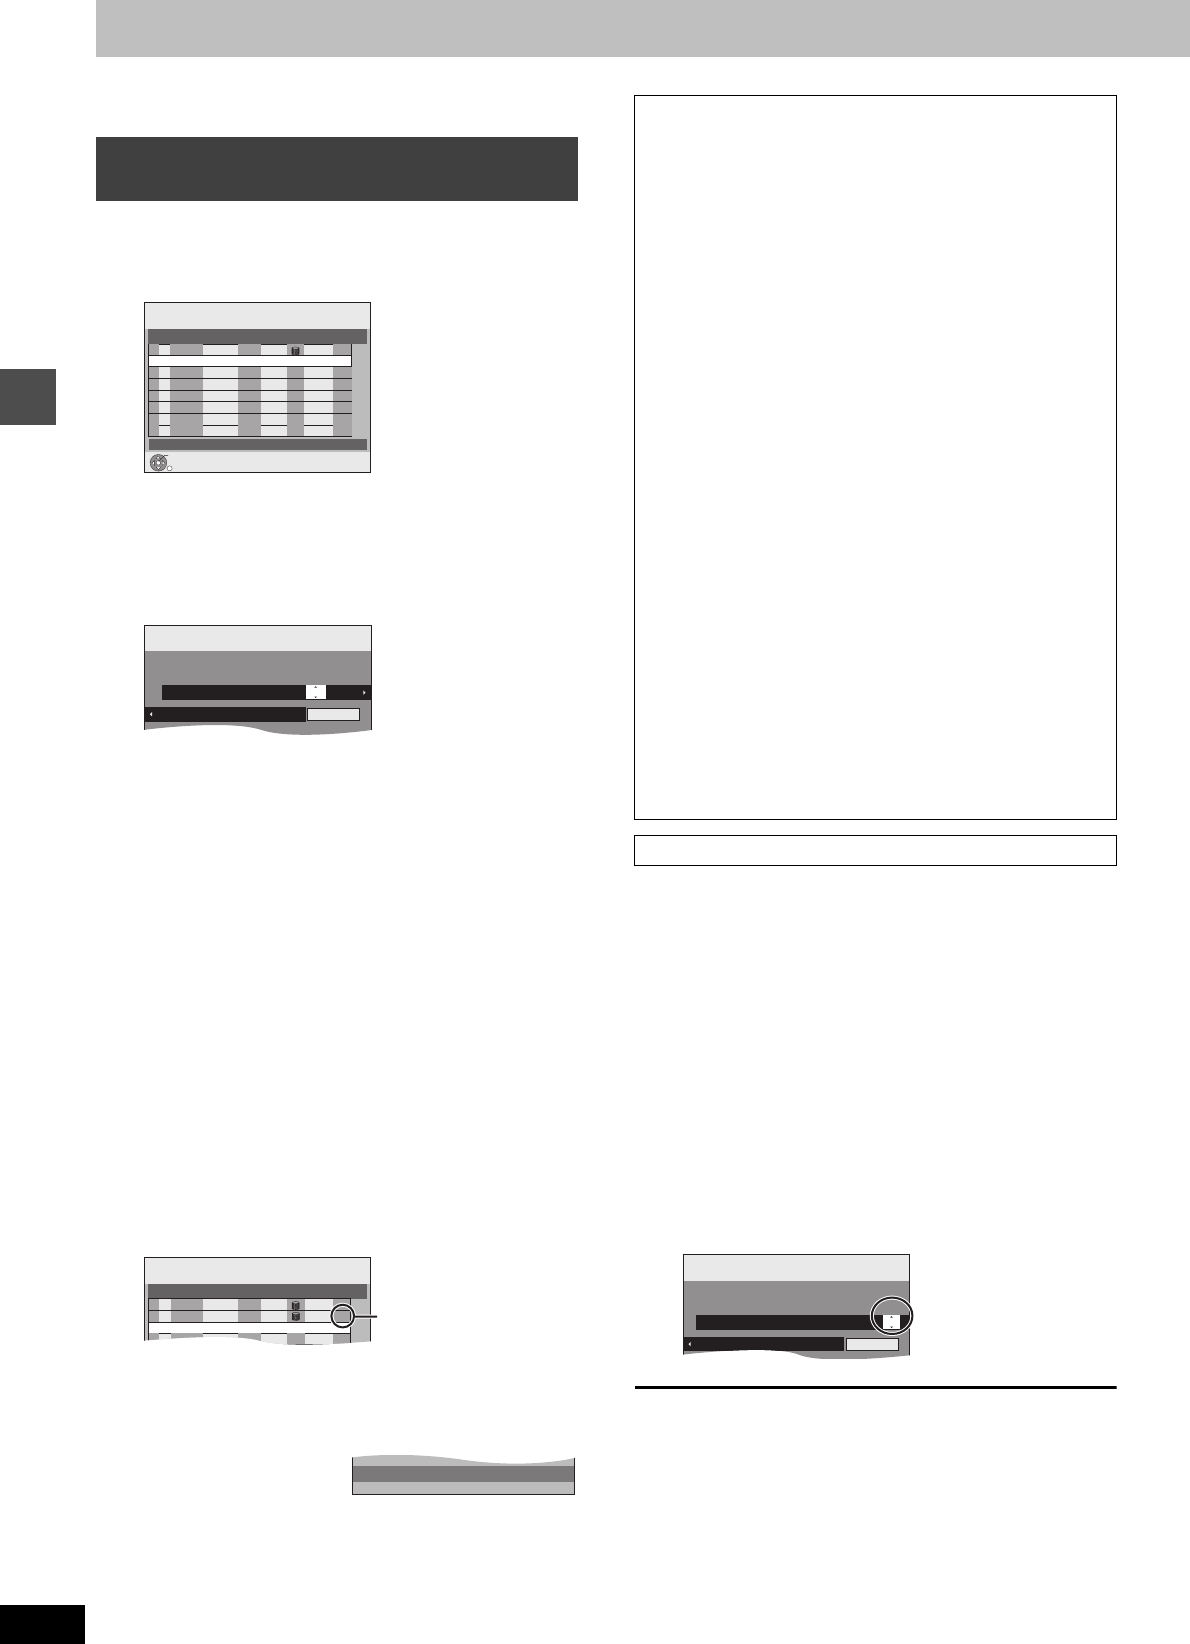
1 Press [PROG/CHECK].
2 Press [3, 4] to select “New Timer
Programme” and press [ENTER].
3 Press [1] to move through the items
and change the items with [3, 4].
≥Press and hold [3, 4] to alter the Start (Start time) and
Stop (Finish time) in 30-minute increments.
≥You can also set Name (Programme position/TV Station
Name), Date, Start (Start time), and Stop (Finish time) with
the numbered buttons.
≥Date
≥You can also press [HDD] or [DVD] to select the recording
drive.
When the recording drive is “DVD” and there is not enough
remaining space, recording automatically switches to the
“HDD” (➡ 25, Relief Recording).
≥You can also press [REC MODE] to change the recording
mode.
≥RENEW (Auto Renewal Recording) [HDD] (➡ right)
ON!)OFF
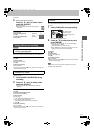
≥Programme Name
Press [2, 1] to select “Programme Name” and press
[ENTER]. (➡ 51, Entering text)
4 Press [ENTER].
Repeat steps 2–4 to programme other recordings.
5 Press [F TIMER].
The unit turns off and “F” lights on the unit’s display to
indicate timer recording standby has been activated.
≥If you turn on the unit, a
message screen appears.
Recording is not possible
while timer recording is in standby. [Playback is possible
however you cannot play a title recorded using a different
encoding system (PAL or NTSC) from that of the TV system
currently selected on the unit.]
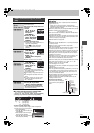
[HDD]
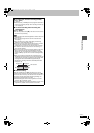
If you record a programme onto HDD repeatedly everyday or every
week using timer recording, the unit will record the new programme
over the old one.
This function can be used only when weekly recording or daily
recording is selected.
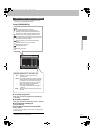
1 Press [PROG/CHECK].
2 Press [3, 4] to select the programme
and press [ENTER].
3 Press [2, 1] to select “RENEW”
column.
4 Press [3, 4] to select “ON” and press
[ENTER].
[Note]
≥If a programme set for Auto Renewal Recording is protected or
while play back is taking place from the HDD, or while transferring
(dubbing), the programme will not be overwritten. Instead the
programme set for recording will be saved as a separate
programme, and this programme will be the one to be overwritten
when the next Auto Renewal Recording takes place.
≥Playlists made from programmes that were set for Auto Renewal
Recording are erased along with auto renewal.
≥When there is not enough space on the HDD, the programme may
not be recorded completely.
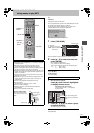
Manually programming timer
recordings
[.
l
l
l
a.
Date: Current date up to one month later minus
one day;:
Daily timer: SUN-SAT>MON-SAT>MON-FRI
;:
Weekly timer: SUN>--->SAT
TIMER
RECORDING
1:58 SP
DVD
30:24 SP
HDDRemain
12:56:00 15. 7. TUE
RETURN
ENTER
Press ENTER to store new programme.
Mode
StopStart
No.
Date
HDD
DVD
Name
Disc
space
SP
OK
20:00
19:00
ARD
15. 7. TUE
01
New Timer Programme
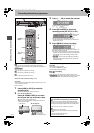
TIMER
RECORDING
1:58 SP
DVD
30:24 SP
HDDRemain
12:54:00 15. 7. TUE
Mode
StopStartName Date
HDD
DVD
22:3022:0015. 7. TUE HDD
1 ARD
Programme Name
SP
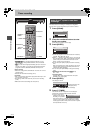
TIMER
RECORDING
1:58 SP
DVD
30:24 SP
HDDRemain
12:56:00 15. 7. TUE
Mode
StopStart
No.
Date
HDD
DVD
Name
Disc
space
SP
OK
20:00
19:00
ARD
15. 7. TUE
01
New Timer Programme
SP
OK
22:30
22:00
ARD
15. 7. TUE
02
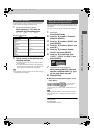
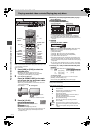
Check to make sure “OK”
is displayed (➡ 27).
Timer standby is active. Playback is possible.
∫ To release the unit from recording standby
Press [F TIMER].
“F” goes out.
≥Be sure to press [F TIMER] before the programme start time to
put the unit on recording standby. Timer recording will work only
if “F” is displayed.
∫ To cancel recording when recording has
already begun
Press [F TIMER].
≥You can also press and hold [∫] on the main unit for more than
3 seconds to stop recording.
[Note]
≥Timer recordings are activated regardless of whether the unit is
turned on/off.
≥Timer recordings begin when the set time is reached even
when playing.
≥Timer recordings do not begin while editing or transferring
(dubbing) in normal speed mode (➡ 41).
≥If the unit is turned on when timer recording begins, it remains
turned on after recording finishes. It does not turn off
automatically. You can turn the unit off during timer recording.
≥“F” flashes for about 5 seconds when the unit cannot go to
timer recording standby.
≥If the unit is not put in the timer recording standby mode at the
latest 10 minutes before the programmed timer recording
starting time, the “F” flashes on the unit display. In this case,
press [F TIMER] to put the unit in the timer recording standby
mode.
≥When you programme successive timer recordings to start
immediately one after the other, the unit cannot record the part
at the beginning of the later programmes [a few seconds when
recording with HDD or DVD-RAM and approximately 30
seconds when recording with DVD-R, DVD-RW (DVD-Video
format) and +R].
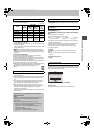
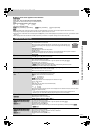
Auto Renewal Recording
TIMER
RECORDING
1:58 SP
DVD
30:24 SP
HDDRemain
12:54:00 15. 7. TUE
Mode
StopStartName Date
HDD
DVD
22:3022:00SUN HDD
1 ARD
Programme Name
SP
RENEW
ON
Timer recording
EH50GN.book Page 26 Friday, March 4, 2005 2:36 PM