


14
Enter the network name
This option allows the NP30 to search for and connect to a particular network
name only.
Type your network name in using the alphanumeric entry screen.
If no matching network is found 'Network not found' will be displayed.
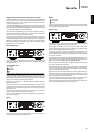
View Config
This menu firstly displays the IP mode (static or dynamic). This will be
Auto/DHCP (i.e. dynamic, this is the default) or alternatively Static IP.
For either mode by turning the Navigation/Select dial the NP30 will scroll
through the various current IP parameters, for instance the ESSID of the
current wireless network, Wired and Wireless MAC addresses, current IP
address, (Sub)Netmask, Gateway address etc.
Edit Config
This menu allows the selection of IP mode between static or dynamic
(Auto/DHCP). Auto/DHCP is recommended for most people in most
circumstances. Static IP requires quite a bit of knowledge about IP networks,
and is for advanced users only.
The default setting is thus Auto / DHCP, here the NP30 obtains its IP address
each time you switch in on by a process called DHCP which means it is
different each time it is acquired. This process is completely automatic and
much simpler than implementing Static IP.
However sometimes it is useful (especially in large networks) to know the exact
IP address of each device, this can only be done by using static IP.
When using Static IP you will also need to enter the network mask you wish to
use and the addresses of your gateway and DNS service, note there is no way
for Cambridge Audio to know what these are in your network. Only select static
IP if you know exactly what you are doing!
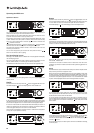
To set static IP, select the 'Settings > Network config > Edit Config' menu and
then press SELECT.
The NP30 will now display 'Auto (DHCP)? YES / NO'. Turn the NP30’s rotary
dial to select 'NO' and then press SELECT.
You will now be able to enter the fixed IP address you wish to give your NP30
by using the rotary dial to select the desired numbers followed by pressing
Navigation/Select dial to end inputting the address.
The NP30 will now prompt you to enter the required network mask for the
network. You will be able to enter this in the same way as before for entering
the IP address.
You will now need to enter the default gateway’s IP address used by the NP30
on the network.
Finally, you will need to enter the DNS IP address for the NP30. On some
networks, you may need to enter your ISP’s DNS IP address, which should be
available on your ISP’s support page on their website.
After entering the above information, the NP30 will now try to connect to your
network. If you wish to use DHCP again simply select 'Settings > Network config
> Edit Config' and then set 'Auto (DHCP)? YES / NO' to 'YES'.
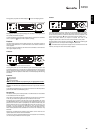
Signal warning
The NP30 can display a warning if the Wi-Fi signal strength is low enough to
be causing reduced throughput.The options for the Signal Warning are simply
Yes or No.
Wi-Fi Region
Different parts of the world use slightly different frequencies for Wi-Fi. For best
performance you should set the NP30 to the region you live in, the current
options are US, Spain, Europe (i.e. other than Spain), Japan.
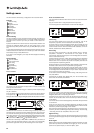
This menu contains various setup / configuration menus as shown below.
Settings
Network Config
Version
Upgrade Firmware
Language
Factory Reset
Register
NP30 Name
WiFi Strength
Remote Code
Network Config
This menu enables you to set your NP30’s network settings, scan again for a
connection to another wireless network, or to manually configure the network
parameters. This is useful if you move your NP30 to a new location for
instance.
By default the NP30 will be set for Automatic wired/wireless detection and
automatic IP addressing (DHCP) which will work without setup in most
circumstances (for Wi-Fi you will need to enter your WEP/WPA key if you have
one).
In Auto mode the NP30 will look for a wired connection first and then scan for
wireless connections if it doesn’t find one. It will also try to obtain an IP address
automatically from your router/DHCP server.
If you wish to make changes to your setup the NP30 displays the following
submenus.
Network Config
Scan for networks
Enter network name
View Config
Edit Config
Signal Warning
WiFi Region
Wired/Wireless
Scan for networks
This option scans all available Wi-Fi frequencies for wireless networks and
allows you to connect to them.
The NP30 can connect to 802.11b/g or n networks (2.4GHz frequency range
only for n networks).
A list of available networks will be presented. If a particular network requires
an encryption key, a symbol will be seen at the end of the network name.
Select your local network using the Navigation/Select dial and press it in for enter.
The NP30 will then connect to the network using a saved key (if you have
previously set one) or present you with an alphanumeric entry menu. Here you
can enter the network key you set up when setting up your wireless network.
Select each character in turn using the Navigation/Select dial and then press
or navigate to the symbol and press Navigation/Select dial to enter that
key. If you make a mistake, press to go back one character.
The NP30 can handle keys in WEP, WPA and WPA2 formats (the choice of
format is made by appropriate settings on your router) and automatically
generates the right format from your text according to the router request.
Settings menu