


LTO
LTO
TM
6
EDITING PARAMETERS USING THE RM2
The UCSPRO-RM2 uses a backlit LCD display, a set of buttons and a very user-friendly, continuously
adjustable rotary control to allow full editing control of the UCS PRO. When you switch on power to the
UCS PRO, the RM2 will show an initial welcome screen (showing the internal software version number). This
will last for about 5 seconds while the UCS PRO initialises. During this period it restores the set-up that was
active when it was last switched off.
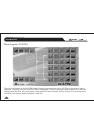
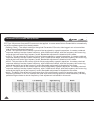
The display will then switch to the last selected Preset (or the factory Default Preset). The Channel
Configuration will be shown in the display. The bold letters represent the input channels and (typically
the and channel respectively). The numbers after the letters show which output channels are fed
from each input. For example, 135 signifies that Input Channel A is feeding Output Channels 1, 3 and 5.
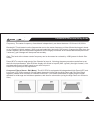
At the far left of the Programmer is a MODE button next to 4 LEDs labelled , , , . Press
the MODE button to sequentially step through the 4 options. Each option provides access to the following
parameters:
accesses the menus for loading and saving presets.
accesses the menus for adjusting delay time on the input and output channels.
accesses the menus for adjusting the Input Gains, Noise Gate, Input EQ, Crossover Filters, Output
EQ, Compressor/Limiting, Output signal Polarity and Output Gains.
accesses menus for selecting the stereo Ganging option, changing the type of unit used in the
menus (i.e. millimetres, microseconds etc.), setting the Lock mode, and various other parameters.
Imagine the various menus as having multiple layers. Follow this example to see it in action
AB
A
left right
Preset Delay Edit Utility
Preset -
Delay -
Edit -
Utility -
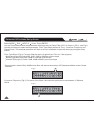
(1) Use the MODE button to select the option (the LED next to lights). The display shows
. Press the button marked NEXT. The display now shows . By pressing the NEXT and
PREV (Previous) buttons you can step through the various top-level options in this menu.
(2) With the display showing , press the button marked ENTER. This takes you down one level
in the menu structure. The display will now show OP1 DELAY (or OP1&2 DELAY) with a flashing digit
Delay Delay Input
Delay Output Delay
Output Delay