


Advanced Settings and Adjustments
69
GB
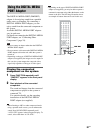
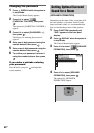
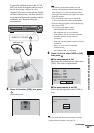
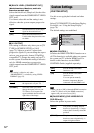
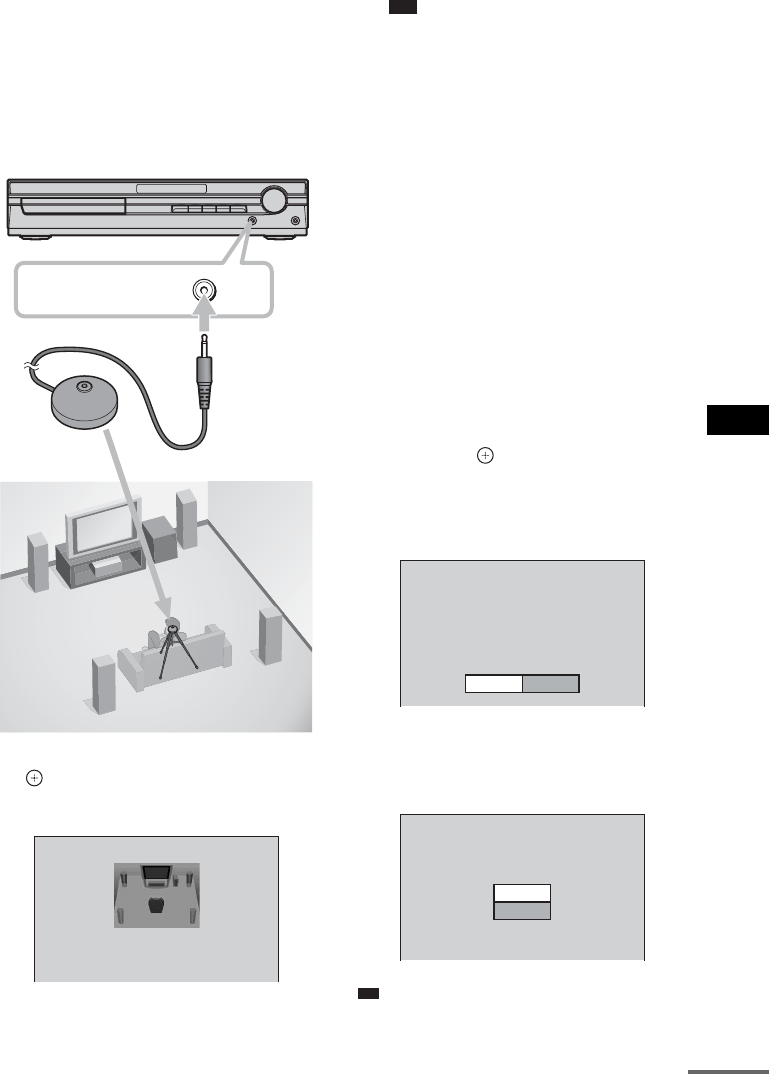
Connect the calibration mic to the A.CAL
MIC jack on the front panel, and set it up at
the ear level using a tripod, etc. (not
supplied). The front of each speaker should
face the calibration mic, and there should be
no obstruction between the speakers and the
calibration mic. Be quiet during the
measurement.
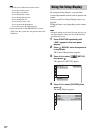
5 Press X/x to select [YES], then press
.
Calibration starts.
Note
• Avoid being in the measurement area and
making noise during the measurement (about
three minutes), to avoid measurement failure.
During the measurement, test signals are output
from the speakers.
• The environment of the room in which the
system is installed may affect measurements.
• If an error message appears, follow the message,
then select [YES].
An error message appears when:
– the headphones are connected.
– the calibration mic is not connected.
– front speakers are not correctly connected.
– surround speakers are not correctly
connected.
– front and surround speakers are not correctly
connected.
– there is excessive noise around the
calibration mic.
– the calibration mic is overloaded.
6 Press C/X/x/c to select [YES] or [NO],
then press .
xThe measurement is OK.
Disconnect the calibration mic, then select
[YES]. The result is implemented.
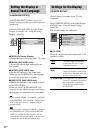
xThe measurement is not OK.
Follow the message, then select [YES] to
retry.
Ti
p
• You can check the distance between the listening
position and each speaker. See page 76.
AUDIO IN / A.CAL MIC
Calibration mic
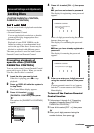
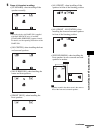
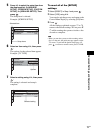
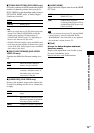
Measuring. Please wait a moment.
FRONT L :
FRONT R :
CENTER :
SUBWOOFER :
SURROUND L :
SURROUND R :
If OK, unplug calibration mic and select
“YES”.
YES
YES
YES
NONE
YES
NONE
NONE
Measurement complete.
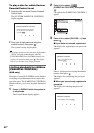
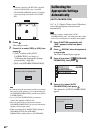
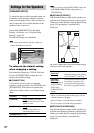
NO
Check speaker connection.
Retry?
YES
Measurement failure.
NO
cont
i
nue
d