


4. Your PC will now prompt you that a device has attempted to connect to your UPnP server. In
order to allow the radio to have access to the media files, you will need to click the “Library”
tab from Windows Media Player 11 and select the “Media Sharing…” item to open the “Media
Sharing” window.
5. From the “Media Sharing” window, the radio will be listed as an unknown device. Click on the
unknown device listed, then click the “Allow” button and then click “OK”.
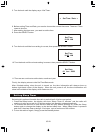
Locating and playing media files using the radio and UPnP
Once the UPnP server is configured to share media files with the Internet radio, you can play the
files by doing the following on the radio:
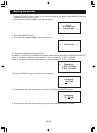
a. Keep pressing BACK to get to the radio's top-level menu and then turn the knob to select
'Media Player'.
b. Press SELECT and then turn the knob to highlight 'UPNP Servers'.
c. Press SELECT and the radio will scan for all available UPnP servers. This may take a few
seconds for the radio complete its scan and before the scan has completed, the radio will
display '(Empty)'. The radio will continue to display '(Empty)' if no UPnP servers are found.
d. After a successful scan, select your UPnP server, by rotating the knob if there is more than
one UPnP server, and than press SELECT.
e. The radio will now list the media categories available from the UPnP server, e.g. 'Music',
'Playlists' etc. Turn the knob to select which category you wish to browse, press SELECT
and turn the knob to highlight a sub category and press SELECT again. For example, you
could select 'Music' and then 'Album'
f. Turn the knob to highlight the media files that you wish to play and press SELECT.
g. The radio will display “Add to Queue”, press SELECT and the radio will add the tracks to its
queue and begin playing them automatically.
Queuing up UPnP tracks for playback later
1. Highlight the required track.
2. Press the SELECT button. 'Track Added To Queue' will be displayed.
Queuing up UPnP albums for playback later
1. Highlight the required album.
2. Press the SELECT button.
3. Turn the knob until '(Add To Queue)' is displayed.
4. Press the SELECT button. 'Tracks Added to Queue' will be displayed.
Controlling playback
1. Use the STOP button to stop playback.
2. Use the PLAY/PAUSE button to either pause a currently playing track or to restart a currently
paused track or to restart a stopped track.
Browsing the list of tracks currently queued up for playback
1. Press the BROWSE button. The currently playing track name will be displayed.
2.Turn the knob to see which tracks are queued up for playback.
3.If you want to jump to a particular place in the queue then press the SELECT button when the
required track is displayed.
4.It is important to note here that media files scanned from the radio's “Windows Shares”
function can also be added to the radio's queue.
5. Use the SKIP TO PREVIOUS TRACK button to start playback of the previous track in the
queue.
6. Use the SKIP TO NEXT TRACK button to start playback of the next track in the queue.
US-19