


US-17
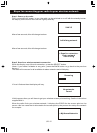
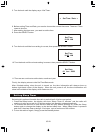
3. Turn the knob until the radio display shows “Media Player”.
4. Press the SELECT button and turn the knob until “Windows Shares” is displayed.
5. Press the SELECT button, turn the knob until “Scan for PCs” is displayed and press SELECT
again.
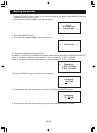
6. The radio will now display “Finding PCs”, once the radio has finished, turn the knob to
highlight the correct PC.
7. Press the SELECT button. The radio will search for shared folders.
8. Turn the knob to highlight the correct shared folder and press SELECT.
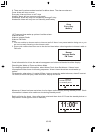
9. The radio will display 'File Scan…' as it scans through the media files in the shared folder. Text
on the bottom row of the display will change to indicate that the file scan is in progress. If you
have a large number of audio files this could take several minutes to complete.
10. Once the radio has finished scanning, it will display 'By Album' You can now browse through
the scanned media files, which will now be organized “By Album”,”By Artist” and “Playlists” if
available.
Note that the first time the file scan is done a file called 'reciva_media_cache' is written to the
folder where the audio files are stored. This is in order to speed up subsequent file scans.
Listening to a single shared track
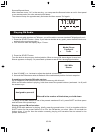
1. Turn the knob until 'By Artist' is displayed.
2. Press the SELECT button.
3. Turn the knob until the required artist is displayed.
4. Press the SELECT button.
5. Turn the knob until the required album name is display.
6. Press the SELECT button. '<Add to Queue>' will be displayed.
7. Turn the knob until the required track is displayed.
8. Press the SELECT button. The track will begin playing.
Listening to a complete shared album
1. Turn the knob until 'By Artist' is displayed.
2. Press the SELECT button.
3. Turn the knob until the required artist is displayed.
4. Press the SELECT button.
5. Turn the knob until the required album name is displayed.
6. Press the SELECT button. '<Add to Queue>' will be displayed.
7. Press the SELECT button. The album will begin playing.
Queuing up tracks for playback later
1. Highlight the required track.
2. Press the SELECT button. 'Track Added To Queue' will be displayed.
Queuing up albums for playback later
1. Highlight the required album.
2. Press the SELECT button.
3. Turn the knob until '<Add To Queue>' is displayed.
4. Press the SELECT button. 'Tracks Added to Queue' will be displayed.
Controlling playback
1. Use the STOP button to stop playback.
2. Use the PLAY / PAUSE button to either pause a currently playing track or to restart a currently
paused track or to restart a stopped track.
3. Use the SKIP TO PREVIOUS TRACK button to start playback of the previous track in the
queue.
4. Use the SKIP TO NEXT TRACK button to start playback of the next track in the queue.