-5-
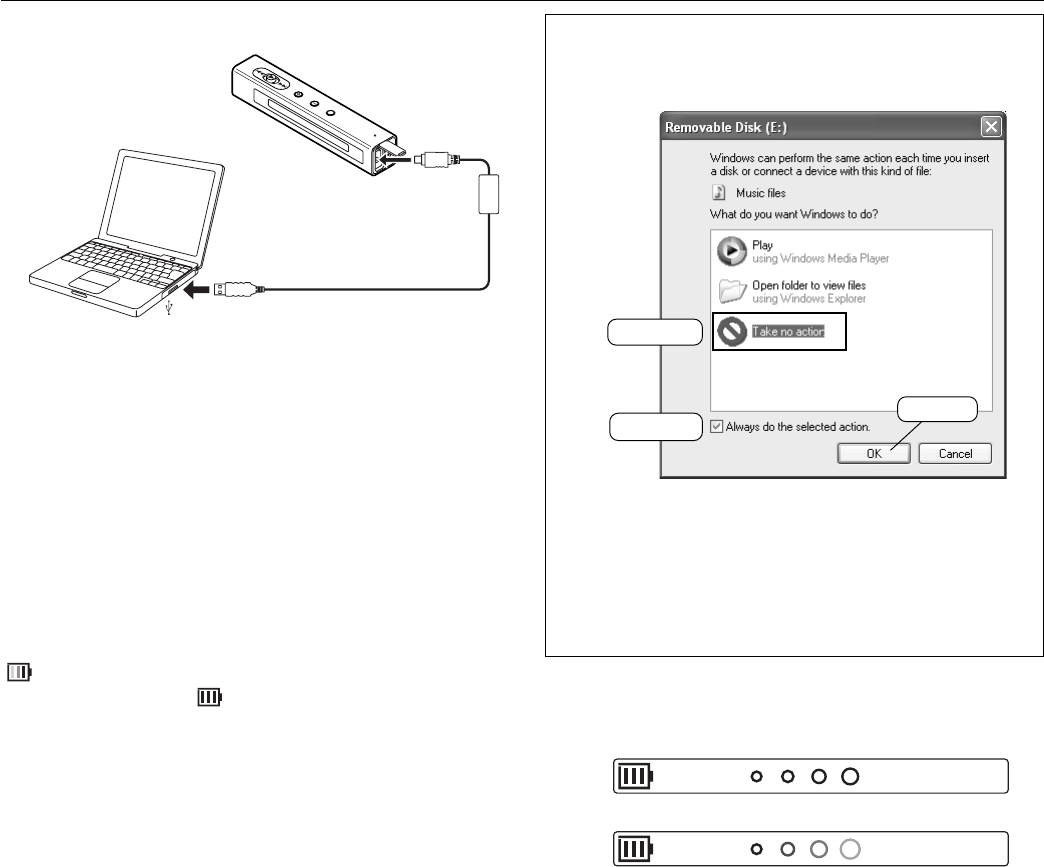
Selecting the action Windows is to take (Windows
XP only)
After connection, the following screen will appear.
Example:
Adjust your settings to match your PC’s environment.
In this manual, [Take no action] is selected, [Always do
the selected action] is checked, and [OK] is clicked. This
completes the connection to the PC.
- For Windows 98SE/Me/2000, this operation is not
needed.
When connected to the PC, the player display will be as
shown below and none of the operating buttons will work.
Connected to PC
Transmitting to/from PC
Before disconnecting the player from the PC, be sure to
follow the steps on page 8. Do not disconnect during data
transfer.
How to connect the player to your PC
I/O
O/I
Pay attention to the
direction of the terminal
Original USB cable
(supplied)
3) Click
1) Select
2) Check
PC
ACCESS
Note:
- Do not use an USB hub or USB extension cable
(Operation is not guaranteed). Use only the supplied
USB cable for connection.
- When you connect the player to the PC for the first
time, it sometimes may not be recognised as a
Removable Disk. In this case, disconnect the player
and reconnect it again.
1. Turn on your PC and Windows is started.
2. Connect the player to the PC with the USB cable.
When the player is connected to the PC, it automatically
enters to the battery charging mode.
“ ” is displayed on the display while charging. When the
charge is completed, “ ” appears.
- Fully charge the battery before using the player for the
first time.
- The battery is fully charged approximately 2 hours.
Moving
