17
RQT6457
Editing
Reference
MENU
E
N
T
E
R
/M
E
M
O
R
Y
1
2
AB
C
3
4
G
H
I
5
JK
L
6
M
NO
7
P
Q
R
S
8
TU
V
0
10
>
_
_
9
W
X
YZ
D
E
F
:
9
SD
R
E
C
P
AU
S
E
V
O
L
U
M
E
D
IS
P
LA
Y
CHARA
: 9
ENTER/MEMORY
MENU
SPACE
! " #
Erasing tracks
Preparation:
≥Press [∫, OPR OFF, FUNCTION] to select SD.
≥Release the write-protect switch (➡ page 8).
1 Press [MENU].
“EDIT?” is displayed.
2 Press [ENTER/MEMORY].
3 Press [:] or [9] to select how to
erase tracks.
∫ TRACK ERASE: Erase one track at a time
(1) Select “TRACK ERASE?”.
(2) Press [ENTER/MEMORY].
(3) Press [:] or [9] to select the track you
want to delete.
(4) Press [ENTER/MEMORY].
If you selected the wrong track
Press [:] or [9] to select “CANCEL?” and
press [ENTER/MEMORY].
∫
ALL TRACK ERASE: Erase all tracks on the card
(1) Select “ALL ERASE?”.
(2) Press [ENTER/MEMORY].
4 After confirming the item to be erased,
press [ENTER/MEMORY].
Erasing is complete when ”CARD Writing” goes out.
After erasing one track, you can continue to erase
other tracks. Repeat the steps from step 3 and press
[MENU] when you are finished.
After erasing all tracks, editing ends automatically.
To stop partway
Press [MENU] before step 4.
Note:
≥ALL ERASE can take several minutes (10 or more in
some cases) if there are a number of tracks on the card
or if it has a large volume.
≥You cannot erase tracks that are in play lists created on
computer software (e.g., Panasonic Media Manager).
Formatting SD cards
CD
All data is erased when you format a card, includ-
ing data recorded with other equipment.
Preparation:
≥Press [∫, OPR OFF, FUNCTION] to select SD.
≥Release the write-protect switch (➡ page 8).
1 Press [MENU].
“EDIT?” is displayed.
2 Press [ENTER/MEMORY].
3 Press [:] or [9] to select “CARD
FORMAT?”.
4 Press [ENTER/MEMORY].
5 Press [ENTER/MEMORY].
Formatting is complete when “CARD Writing” goes
out.
To stop partway
Press [MENU] before step 5.
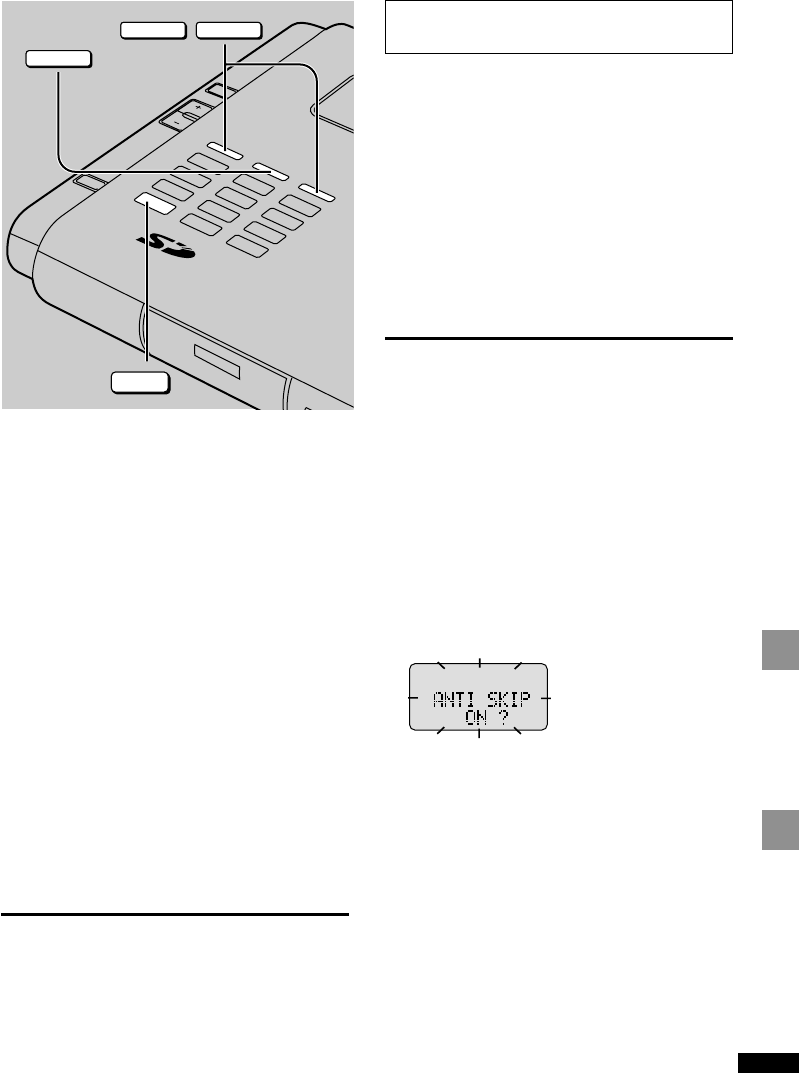
Anti-Skip System
This system uses digital compression technology to save
CD audio data in the memory (a maximum of 48 sec-
onds) and uses this data to fill in gaps caused by bumps
or vibration.
1 Press [MENU] while stopped.
2 Press [:] or [9] to select “ANTI
SKIP ON/OFF?”.
3 Press [ENTER/MEMORY].
The current settings appears.
4 Press [:] or [9] to select “ON?”
or “OFF?”.
5 Press [ENTER/MEMORY].
Note:
≥If bumps or vibration continue, the elapsed play time
disappears and play is interrupted.
≥The disc rotates faster while the system is on so there
may be a slight increase in disc rotation noise.
≥The anti-skip system switches off automatically during
recording, but switches back on when you are finished.


