13
RQT5210
Recording
B
1
3
C
1
2
4
3
A
3 1
42 1 3
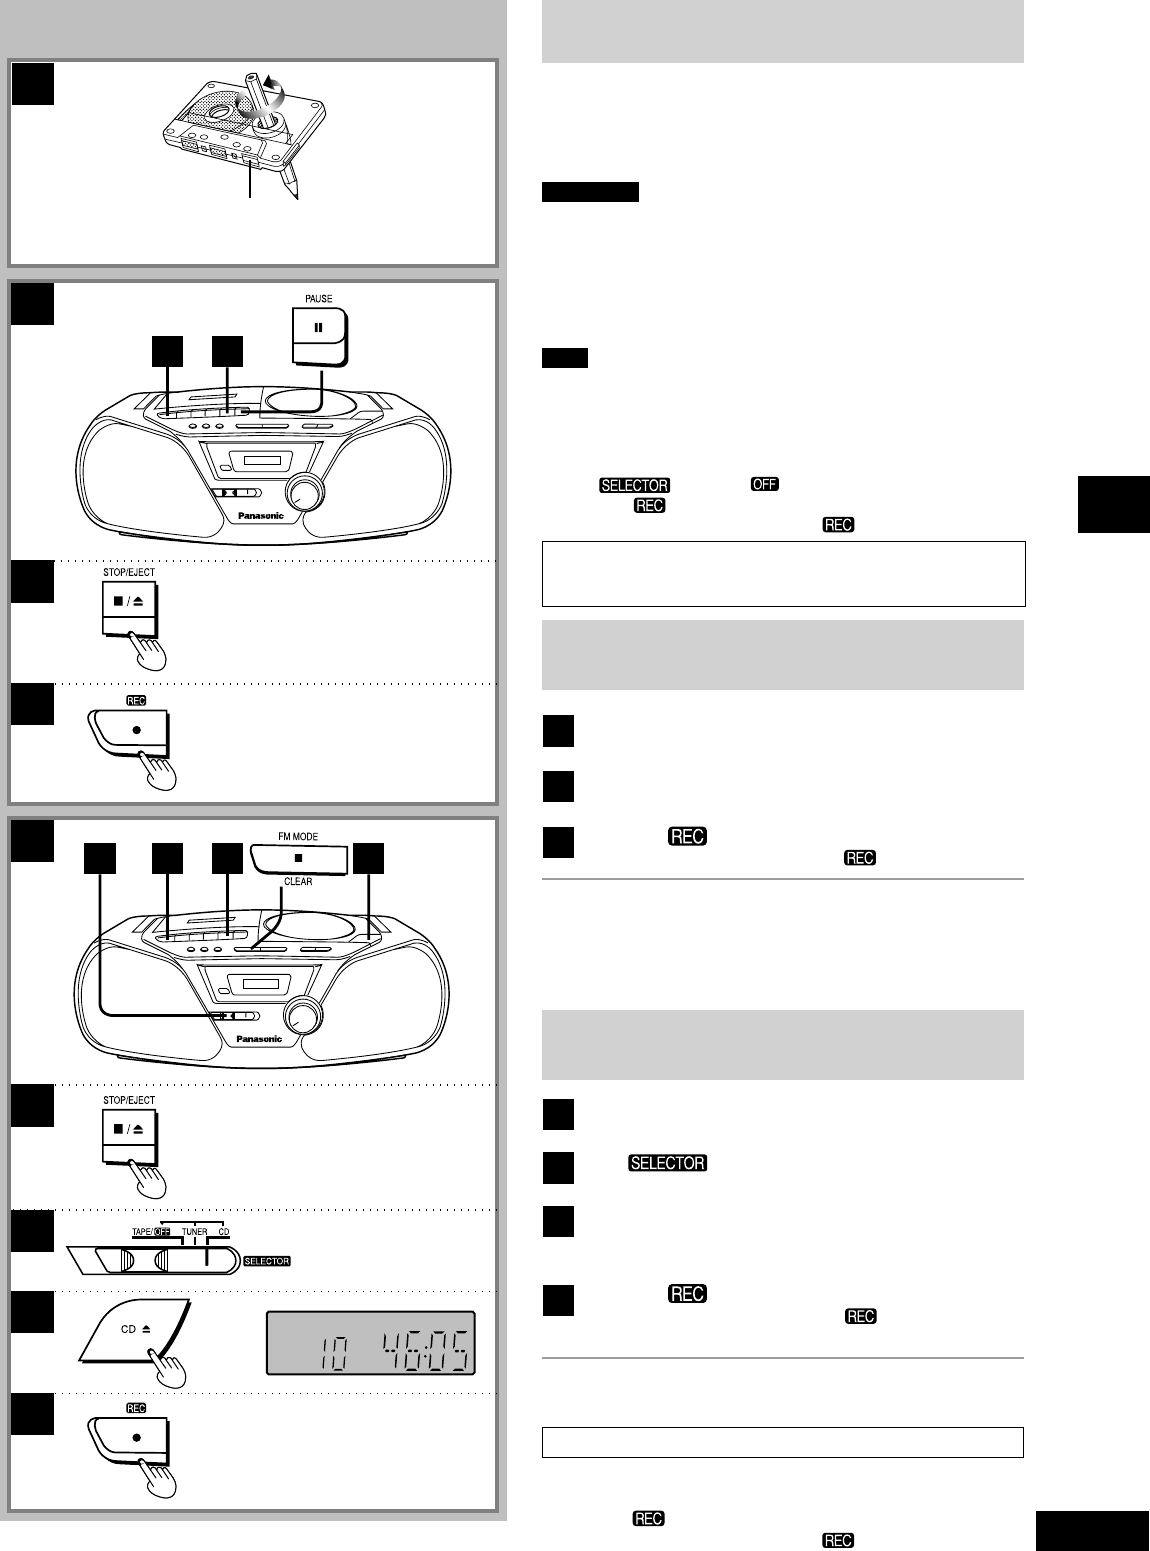
Leader tape
(Recording cannot be made.)
Before recording
To take up the leader tape: A
Only normal tapes can be used.
High position and metal position tapes can be used, but the unit will
not be able to record or erase them correctly.
References
•
Any changes made to the volume or sound quality during recording
will not affect the recording.
•
In order to prevent trouble caused by flat batteries, it is
recommended that you either supply power to the unit from the
household mains socket or replace all the batteries with new ones
when you are recording something which is important to you.
•
The recording level is set automatically.
Note
If the unit is brought near a TV set during recording, noise may be
recorded due to the effects of the signals from the TV set. Maintain a
distance of at least 1.5 metres between the unit and a TV set.
To make a blank tape:
1. Load the recorded tape with the side to be erased facing upward.
2. Set [ ] to “TAPE/ ”.
3. Press [[ ].
[- PLAY] is also depressed with [[ ].
Your attention is drawn to the fact that recording pre-recorded
tapes or discs or other published or broadcast material may infringe
copyright laws.
Recording from radio broadcasts
B
1
Press [L/c STOP/EJECT] and load the tape.
Load the tape with the side to be recorded facing upward.
2
Tune in the station.
(See page 9.)
3
Press [a
] to start recording.
[- PLAY] is also depressed with [a ].
To stop the recording:
Press [L/c STOP/EJECT].
To stop the recording temporarily:
Press [J PAUSE].
To resume recording, press [J PAUSE] again.
Recording from CDs
C
1
Press [L/c STOP/EJECT] and load the tape.
Load the tape with the side to be recorded facing upward.
2
Set [ ] to “CD”.
3
Press [CD c] and insert the CD.
The total number of tracks and total play time of the CD are
displayed.
4
Press [a
] to start recording.
[- PLAY] is also depressed with [a ].
CD play starts simultaneously.
To stop the recording:
Press [L CLEAR] and [L/c STOP/EJECT].
Recording favourite tracks
1. Program desired tracks (refer to steps 2 to 4 on page 11) after
step 3.
2. Press [a ] to start recording.
[- PLAY] is also depressed with [a ].
