


30
RQT8415
Timer recording
Refer to the control reference on page 28.
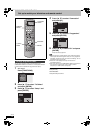
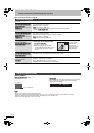
Entering SHOWVIEW numbers is an easy way of timer recording. You
can find these numbers in TV listings in newspapers or magazines.
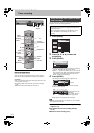
1 Press [ShowView].
2 Press the numbered buttons to enter
the SHOWVIEW number.
Press [2] to move back to correct a digit.
3 Press [ENTER].
≥Confirm the programme and make corrections if necessary
using [3, 4, 2, 1] (➡ right column, step 3).
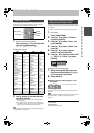
≥When “-- ---” appears in the “Name” column, you cannot set
timer recording. Press [3, 4] to select desired programme
position. After you have entered the information of a TV
station, it is kept in the unit’s memory.
4 Press [ENTER].
The settings are stored and the timer programme is on.
Timer icon is displayed in left column.
“F” lights on the unit’s display to indicate timer recording
standby has been activated.
Repeat steps 1–4 to programme other recordings.
∫ To cancel recording when recording has already
begun (➡ 31)
∫ To release the unit from recording standby
(➡ 31)
∫ Notes on timer recording (➡ 31)
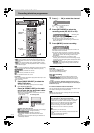
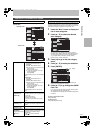
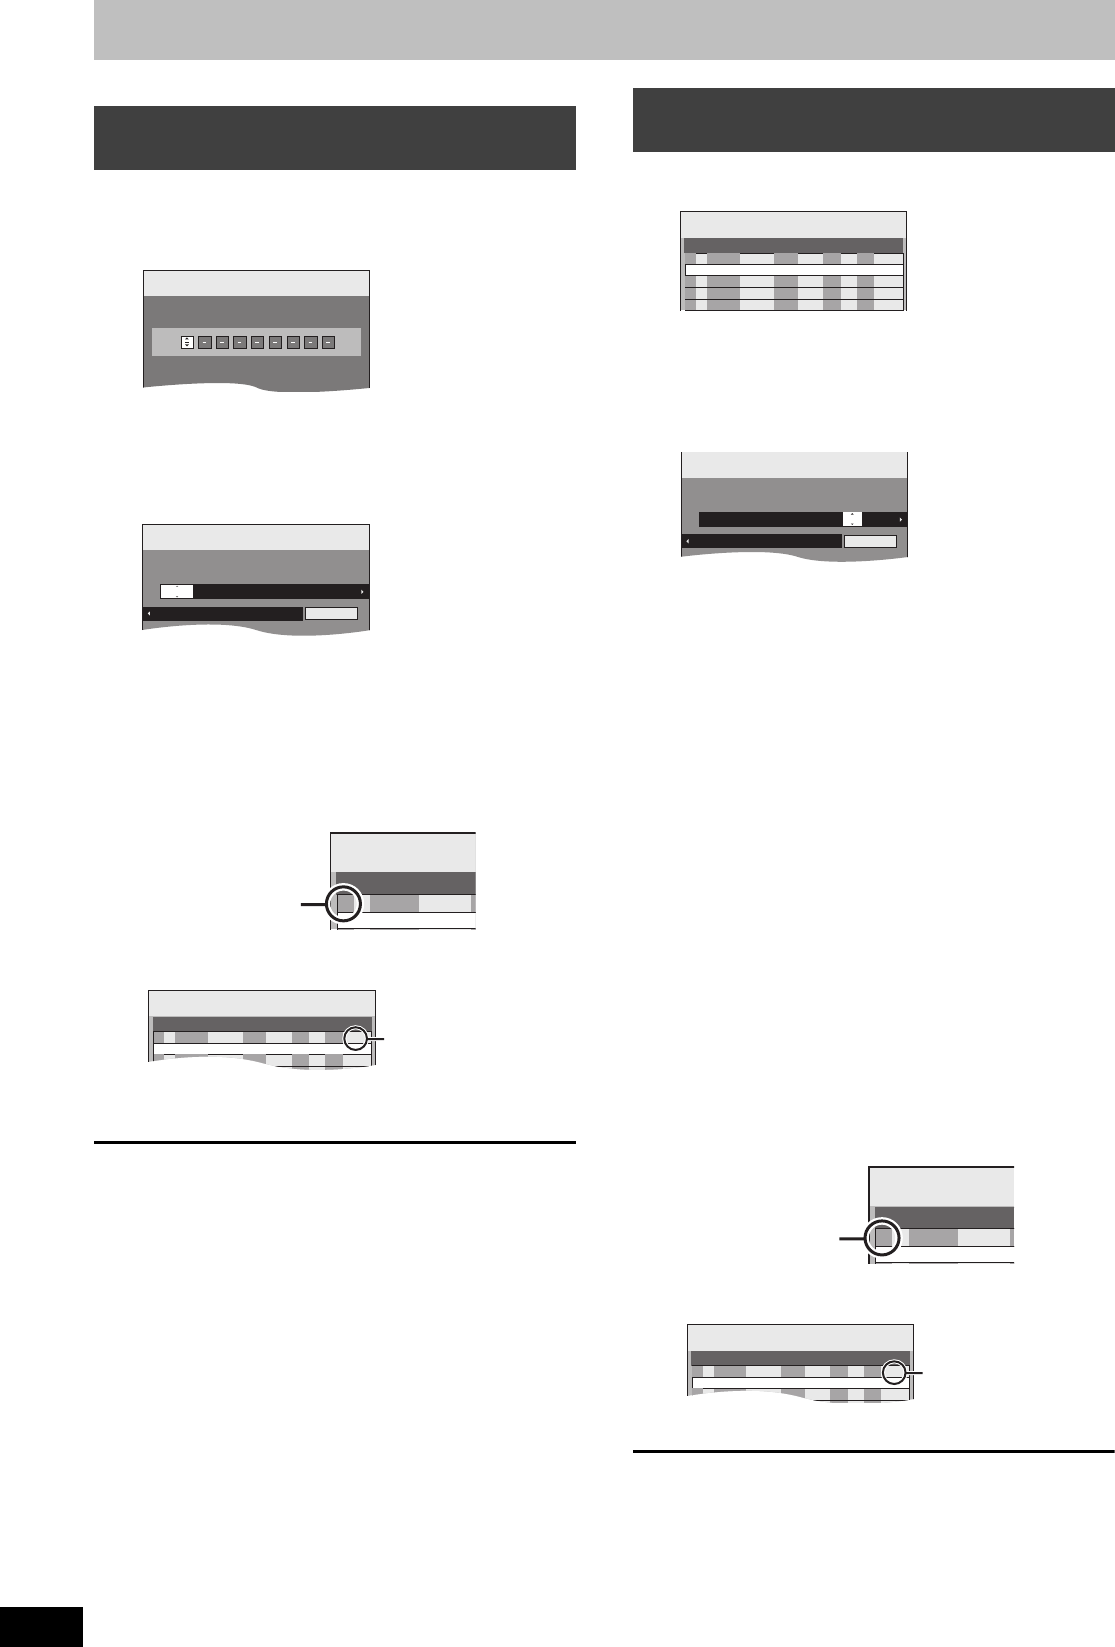
1 Press [PROG/CHECK].
2 Press [3, 4] to select “New Timer
Programme” and press [ENTER].
3 Press [1] to move through the items
and change the items with [3, 4].
≥Press and hold [3, 4] to alter the Start (Start time) and
Stop (Finish time) in 30-minute increments.
≥You can also set Name (Programme position/TV Station
Name), Date, Start (Start time), and Stop (Finish time) with
the numbered buttons.
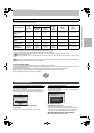
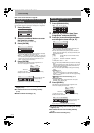
≥Date
≥You can also press [DRIVE SELECT] to select the recording
drive.
When the recording drive is “DVD” and there is not enough
remaining space, recording automatically switches to the
“HDD” (➡ 32, Relief Recording).
≥You can also press [REC MODE] to change the recording
mode.
≥VPS/PDC (➡ 32)
ON!)OFF (– – –)
If the broadcasting station is not transmitting VPS/PDC
signals, “jjj” appears in the menu for timer programming
under “VPS/PDC”.
≥[HDD] RENEW (Auto Renewal Recording) (➡ 32)
ON!)OFF
≥Programme Name
Press [2, 1] to select “Programme Name” and press
[ENTER]. (➡ 63, Entering text)
4 Press [ENTER].
The settings are stored and the timer programme is on.
Timer icon is displayed in left column.
“F” lights on the unit’s display to indicate timer recording
standby has been activated.
Repeat steps 2–4 to programme other recordings.
∫ To cancel recording when recording has already
begun (➡ 31)
∫ To release the unit from recording standby
(➡ 31)
∫ Notes on timer recording (➡ 31)
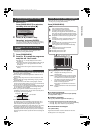
Using SHOWVIEW number to make timer
recordings
Input ShowView Number 0-9, and press ENTER.
ShowView
Record
1:58 SP
DVD
30:24 SP
HDDRemain
12:53:00 15. 7. TUE
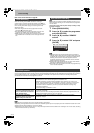
Timer
Recording
1:58 SP
DVD
30:24 SP
HDDRemain
12:54:00 15. 7. TUE
Mode
StopStartNameName Date
VPS
PDC
HDD
DVD
17:0016:0015. 7. TUE SP OFFHDD
1 ARD
Programme Name
Timer
Recording
Remain
No.
DateName
ARD
15. 7. TUE
01
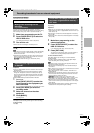
New
T
F
Timer icon
Timer
Recording
1:58 SP
DVD
30:24 SP
HDDRemain
12:56:00 15. 7. TUE
Mode
StopStart
No.
Date
VPS
PDC
HDD
DVD
HDD
Name
Drive
space
SP
OK
20:00
19:00
ARD
15. 7. TUE
01
OFF
New Timer Programme
F
Check to make sure “OK”
is displayed (➡ 31).
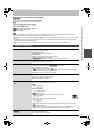
Manually programming timer
recordings
[.
l
l
l
a.
Date: Current date up to one month later minus
one day;:
Daily timer: SUN-SAT>MON-SAT>MON-FRI
;:
Weekly timer: SUN>--->SAT
Timer
Recording
1:58 SP
DVD
30:24 SP
HDDRemain
12:56:00 15. 7. TUE
Mode
StopStart
No.
Date
VPS
PDC
HDD
DVD
HDD
Name
Drive
space
SP
OK
20:00
19:00
ARD
15. 7. TUE
01
OFF
New Timer Programme
F
Timer
Recording
1:58 SP
DVD
30:24 SP
HDDRemain
12:54:00 15. 7. TUE
Mode
StopStartName Date
VPS
PDC
HDD
DVD
22:3022:0015. 7. TUE OFFHDD
1 ARD
Programme Name
SP
Timer
Recording
Remain
No.
DateName
ARD
15. 7. TUE
01
New
T
F
Timer icon
Timer
Recording
1:58 SP
DVD
30:24 SP
HDDRemain
12:56:00 15. 7. TUE
Mode
StopStart
No.
Date
VPS
PDC
HDD
DVD
HDD
Name
Drive
space
SP
OK
20:00
19:00
ARD
15. 7. TUE
01
OFF
New Timer Programme
F
Check to make sure “OK”
is displayed (➡ 31).
EH55.book Page 30 Thursday, January 19, 2006 1:58 PM