


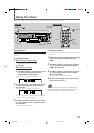

35
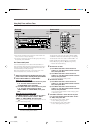
77
77
7 Turning on or off sampling frequency rate converter
The sampling frequency rate converter built in CD Recorder
allows you to record a digital source having sampling
frequency (fs) of 32 kHz, 44.1 kHz, or 48 kHz. It can convert
the fs of the source signals into 44.1 kHz so that CD Recorder
can record the source.
When the sampling frequency converter is turned “OFF,”
digital signals are sent to CD Recorder bypassing the
sampling frequency converter (without conversion).
Normally set it to “ON” (Initial setting). Only when you record
dts* or HDCD
®
**
signal coming through the DIGITAL IN
terminals, turn off the sampling frequency rate converter. To
turn off the converter, follow the procedure below.
1
While 3-CD Changer and CD Recorder are in stop
mode, press MENU.
2
Turn MULTI JOG ¢ / 4 on the unit or press 3
or 2 on the remote control until “CONVERTER”
appears on the display, then press SET.
“CONVERTER ON” (initial setting) appears on the display.
• To cancel the setting, press CANCEL.
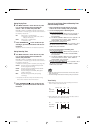
77
77
7 Separating recording tracks automatically
When this function is turned on, CD Recorder automatically
places a 2-second blank space at the beginning of each
track in recording (initial setting).
To turn off the function, follow the procedure below.
Available recording method
Standard Recording, Disc Direct Recording (except
seamless recording), One Track Recording,
Listening Edit Recording, Program Edit Recording
1
While 3-CD Changer and CD Recorder are in stop
mode, press MENU.
2
Turn MULTI JOG ¢ / 4 on the unit or press 3
or 2 on the remote control until “TRACK SPACE”
appears on the display, then press SET.
“TR SPACE ON” (initial setting) appears on the display.
• To cancel the setting, press CANCEL .
3
Turn MULTI JOG ¢ / 4 on the unit or press 3
or 2 on the remote control to select “TR SPACE
OFF,” then press SET.
To activate automatic track spacing again, select “TR
SPACE ON” in step 3.
77
77
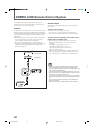
7 Recording skip marks onto a CD-R/CD-RW—Track Skip
Before finalizing a disc, you can record a skip mark to an
unwanted track so that it will be skipped (ignored as if it does
not exist) during play.
• You can record up to 21 skip marks on a disc.
IMPORTANT
• Once skip marks are recorded, they cannot be erased
(you can only erase skip marks by erasing the tracks with
skip marks).
• When you unplug the power cord or when a power failure
occurs while “WRITE SKIP” is flashing on the display, the
disc may not be utilized any more if it is a CD-R.
1
Load a recorded disc on the CD Recorder disc
tray.
2
While 3-CD Changer and CD Recorder are in stop
mode, press MENU.
3
Turn MULTI JOG ¢ / 4 on the unit or press 3
or 2 on the remote control until “TRACK SKIP”
appears on the display, then press SET.
“SKIP ?” appears on the display.
• To cancel the setting, press CANCEL.
4
Turn MULTI JOG ¢ / 4 on the unit or press 3
or 2 on the remote control to select a track you
want to skip, then press SET.
“WRITE SKIP” appears on the display and starts
recording a skip track.
• The skip marked tracks are not shown on the track
number indicators and the SKIP ON indicator lights up
on the display.
5
To record skip marks for other tracks, repeat steps 2
and 4.
•“Skipping tracks during play” does not mean erasing recorded data.
Therefore the remaining time of the disc will not change.
• Tracks with skip marks will be skipped only when playing the disc
on CD Recorder and other CD player which can read these skip
marks.
3
Turn MULTI JOG ¢ / 4 on the unit or press 3
or 2 on the remote control to select
“CONVERTER OFF,” then press SET.
To activate the converter, select “CONVERTER ON” in step 3.
* dts is a trademark of Digital Theater Systems, Inc.
**HDCD
®
is a registered trademark of Pacific Microsonic, Inc.
To activate auto track-marking again, select “AUTO TR ON”
in step 3.
• Track marks must be recorded apart from each other by 4 seconds.
If you press SET twice within 4 seconds, the second press will be
ignored (only one track mark will be recorded where you press SET
for the first time).
• You cannot put track marks manually during CD Synchronized
Recording. (Auto track-marking is activated temporarily.)