


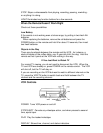
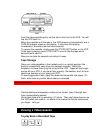

1. Insert the cassette, arrow-side forward, into the slot at the front of the
VCR. The power comes on automatically and the tape indicator lights on the
display.
2. Turn on the TV and select the video channel (3 or 4) using the number
buttons of the TV's remote control.
3. Press PLAY to start the tape.
4. Press STOP to end play.
Direct Video Input to the TV
Normally you would select channel 3 or 4 on the TV to receive a signal from
the VCR. You can get an even better picture if your TV has an auxiliary
video input feature and if the TV and VCR have a direct video-to-video
hookup. If this is the case, do not select channel 3 or 4. Instead:
Press the AUX or VIDEO button on the TV's remote control to select the
proper input channel for playback.
To Fine Tune the Picture
Auto Tracking
Pressing PLAY starts the auto tracking feature, which adjusts the tuning to
eliminate static lines that may appear on the screen.
Manual Tracking
Scratched tapes or poorly recorded tapes may require additional picture
adjustment. You can do this with the remote control. Press either 1 or 4
button until picture clears up.
After operating the tracking manually, eject the tape and reinsert it to
reactivate auto tracking.
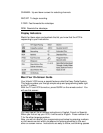
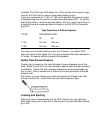
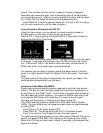
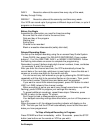
If you press the DISPLAY button when viewing a videocassette, the display,
as shown, appears for several seconds so you can see the functions of the
number buttons on the remote control.
1: TRACKING + 3: SLOW +
4: TRACKING - 6: SLOW -
9: FRAME ADVANCE
The above functions always work when you are viewing a videocassette
even if the display, as shown, is not displayed.
Rewinding the Tape