


24 Auto LUN XP for the XP12000/XP10000
copy data that have not been migrated and data that have already been copied to the migration
destination.
To power off the disk array, obtain the monitoring results first. If you do not, the Physical tab will not display
some monitoring results. For example, if 4:00 a.m. and p.m. is specified in the Gathering Time option in
the Auto LUN XP Monitoring Options pane and you turn off the power to the disk array at 5:00 p.m., the
Physical tab will not display the monitoring results from 4:00 p.m. to 5:00 p.m.
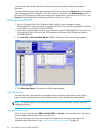
Starting Auto LUN XP
1. Log in to Command View XP or XP Remote Web Console. For more information, see the
HP StorageWorks Command View XP user guide for XP Disk Arrays or the HP StorageWorks XP Remote
Web Console user guide for XP12000/XP10000.
2. Ensure that you are in Modify mode. For more information, see the HP StorageWorks Command View
XP user guide for XP Disk Arrays or the HP StorageWorks XP Remote Web Console user guide for
XP12000/XP10000.
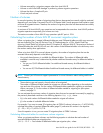
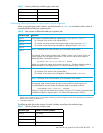
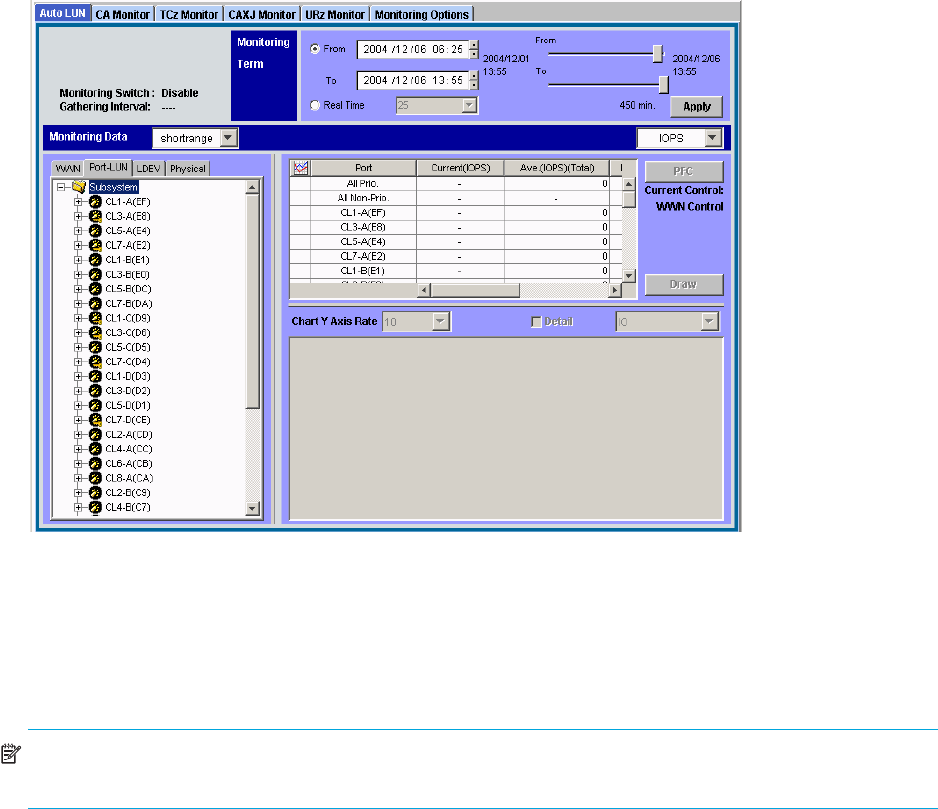
3. Click Auto LUN / Perf Control Base Monitor / PFC in the left pane. The Auto LUN pane appears.
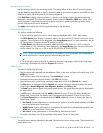
Figure 5 Auto LUN pane
4. Click Monitoring Options. The Monitoring Options pane appears.
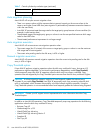
Auto LUN pane
The Auto LUN pane is the performance management pane. It displays usage rates for parity groups,
logical volumes, channel processors, disk processors, and so forth. The pane has several sections.
NOTE: If a hyphen appears in monitoring data columns on the Auto LUN pane, statistics cannot be
collected for that item.
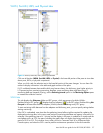
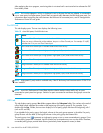
Tabs and selection trees
When you click one of the tabs (WWN, Port-LUN, LDEV, or Physical) in the lower-left portion of the pane,
the pane displays different trees of items you can click.
The top left of the pane shows the status of the Short range Monitor and Long range Monitor. For
information about these monitors, see ”Auto LUN Monitoring Options pane” on page 50.