


Software Applications 4-3
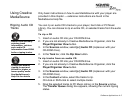
Transferring tracks
With Creative MediaSource, you can transfer files and audio tracks to and
from your player.
To transfer files from one source to another
1. If you are not already in Creative MediaSource Organizer, click the
Player/Organizer View
button.
2. Click the
Show/Hide Right Panel
button.
3. In the
Sources
window, select the source device.
If you are transferring files from PC Music Library to a portable hard disk,
select PC Music Library as your source.
4. In the
Content
window, select the tracks to transfer.
CTRL-click to select multiple tracks. If you do not see any tracks, use
Media Sniffer
(see section below) to update the Content window.
5. In the
Right Panel
window, click the
Source
bar and select the
destination.
6. Click the
Destination Transfer
button to transfer the selected tracks.
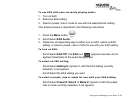
The
Now Transferring
dialog box appears, showing the current transfer
status.
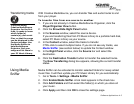
Using Media
Sniffer
Media Sniffer can be activated to monitor selected folders for newly added
music files. It will then update your PC Music Library for you automatically.
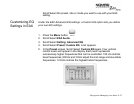
1. Go to
Tools -> Settings ->Media Sniffer
.
2. Click
Enable Media Sniffer
. A tick mark appears in the check box.
3. Click
Add Folders
and then select the folder(s) in which you store all
your music.
4. Click
Apply
and then click
OK
to close the settings page.
If you are using
Creative MediaSource
Organizer for the first
time, it needs to know
which folder(s)
contain(s) your music
files, so that the songs
can be displayed in the
Content window. Use
the Media Sniffer to
help MediaSource
Organizer find your
songs and list them in
your PC Music Library.