


Using the Joybee 150 Digital Audio Player16
Press the or button to scroll to a desired item, and then the button to select it.
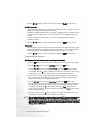
Sampling Frequency
The higher the sampling frequency (with larger number before kHz), the higher the sound
quality and it will also result in larger recorded files.
In MPEG1 LAYER3 recording mode, you can select a sampling frequency at 32kHz, 44.1kHz
or 48kHz. When recording music, it is recommend that you use a sampling frequency at
44.1kHz.
In MPEG2 LAYER3 recording mode, you can select a sampling frequency at 16kHz,
22.05kHz or 24kHz.
Press the or button to scroll to a desired item, and then the button to select it.
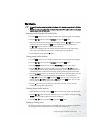
Silence Time
When recording using the built-in microphone of the Joybee 150 Digital Audio Player, if the
VAD did not detect any sound signal at a period of time set here, a new recorded file will be
created automatically. The selectable silence time ranges from 0.5 to 1.5 seconds.
Press the or button to scroll to a desired item, and then the button to select it.
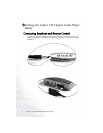
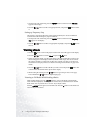
Using the Record Function
Recording using the built-in microphone or sound signal source input
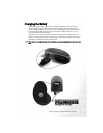
1. Press the button to turn on the player and the main menu will appear on the display.
2. Press the or button to scroll to R
R
ecording and press the button.
3. Press the or button to scroll to R
R
ecord Setup and press the button. Configure
record setup according to the sound signal input source, recording environment and
sound quality. Press the button several times to return to the record menu. This step can
be skipped if you have already configured the record setup options beforehand,
4. If you want to record from input sound signal source through the Line In connection,
plug one end of the Line In cable to the Line In jack of the Joybee 150 Digital Audio
Player, and the other end to the signal output device.
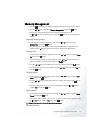
5. Press the or button to scroll to R
R
ecord Now and press the button to start
recording. If you are recording from Line In source, first start playing the sound signal on
the output device before start recoeding on the Joybee 150 Digital Audio Player. When
recording is in progress, the icon will flash on the display. M
M
ic will appear on the
display if you are using the built-in microphone for recording, and L
L
ine In if you are using
Line In as the signal source.
6. To stop recording, press the button. The Joybee 150 Digital Audio Player will create a
recorded file and locate it behind all existing files in the memory.
When you record using the built-in microphone, a directory named MICIN will be created automatically in
the player. All files recorded using the built-in microphone will be saved in that directory automatically.
When you record from the external Line In source, a directory named LINE IN will be created automatically
in the player. All files recorded from the external Line In source will be saved in that directory automatically.
When recording is completed, you will be switched to current recording directory. To return to the previous
directory, press the A-B/TRP button.