Page 14 of 25 2487S - Rev: 1/21/2014 7:37 AM
• Tap the scene button you wish to setup before entering setup mode
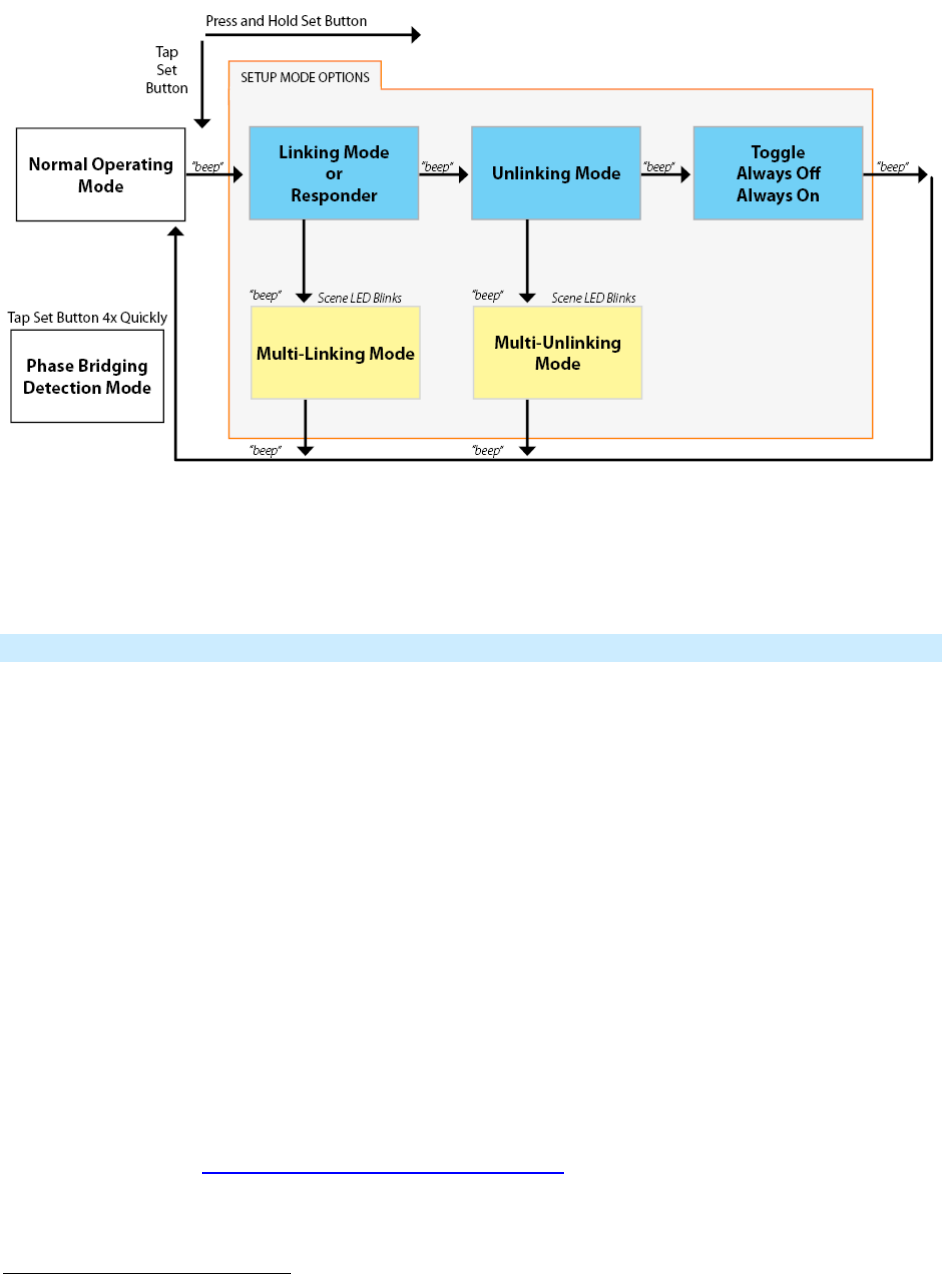
• Advanced setup features are highlighted in yellow
• Toggle: Cycles automatically between “Toggle”, “Always Off”, “Always On” upon entry into this mode,
then exists to Normal Operating Mode
Add KeypadLinc Button to a Scene as a Controller (also known as Linking Mode)
1) Tap the KeypadLinc Scene button of choice (doesn’t matter if you send an on or an off)
2) Press and hold KeypadLinc’s Set button until it beeps
KeypadLinc’s scene button’s LED will blink
All illuminated LEDs on KeypadLinc will brighten to 100%
You will have 4 minutes to complete the next step before Linking Mode automatically times out.
3) Adjust the scene responder to the “state” you wish it to be at when the Scene is activated from
KeypadLinc (e.g. 50%, 25% or even OFF)
2
(Note: manual tap of responder button/paddle/etc. is
required)
4) Press and hold the Responder’s Set button until it beeps (or until its LED/load flashes)
KeypadLinc will double-beep and its scene button’s LED will stop blinking
KeypadLinc’s LEDs will return to normal brightness
Responder’s LED will stop blinking (it may also double-beep)
5) Confirm that Scene addition was successful by tapping on/off on your chosen KeypadLinc button
The Responder will toggle between the Scene level and Off
6) If you wish to add more responders to KeypadLinc, repeat steps 1-5 for each additional scene
responder (or see Add Multiple Scene Responders at Once
)
2
If the Responder is a multi-scene device, tap the Scene button you wish to control until its LED is in the desired state (on or off)


