3-13
Cisco 7200 VXR Installation and Configuration Guide
OL-5013-09
Chapter 3 Installing a Cisco 7200 VXR Router
Rack-Mounting a Cisco 7200 VXR Router
Caution To prevent injury, review the safety precautions in Chapter 2, “Preparing for Installation,” before
installing the router in a rack.
Installing the NPE-G1 and NPE-G2 Cable-Management Brackets on a Rear-Mounted Router
Use the instructions in this section to attach the standard cable-management brackets if you have a
rear-mounted router.
If you wish to install the NPE-G1 or NPE-G2 optical cable-management bracket, see the “Installing the
NPE-G1 and NPE-G2 Optical Cable-Management Bracket” section on page 3-11.
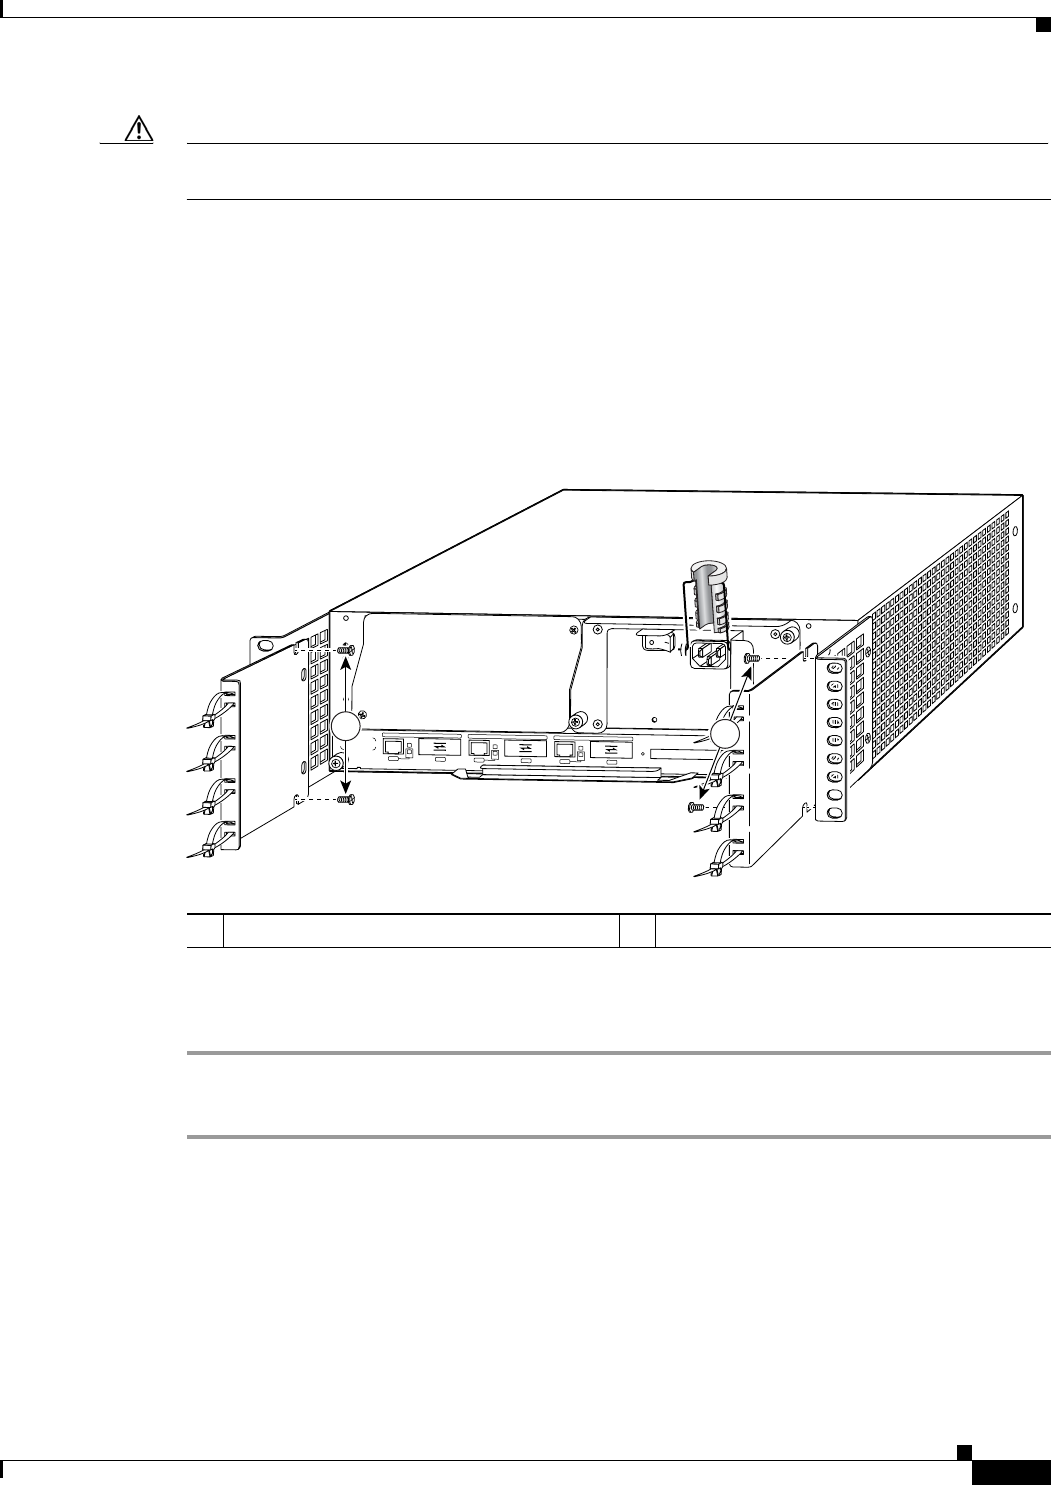
Figure 3-12 Installing the Rear Cable-Management Brackets with the NPE-G1 or NPE-G2—Router
Rear-Mounted
If you have an NPE-G1 or NPE-G2 installed, you will want to install cable-management brackets on the
rear of the router as well as on the front of the router.
Step 1 Align the cable-management brackets with the rack-mount brackets.
Step 2 Insert and tighten two screws for each bracket. The screws come with the cable-management brackets.
This completes the procedure for installing the rack-mount brackets and cable-management brackets on
a Cisco
7200 VXR router. Proceed to the “Installing the Chassis in the Rack” section on page 3-14.
1 Cable-management bracket screws
GIGABIT ETHERNET 0/1
R
J
4
5
G
B
IC
E
N
R
X
T
X
L
I
N
K
C
O
N
S
O
L
E
A
U
X
GIGABIT ETHERNET 0/1
R
J
4
5
G
B
IC
E
N
R
X
T
X
L
IN
K
GIGABIT ETH
ERNET 0/1
R
J
4
5
G
B
IC
E
N
R
X
T
X
L
I
N
K
C
P
U
R
E
S
E
T
C
O
M
P
A
C
T
F
L
A
S
H
P
O
W
E
R
O
N
S
L
O
T
A
C
T
IV
E
N
E
T
W
O
R
K
P
R
O
C
E
S
S
IN
G
E
N
G
I
N
E
-
G
1
66750
E
N
1
1


