6
POWER SOURCES (CONTINUED)
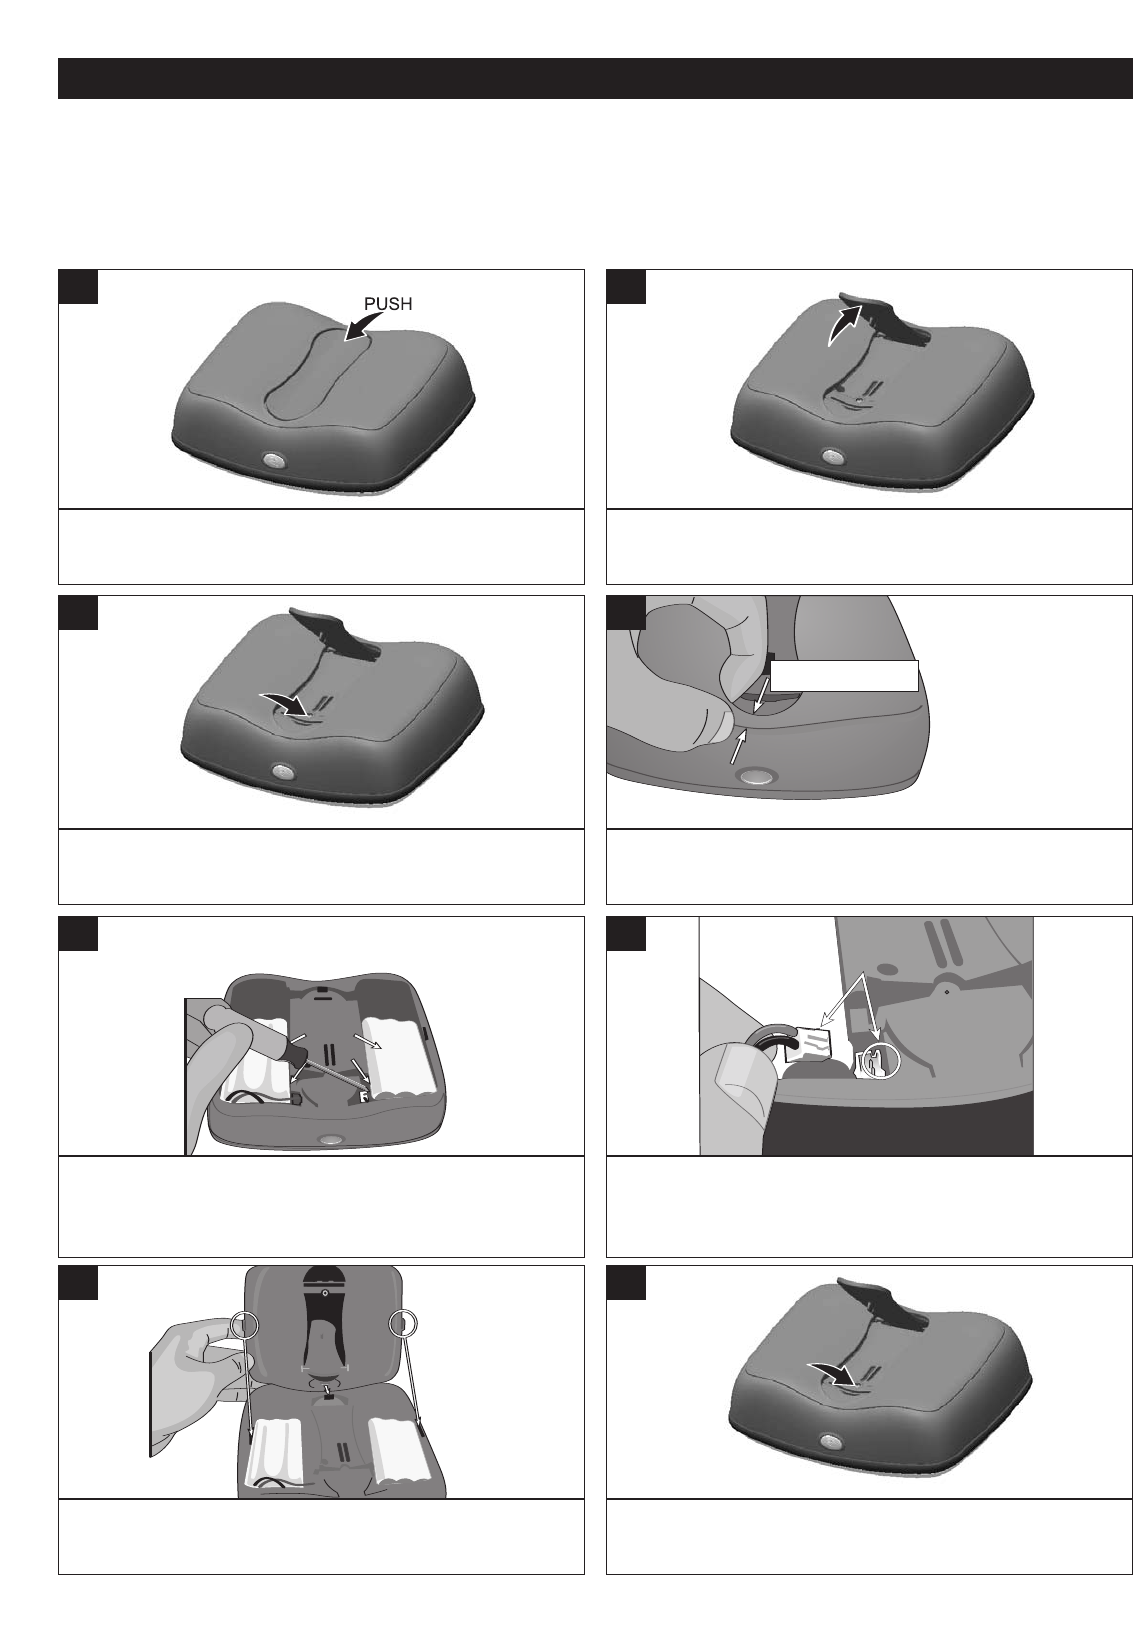
Push in on the top of the Stand to release the Stand.
1
Pull the Stand out.
2
Remove the screw under the Stand using a Philips
screwdriver.
3
Hold the bottom edge and pull out the rear cabinet.
Make sure the pos itioning guide (a) at the
adapter is positi oned to the posit ioning
g
uide at the bat tery's adapter ja ck (b).
A
B
H
olding with the bottom edge
and then pull out the rear cabinet.
Battery Pack
4
Disconnect the connectors, then use a screwdriver to
remove the battery packs.
Make sure the pos itioning guide (a) at the
a
dapter is positi oned to the posit ioning
guide at the bat tery's adapter ja ck (b).
A
B
Holding with the bottom edge
and then pull out the rear cabinet.
B
attery Pack
5
Insert the new rechargeable batteries to the unit. Insert
the connector into the jack, making sure to align it
properly as shown.
M
ake sure the pos itioning guide (a) at the
adapter is positi oned to the posit ioning
guide at the bat tery's adapter ja ck (b).
A
B
Holding with the bottom edge
and then pull out the rear cabinet.
Battery Pack
6
Replace the rear cabinet, making sure the three tabs are
aligned to the corresponding slots on the main unit.
Make sure the pos itioning guide (a) at the
adapter is positi oned to the posit ioning
guide at the bat tery's adapter ja ck (b).
A
B
Holding with the bottom edge
and then pull out the rear cabinet.
Battery Pack
7
Replace the screw.
8
REPLACING THE RECHARGEABLE BATTERY PACKS
It is very rare that the rechargeable battery packs will require replacing. If you charge up the
rechargeable battery for 3-3.5 hours but the battery only can playback/operate for a short period of time,
then the battery packs need to be replaced. Contact customer services (contact information is on rear
cover page) to purchase a new battery and follow the steps to replace the rechargeable battery packs.
IMPORTANT: Only replace battery packs with one purchased from Memorex. Other battery packs may cause unit failure, shock, etc.


