


AM/FM/CD Weather Band Car Stereo
(120-2157) Installation Faxback Doc. # 58422
Before you Begin the Installation
Before you install your stereo, read all the instructions in this owner's
manual. You should be able to answer all of these questions about your
vehicle's electrical and sound system.
Which terminal in my vehicle's fuse box supplies power even when the
ignition is turned off?
Which terminal in my vehicle's fuse box is for accessories?
How do I connect a wire to the fuse box?
Also, be aware that installation in your vehicle might require cutting or
modifying your vehicle.
Place the stereo as close as possible to the selected mounting location.
We recommend that you install the stereo by temporarily connection it to
ground and power, optional components, and your speakers. Then test the
connections, disconnect the stereo, mount it in your vehicle, and
reconnect it. The instructions in this manual are arranged in this order.
Preparing the Mounting Area
Before you mount the stereo, make sure you have all the necessary
materials. Then confirm that the stereo fits your vehicle's mounting area.
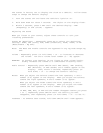
This auto sound stereo system is a DIN-E size stereo that requires a
2-1/16 inch high by 7-1/8 inch wide by 5-15/16 inch deep (52 x 181 x 152
mm) mounting area.
Note: If the mounting area is too large, you might be able to mount the
stereo with an in-dash installation kit, available at your local
RadioShack store. Follow the installation kit's instructions to
mount the stereo.
CAUTIONS: Make sure the stereo will not tilt up more than 30 degrees when
it is mounted.
Be sure to avoid obstructions behind the mounting surface.
Routing Speaker Wires