28
CHAPTER 4 – Admin User Interface
the Genres attribute, scroll to the end of the word Indie,
then press the R Return button before entering Indie
Rock. Press R Return again and enter Alt Country.
Note that on the Edit Album Details screen, multiple
genres are separated by a semi-colon, but when entering
them, you must use the R Return button, otherwise a
new genre consisting of all the words you entered will be
created.
When you have nished making changes to the album’s
details, press the
M
Save button.
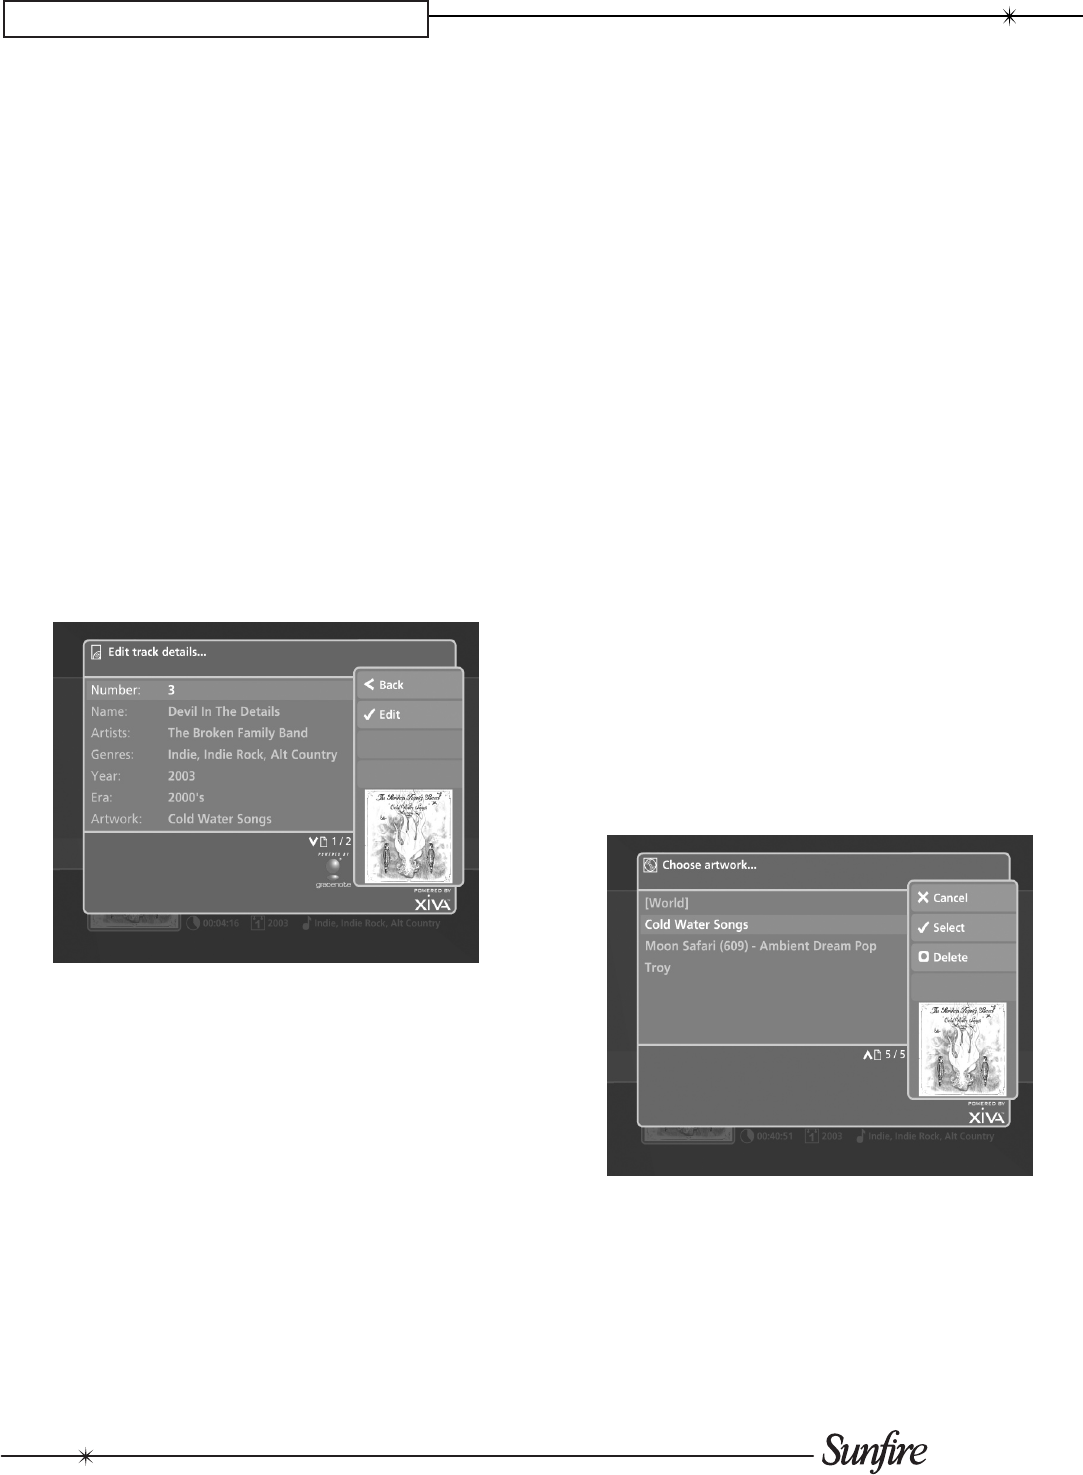
Editing Track Information in the Audio Library
Navigate to the • Admin UI and select Audio Library.
Press the •
U
or
V
buttons to select Tracks and press
the
T
button.
Use the •
U
or
V
buttons again to highlight the Track
you wish to edit.
Press the •
ä
Options button and choose Edit Track
Details.
The following screen is displayed:
Use the •
U
or
V
buttons to highlight the attribute you
want to change.
Press the•
O
Edit button.
Use the alphanumeric keypad to edit the title and press •
the
O
OK button.
When you have nished making changes to a Track’s
details, press the
M
Save button.
Editing Genre, Year and Era names in the Audio Library
Navigate to the • Admin UI and select Audio Library.
Press the •
U
or
V
buttons to select either Genres,
Years or Eras and press the
T
button.
Use the •
U
or
V
buttons again to highlight the Genre,
Year or Era you wish to edit.
Press the •
ä
Options button and choose the Edit
name option.
Use the alphanumeric keypad to enter a new name for •
the Genre, Year or Era.
Press •
O
Select to save your changes.
Selecting Album Artwork
For most albums, your TGM-100 should automatically
retrieve the cover art from the Internet. If cover art is not
found or you have recorded custom CDs, you may apply
generic artwork to the album or import your own from a
connected PC.
Highlight the album in your• Audio Library to which you
would like to apply a cover art image.
Press the •
ä
Options button.
Use the •
U
and
V
buttons to select Edit Album
Details and press the
O
Select button.
Choose the• Artwork option and press the
O
Edit
button.
The following screen, listing all of the cover art images
stored on your TGM-100, is displayed:
Use the •
U
or
V
buttons to scroll through the cover art
images.
Press the •
O
Select button to associate a piece of
artwork with your chosen album.
It is also possible to upload images from your PC to your
TGM-100 and apply these to items in the media libraries
(see pg. 38).


