


Sea Data Set TH52 English
15
1. Drill a 3mm or 1/8" pilot hole from inside the hull. If there is a rib, strut, or other hull
irregularity near the selected mounting location, drill from the outside. (If the hole is
drilled in the wrong location, drill a second hole in a better location. Apply masking
tape to the outside of the hull over the incorrect hole and fill it with epoxy.)
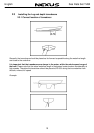
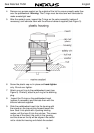
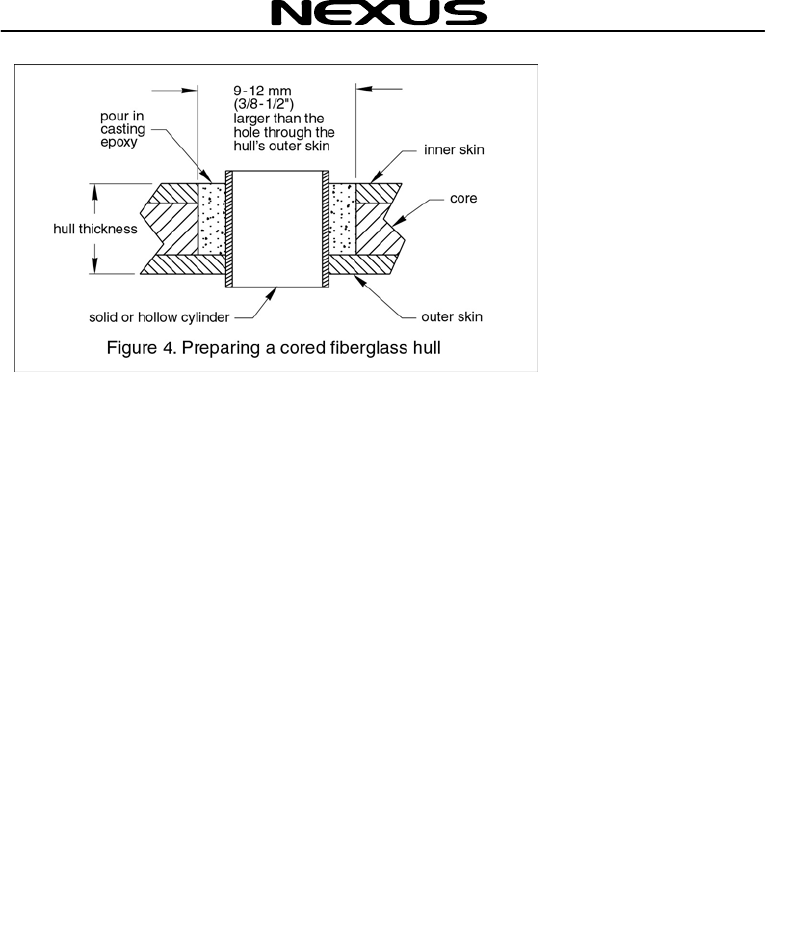
2. Using the 51mm or 2" hole saw, cut the hole from outside the hull through the outer
skin only (see Figure 4).
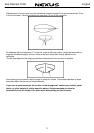
3. From inside the hull, use the 60mm or 2-3/8" hole saw to cut through the inner skin
and most of the core. The core material can be very soft. Apply only light pressure
to the hole saw after cutting through the inner skin to avoid accidentally cutting the
outer skin.
4. Remove the plug of core material so the inside of the outer skin and the inner core
of the hull are fully exposed. Sand and clean the inner skin, core, and the outer
skin around the hole. Caution: Completely seal the hull to prevent water seepage
into the core.
5. If you are skilled with fiberglass, saturate a layer of fiberglass cloth with a suitable
resin and lay it inside the hole to seal and strengthen the core. Add layers until the
hole is the correct diameter. Alternatively, a hollow or solid cylinder of the correct
diameter can be coated with wax and taped in place. Fill the gap between the
cylinder and hull with casting epoxy. After the epoxy has set, remove the cylinder.
6. Sand and clean the area around the hole, inside and outside, to ensure that the
sealant will adhere properly to the hull. If there is any petroleum residue inside the
hull, remove it with either mild household detergent or a weak solvent (alcohol)
before sanding.
7. Proceed with “Bedding” and “Installing” on page 2.