


9
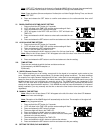
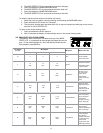
These icons indicate the expected weather change in the next 12 to 24 hours. The icon does not give
an exact prediction of the weather, however it should be viewed as a generalization of the expected
weather change (for example a “sunny” icon indicates the weather is expected to improve).
The weather icons change when the unit detects a change in air pressure. The icons change in order,
from “sunny” to “partly sunny” to “cloudy” or the reverse. It will not change from “sunny” directly to
“rainy”, although it is possible for the change to occur quickly. If the symbols do not change then the
weather has not changed, or the change has been slow and gradual.
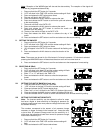
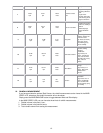
B. WEATHER TENDENCY ARROWS
Other possible displays in the FORECAST LCD are 2 weather tendency arrows, one that points up
(on the left side of the LCD) and one that points down (on the right side of the LCD). These arrows
reflect current changes in the air pressure. An arrow pointing up indicates that the air pressure is
increasing and the weather is expected to improve or remain good, an arrow pointing down indicates
that the air pressure is decreasing and the weather is expected to become worse or remain poor. No
arrow means the pressure is stable.
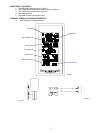
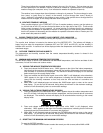
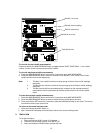
II. INDOOR TEMPERATURE, HUMIDITY, AND COMFORT LEVEL INDICATOR
The current indoor temperature and relative humidity are displayed in the INDOOR LCD.
The comfort level indicator is located at the bottom left of the INDOOR LCD. The indicator will display a
happy face icon when the temperature is between 68°F and 79°F (20°C and 25.9°C), and the humidity is
between 45% and 64%. A sad face icon will be displayed when the temperature and humidity are outside the
mentioned ranges.
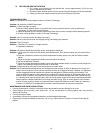
III. OUTDOOR TEMPERATURE AND HUMIDITY
The temperature and humidity received from the remote temperature/humidity sensor is viewed in the
OUTDOOR LCD.
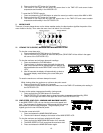
IV. MINIMUM AND MAXIMUM TEMPERATURE RECORDS
The WS-9035U keeps a record of the MINIMUM and MAXIMUM temperature, and the time and date of their
occurrence, for both the indoor and outdoor modes.
A. VIEWING THE INDOOR TEMPERATURE RECORDS
2. Press and release the IN/HR button once. “MAX” appears to the right of the indoor temperature,
indicating that the maximum temperature (along with the humidity measured at that time) and the
time and date of occurrence are displayed. The maximum records will display for 30 seconds
before returning to the normal display mode.
3. Press and release the IN/HR button again (once while “MAX” is still displayed, twice otherwise).
“MIN” appears to the right of the indoor temperature, indicating that the minimum temperature
(along with the humidity measured at that time) and the time and date of occurrence are
displayed.
4. While “MIN” is still displayed press and release the IN/HR button again to return to the current
data display. Or you can wait 30 seconds, during either the minimum or the maximum readings,
and the unit will automatically return to current data readings.
B. VIEWING THE OUTDOOR TEMPERATURE RECORDS
1. Press and release the OUT/MIN button once. “MAX” appears above the outdoor temperature and
the LCD will flash, indicating that the maximum temperature, and the time and date of occurrence
are displayed. The maximum records will display for 30 seconds before returning to the normal
display mode.
2. Press and release the OUT/MIN button again (once while “MAX” is still displayed, twice
otherwise). “MIN” appears to the right of the outdoor temperature, indicating that the minimum
temperature and the time and date of occurrence are displayed.
3. While “MIN” is still displayed press and release the OUT/MIN button again to return to the current
data display. Or you can wait 30 seconds, during either the minimum or the maximum readings,
and the unit will automatically return to current data readings.
C. RESETTING THE MIMIMUM AND MAXIMUM RECORDS
To reset the INDOOR records:
1. Press and release the IN/HR button to select the record you wish to reset, either MAX or MIN.