


48
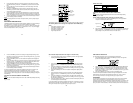
mounted using the screw or cable tie provided onto a solid wall/ panel mast or mast to
allow the wind to travel around the sensor unhindered from all directions (ideal mast
size should be from diameter about
5
/
8
” (16 mm) to 1
1
/
4
” (33 mm)).
Once the wind sensor is fixed onto the mast, connect the cable to the corresponding
thermo-hygro sensor socket so that operating power supply can be received and data
can be transmitted to the base station.
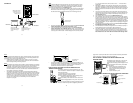
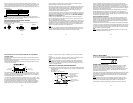
Rain Sensor
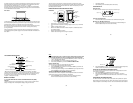
For best results, the rain sensor should be securely mounted onto a horizontal surface
about 2-3ft (60-90cm) above the ground and in an open area away from trees or other
coverings where rainfall may be reduced causing inaccurate readings.
When securing into place, check that rain excess will not collect and store at the base
of the unit but can flow out between the base and the mounting surface (test by
pouring clean water).
After mounting the rain sensor, connect the cable to the thermo-hygro sensor at the
corresponding socket so power supply can be received and data be transmitted to the
base station
Horizontal panel
49
The rain sensor is now operable. For testing purposes, very slowly pour a small
amount of clean water into the rain sensor funnel. The water will act as rainfall and will
be received and displayed at the base station after about 2 minutes delay i.e. when
the reading interval is reached.
BONUS RECEIVER FUNCTIONS AND SETTINGS
FEATURES:
• Quartz clock in 12 or 24-hour time display
• Indoor and outdoor temperature reading in degrees Celsius (°C) or Fahrenheit
(°F)
• Outdoor humidity reading in %RH
• Minimum and Maximum records of indoor temperature, outdoor temperature
and outdoor humidity
• Wireless transmission at 915 MHz
• Outdoor data checking interval at every 4.5 seconds
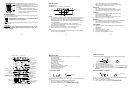
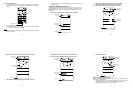
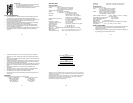
LCD
Display
Function
Keys
Hanging
Hole
Battery
compartment
cover
Foldout stand
50
• Low battery indicator
• Table standing or wall mountable (foldout table stand)
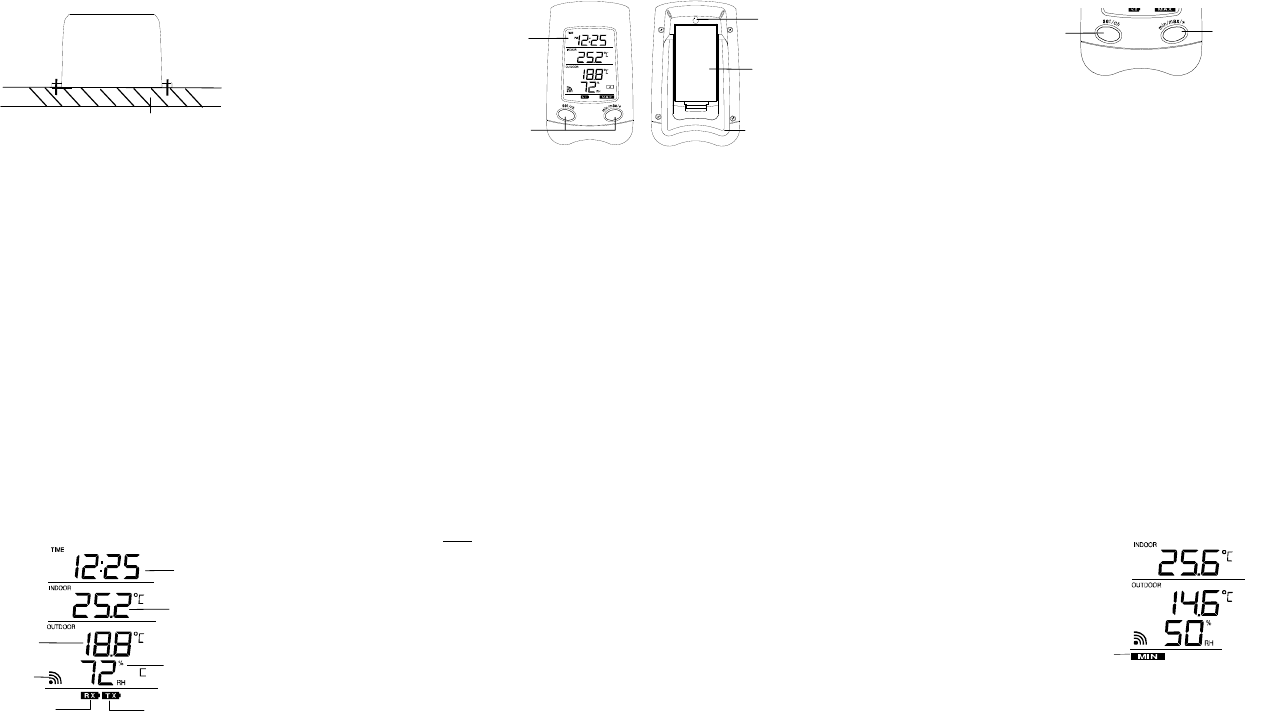
FUNCTION KEYS:
Bonus Receiver:
The Bonus Receiver features only two easy-to-use function keys.
Set/ch key (Setting/Channel)
• Press and hold for about 3 seconds to enter the Manual Setting mode.
Min/max/+ key (Min/ Max temperature)
• Used to toggle between the minimum and maximum recorded readings of
indoor & outdoor temperature and outdoor humidity.
min/ max/ + key
Set/ ch key
51
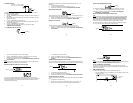
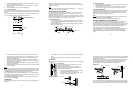
LCD SCREEN AND SETTINGS:
* When the signal is successfully received by the Bonus Receiver, the outdoor
reception icon will be switched on. (If not successful, the icon will not be shown on the
LCD) So the user can easily see whether the last reception was successful (icon on)
or not (icon off). On the other hand, the short blinking of the icon shows that a
reception - is being done currently.
MANUAL SETTINGS:
12 / 24- HOUR TIME DISPLAY SETTING AND TEMPERATURE UNIT (°C/°F)
SETTING
The Bonus Receiver can be set to display time in 12-hour or 24-hour mode. Default
setting 12h display mode and temperature display in degree Fahrenheit:
Outdoor Reception
Signal icon*
Time
Indoor
Temperature in °C/°F
Outdoor
Temperature in
°C/ °F
Transmitter Low battery indicator
Receiver Low battery indicator
Outdoor humidity
%RH
52
Note:
When the time display is set as 12-hour mode, the temperature unit will be fixed
to °F; when the time mode is 24-hour, the temperature unit will be fixed to °C.
1. In normal display mode, press and hold the set/ch key for about 3 seconds. The
"12h" or "24h" digit will be flashing.
2. Press the min/max/+ key to set the desired time display mode.
3. Press shortly the set/ch key to enter the MANUAL TIME SETTING.
MANUAL TIME SETTING
The time can be manually set. Please follow the steps below:
1. The hour digit of the time display will be flashing.
2. Press the min/max/+ key to set the hour. Press the set/ch key to confirm and
proceed to the minute setting.
3. The minute digit will be flashing. Press the min/max/+ key to adjust the minute.
Press the set/ch key once more to return to normal display.
VIEWING THE MINIMUM AND MAXIMUM READINGS:
The minimum and maximum temperature and humidity data records of the indoor or
outdoor channels can be view by following the steps below:
1. Press the min/max/+ key once to view the minimum indoor temperature,
minimum outdoor temperature and minimum outdoor humidity.
53
2. Press the min/max/+ key once more to view the maximum indoor temperature,
maximum outdoor temperature and maximum outdoor humidity.
RESETTING THE MINIMUM AND MAXIMUM READINGS:
To reset the minimum and maximum temperature and humidity data to the current
value, follow the step below:
1. Press the min/max/+ key to display the minimum values.
2. Press and hold the min/max/+ key for about 3 seconds to reset all the
minimum/ maximum indoor and outdoor data to the current values in a single
action.
POSITIONING THE BONUS RECIVER:
The Bonus Receiver comes with a foldout table stand, which provides the option of
table standing or wall mounting the unit. Before wall mounting, please check that the
outdoor temperature and humidity values can be received from the desired locations.
Minimum icon