


Page 25
English
XL-MV777GD/XL-MV757TN
LVT0194-001B [U, US]
AV COMPU LINK REMOTE CONTROL SYSTEM
AV COMPU LINK remote
control system
When you are going to enjoy a disc, you usually have to turn on your
television, receiver and Video CD player and setup these components’
individually. If, however, the system consists of components which
support JVC’s AV COMPU LINK remote control system, instead of
individual setup, simply pressing the 3 (PLAY)/SELECT button allows
you to enjoy the disc.
Connection and setup
Using the AV COMPU LINK cable, connect the AV COMPU LINK
terminals of each component to one another.
After the connection is done, make the player’s AV COMPU LINK
setting by the following procedures.
1. While the player is in the STANDBY mode, hold down the 7
(STOP) button and press the
/
(STANDBY/ON) button.
The corresponding CD button (CD1 to CD3) of the selected AV
COMPU LINK setting blinks.
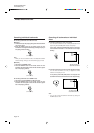
2. To change the selection, press the 3 (PLAY)/SELECT button.
Each press of the button cycles the selection as shown below.
CD 1 CD 2 CD 3
3. To exit the setting mode, press the 7 (STOP) button to return
to the STANDBY mode, or press the
/
(STANDBY/ON) button
to enter the ON mode.
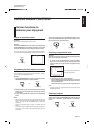
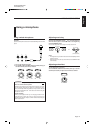
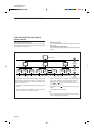
If you connect the Video CD player to a television via AV COMPU LINK
as illustrated above, set the Video CD player’s AV COMPU LINK
setting as follows.
• When connecting with VIDEO 1 input terminal of the television:
CD 2
• When connecting with VIDEO 2 input terminal of the television:
CD 3
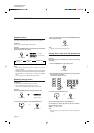
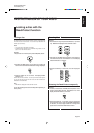
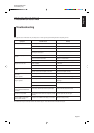
If you connect the Video CD player to a television and VCR via AV
COMPU LINK as illustrated above, set the VCR’s Remote Control
Code and Video CD player’s AV COMPU LINK setting as follows.
• When connecting with VIDEO 1 input terminal of the television:
Video CD player’s AV COMPU LINK setting: CD 2
VCR’s Remote Control Code: B
• When connecting with VIDEO 2 input terminal of the television:
Video CD player’s AV COMPU LINK setting: CD 3
VCR’s Remote Control Code: A
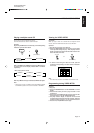
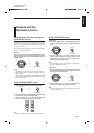
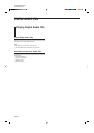
If you connect the Video CD player to a television and receiver via AV
COMPU LINK as illustrated above, set the Video CD player’s AV
COMPU LINK setting to CD1.
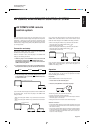
Operation
You can enjoy pictures and/or sound by just putting the Video CD
player into play mode. You do not have to operate the TV and/or
receiver including power switching.
Preparation
Set the POWER switch of each component to ON.
1. Insert a disc into the Video CD player.
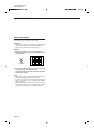
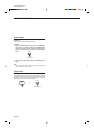
2. Press 3 (PLAY)/SELECT of the Video CD player.
SELECT
The following actions are performed automatically:
• Turning on the power of each component.
• Setting the source of the television to the external input which the
Video CD player is connected to.
• Setting the source of the receiver to the Video CD player.
Notes for connection
• Connect the AUDIO OUT jacks of the Video CD player to the audio
input jacks of a receiver which show “DVD”. Otherwise, the system
will not work correctly.
• There may be no description about connections to a Video CD player
in the instruction manual of a television or VCR. But a television or
VCR with AV COMPU LINK terminals which show II can be con-
nected to a Video CD player.
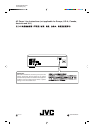
Video CD player
TV
To AV COMPU LINK (II or EX)
Video CD player Video cassette recorder
TV
To AV COMPU LINK
To AV COMPU LINK
(II or EX)
Receiver Video CD player
TV