


17
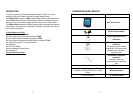
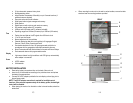
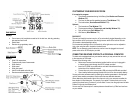
WEATHER STATION CONTROLS PANEL
A. UP
Selects the next available mode clockwise
Increases parameters
Activates manual search for atomic time signal
Enables or disables time alarms (W) and (S) and Ice
Warning Alarm
B. DOWN
Selects the next available mode anti-clockwise
Decreases parameters
Activates manual search for signals from the remote
weather sensors when depressed and held for 5 sec.
C. SET
Toggles display between different modes
If depressed and held, activates programming mode or
changes unit of selected parameter
Confirms programmed parameters
D. CHANNEL
Recalls a different temperature and humidity channel
from 1 to 5
Activates the remote temperature and humidity channels
auto-scan feature
E. MEM
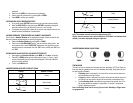
Allows displaying the memory records of the moon
phase, temperature, humidity, rainfall and wind data
If depressed and held, clears memory of collected
records
Activates a searching mode of the sunrise and sunset
history records
F. HISTORY
Allows displaying the SEA LEVEL pressure history
G. ALARM/CHART
Allows displaying all available alarms – for time,
temperature, rainfall and wind.
If depressed and hold, allows entering into the alarm
programming mode for selected parameter
When depressed and hold in pressure/forecast mode,
allows viewing of the temperature and humidity history
charts
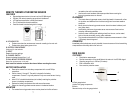
PLACEMENT
• For best Weather Radio reception place the main unit where it can receive
NWS signals and you can hear the weather broadcast – do not place it near
18
any large obstructions or surfaces such as refrigerators, metal cabinets, etc
• For best Weather Station reception make sure that the main unit is locating
within the operating range of all remote weather sensors
• Ideally the remote weather sensors should be mounted within the line of sight
from the main unit
• Transmission range may be affected by trees, metal structures and electronic
appliances
• Test reception before permanently mounting all remote weather sensors
Avoid placing the main unit in the following areas:
• Direct sunlight and surfaces emitting and radiating heat, such as heating ducts
or air conditioners
• Areas with interference from the wireless devices (such as cordless phones,
radio headsets, baby listening devices) and electronic appliances
OPERATION
Once the main unit is powered, the Weather Station display will show all available LCD
segments for 2 seconds.
The Weather Radio display line will remain blank for 2 seconds, then SIGNAL LOSS
statement with RF reception symbol will appear and radio will start scanning through all 7
NOAA channels. If the reception is successful, it will detect and lock on the available
channel.
IMPORTANT:
All of the Weather Station display functions will be locked, allowing setting
pressure parameters and local altitude. The locked display will show the pressure icon
and abbreviation “inHg” flashing in Pressure Window, indoor temperature and humidity
readings in Temperature/Humidity Window, default time in Time Window and a default
sunset/sunrise time in the Sunrise/Sunset Window.
If pressure and altitude are not configured during this time, the Weather Station will
self-calibrate in a few minutes and show the default settings for the pressure and altitude
(sea level) and then all remote weather sensors readings.
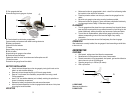
To set the pressure & altitude units and program your altitude, use the main unit control
panel, located on the back.
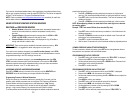
NOTE: When adjusting altitude in feet or meters, be noted that the last small
digit is not a decimal but a whole number.
Example: “
350” feet means 350 feet (three hundred fifty feet).