


31.
6. TRANSITION MODE OF THE SLIDESHOW
During a slideshow you can press cyclically the
PROGRAM key, in order to select one of the
following picture transitions.
WIPE TOP: Wipe from top.
WIPE BOTTOM: Wipe from bottom.
WIPE L: Wipe from the left.
WIPE R: Wipe from the right.
DIAGONAL WIPE L TOP: Wipe from the left top
diagonal.
DIAGONAL WIPE R TOP: Wipe from the right
top diagonal.
DIAGONAL WIPE L BOTTOM: Wipe from the
left bottom diagonal.
DIAGONAL WIPE R BOTTOM: Wipe from the
right bottom diagonal.
EXTEND FROM CENTER H: Extend from the
center horizontal.
EXTEND FROM CENTER V: Extend from the
center vertical.
COMPRESS TO CENTER H: Compress to the
center horizontal.
COMPRESS TO CENTER V: Compress to the
center vertical.
WINDOW H: Horizontal jalousie effect.
WINDOW V: Vertical jalousie effect.
WIPE FROM EDGE TO CENTER: Wipe from
the edge to the center.
RANDOM: Random picture transition effect.
NONE: Picture transition effects turned off.
SETTING OF COLOR AND BRIGHTNESS (LCD
SCREEN)
Use the ADJ button at the device to adjust the color
intensity, brightness and contrast. Press the button
once to enter the color setting mode. Press the NEXT
and PREV keys to adjust the color. Press the button
twice to enter the brightness mode and three times to
enter the contrast mode.
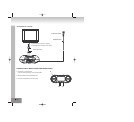
EXTERNAL MEMORY MEDIA OPERATION (USB)
Preparation of the player for usage of external
memory media
1. Turn on the player and rotate the function mode
switch to the DVD position. The POWER LED will
light up.
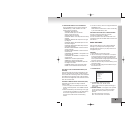
2. Insert a USB memory stick containing music, jpeg
or video files into the USB port. The USB memory
stick will be recognized and read after some
seconds. The screen shows now all existing
folders.
3. The files in memory stick can be played back like a
MP3/MPEG 4 CD.
Note: Make sure that there is no CD in the CD tray,
if you insert USB memory stick.
KARAOKE-FUNCTION WITH 2 MICROPHONES
Connect a microphone with one of the two
microphone sockets MIC1 or MIC 2.
You are now able to match the volume level of the
microphone signal with the MIC LEVEL control to the
total volume.
BASIC SETTINGS
With the basic settings you can make preferential
settings for your Player. After entering the basic
settings these are stored in your player and can be
changed at any time.
GENERAL
1. Press SETUP on the remote control.
2. Use the arrow keys for the selection of the option
to be changed and confirm with the SELECT key.
The setting page of the screen is displayed with
further options. Make changes again with the arrow
keys and confirm them with SELECT.
3. Move with the arrow keys to another setting on the
main setting page.
4. Exit the main setting page with the SETUP key on
the remote control.
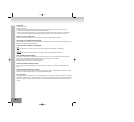
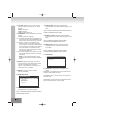
1. SYSTEM SETUP
SYSTEM SETUP
TV SYSTEM
PASSWORD
RATING
DEFAULT
EXIT SETUP
TV TYPE
SCREE
N SAVER
1.1 TV SYSTEM – Select the TV-mode.
Options: NTSC, PAL, PAL60, AUTO
Please select one of the options accordingly to
your TV set.
1.2 SCREEN SAVER --
If the player is not operated
for two minutes or more, a DVD Logo moves
across the screen to protect of your TV Set.
Options:
ON: The screen saver is turned on.
OFF: The screen saver is turned off.